Estimated reading time: 22 minutes
A self-feeding fire is exactly that. A fire that manages to feed itself due to its construction and design. There are a variety of ways to do it developed over the centuries by cultures around the world. Some are primitive and basic and there some contemporary interpretations that are engineered.
We’re going to cover 3 basic designs for a self-feeding fire that will sustain a fire without attention from 4 to 16 hours. Here are the 3 designs and then we’ll get into detail on how to assemble them and some tips and tricks to keep them burning.
1. The Inclined Feed
2. The Norwegian Upside-Down Fire
3. The Canadian Candle
Why Would You Do This?
In the grand scheme of things there’s nothing terribly complicated or technical about throwing another log on the fire. But there are situations where a fire that sustains itself makes sense.
- Cold nights may be the best example. A wilderness lean-to heated by a fire reflecting into the lean-to is a classic bushcraft shelter. Getting up at 2 in the morning to add more wood to the fire is also a classic chore. That’s when a fire that can sustain itself offers the best advantage.
- Snow covered or wet ground is another occasion when a self-feeding fire makes everything easier. The design of all self-feeding fires creates an area of heat that keeps layers and tiers of wood dry to keep the fire going. It does this by either separating the fire from the frozen, wet ground or by pre-heating logs that will eventually find themselves in the fire.
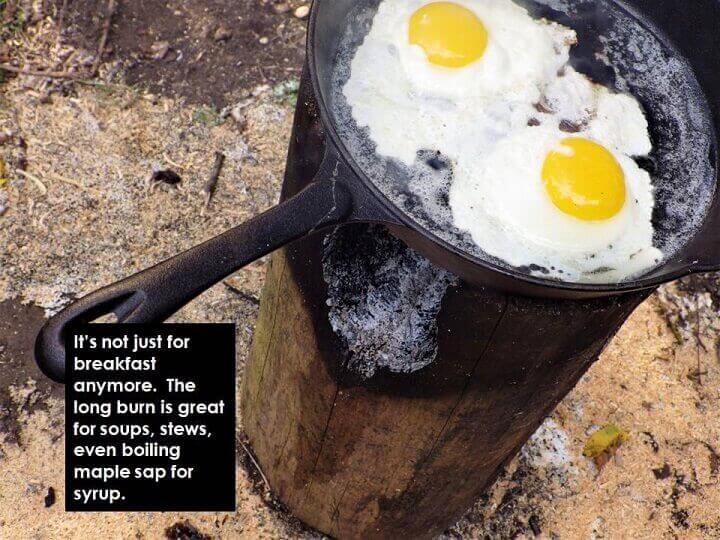
- Cooking either long-term or short-term is another time when a self-feeding fire has advantages. The Canadian candle is perfect for cooking for any length of time and the other designs can provide long-term heat for tasks like maple sap boiling for syrup or cooking very large cuts of meat like a whole hog or a venison haunch.
- Multi-tasking is common in any camp. A self-sustaining fire is one task that will take care of itself while you’re doing anything else around your camp.
Which Self-Feeding Fire is Best?
That depends on your time, energy and needs.
The inclined feed setup will burn the longest but it requires some construction and the proper design of the fire-pit.

The Canadian candle is the fastest and simplest but works best when the grooves in the top of the log are cut with a saw (ideally a chain saw) or carefully gouged and grooved with an axe.

The Norwegian upside down fire is the easiest but the length of time that it will continue to burn varies and it will eventually need some attention.
A Word about Wood
The word is “hardwood.” Hardwoods burn the longest and if your goal is to sustain a fire over a period of time it makes sense to burn woods that burn long and slow.
Here’s a short list of hardwoods that make for the longest fires:
- Oak
- Maple
- Hickory
- Elm
- Walnut
Softwoods burn faster but if that all you have available that may be another good reason to build a self-feeding fire. One benefit of softwoods is that they can get a fire off to a good start, but if endurance is your goal try to stick with the hardwoods or at least mix them in with the softwoods.
Here’s a short list of softwoods:
- All pines
- Cedar
- Spruce
- Hemlock
- Larch
1. Building an Inclined Self-Feeding Fire

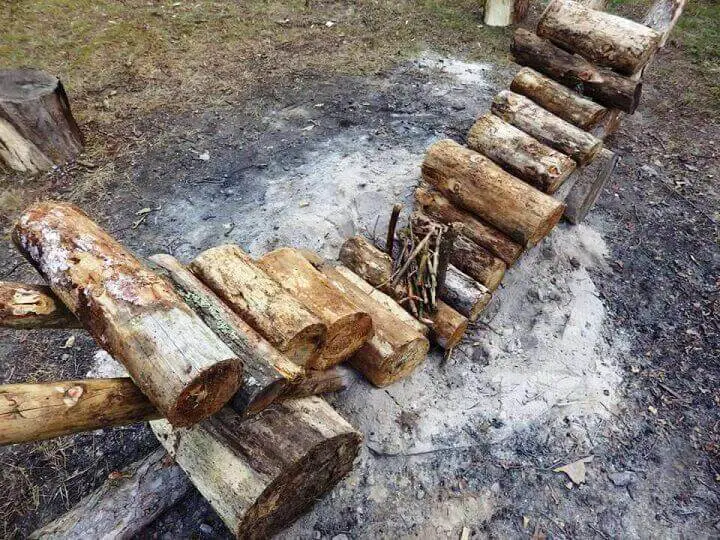
The design is simple but it takes some time. It’s essentially a supported ramp consisting of two smooth logs (no large knots or branch stubs) on an incline.
Logs are carefully placed on the incline and they should also be round, smooth and of somewhat consistent thickness across their length. You want the logs to slowly roll down the incline as advancing logs are consumed in the fire.
The key to success with an inclined fire is the proper design of the fire pit. You need the logs to burn across their entire length so the inclined logs can continue to advance. If the logs only burn in the center the incline will fail as the logs don’t advance.
Here are the steps to successfully building an inclined, self-feeding fire:

The most important thing to do is to make sure you dig trench in the center of your fire pit that is the length of your longest log. You need the logs to burn across their full length or the unburned ends will cause your logs to jam on the incline and the fire may die out.
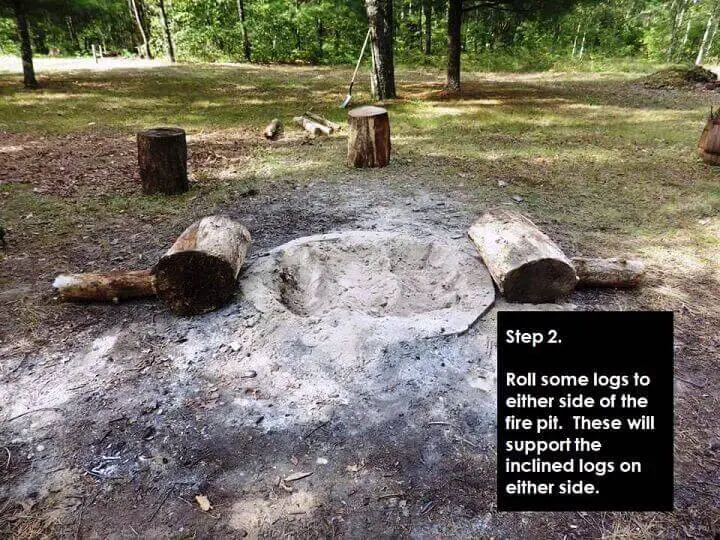
There are a variety of ways to support your inclined logs. We used two large logs on either end of the pit but you could also brace them with forked branches or a stack of logs. What’s critical is that the supports for the incline can support the weight of all the logs you’ll be stack on the inclines.
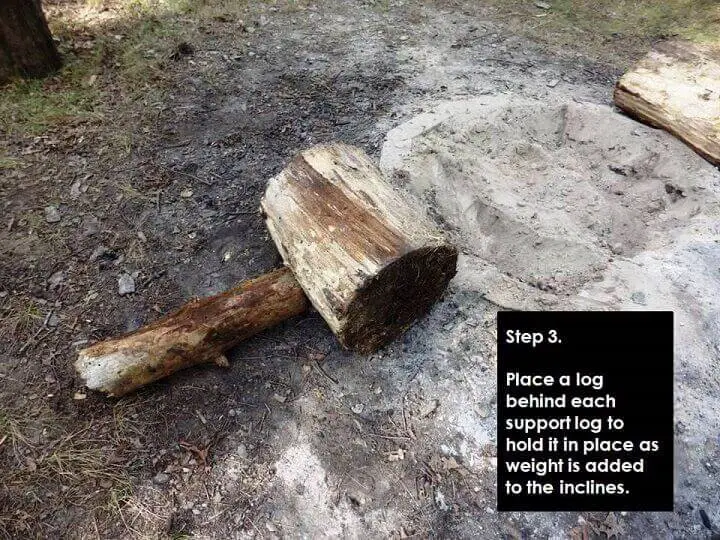
To make sure the large logs did not roll away from the fire pit from the weight of the stacked logs we braced them with a log at a 90 degree angle. Stakes in the ground could also work or rocks. Just make sure the inclines don’t collapse or shift when you stack your logs.
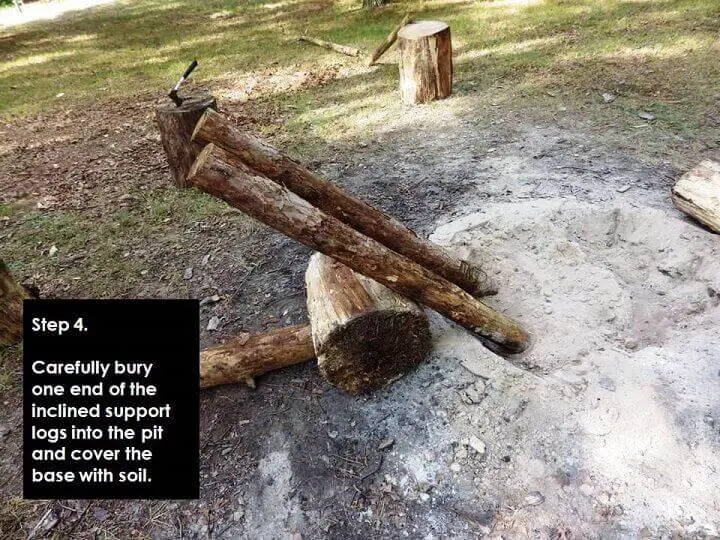
Jam your inclined logs into the fire pit and cover with soil. You could also sharpen the ends to drive them in deeper. You just don’t want the inclined support logs to shift over time as the fire burns and the logs move down the incline.
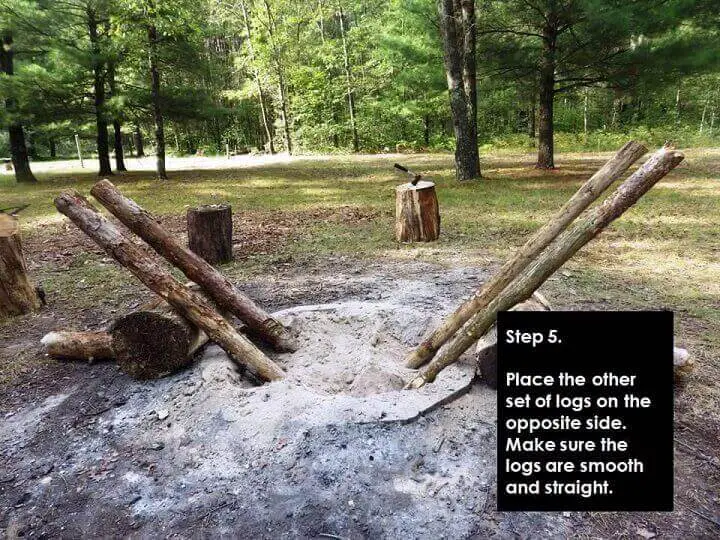
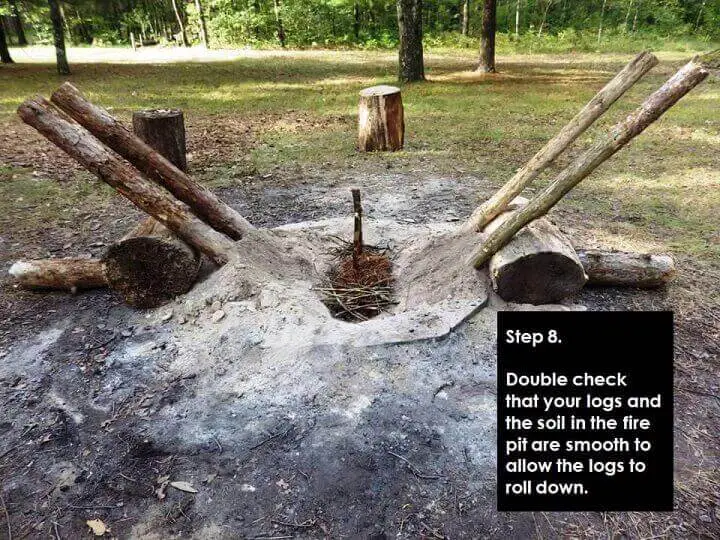
Once you have your inclines in place, make sure the inclined logs are smooth without knots or branch stubs that can stop or jam the feed. Also make sure that any soil at the base of the inclines is smoothed so the logs will roll directly into the pit and the bed of coals that will develop.
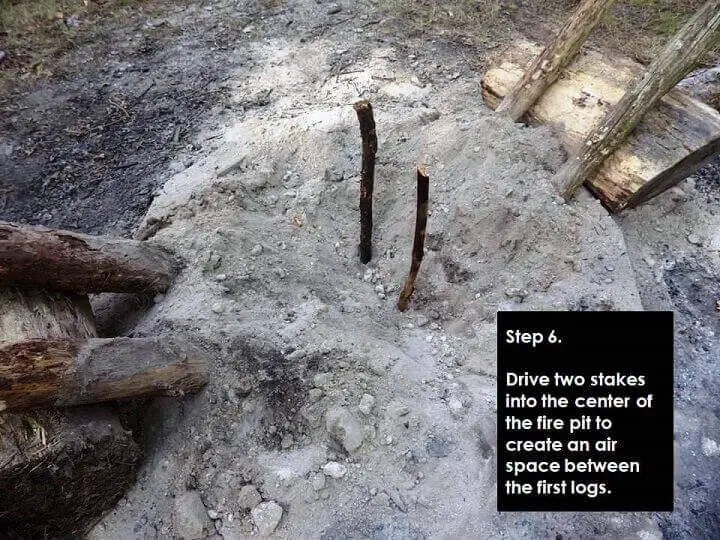
A critical success factor is ensuring that the first two logs get off to a good start. Placing two sticks into the center of the pit will create a gap that will help the logs burn along their lengths.
These two sticks in addition to the gap under the logs will get your fire off to a good start. The 2 sticks should be at least 1-inch in diameter.

You’ll need tinder and kindling to get your fire started and it’s a lot easier to do that before you start placing the logs. We’re using pine needles and pine twigs.
You can use any combination of tinder and kindling but make sure you are generous. It’s difficult to add more when a quarter ton of logs are stacked above a narrow fire pit.
Before you start adding your logs, step back and make sure everything is in place and ready to go.
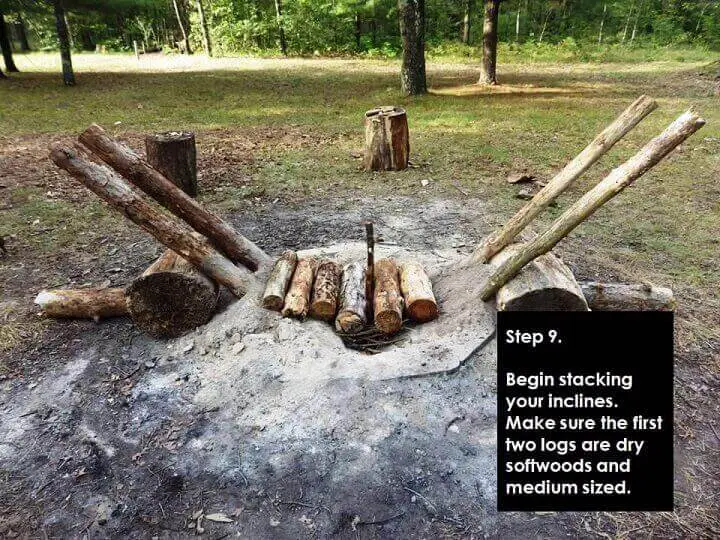
As you start to build up your log supply, try to start with smaller, softwood logs. They’ll catch fire best and ensure you get off to a good start.
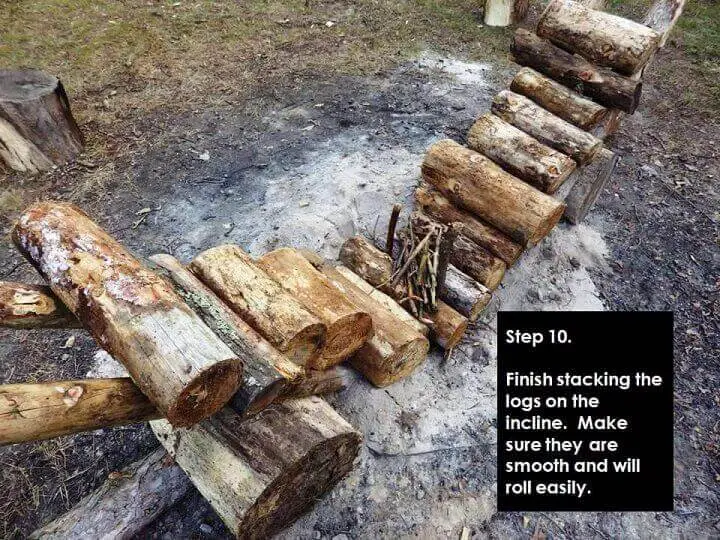
After you have your logs in place, do a quick walk around to make sure they are balanced properly and that each log is free of knots, branch stubs or anything else that could hamper the smooth rolling of the logs down the incline.
One idea is to alternate hardwoods and softwood on the incline to make sure the fire gets an occasional “softwood boost” as it burns. It’s not necessary but sounds like a good idea.
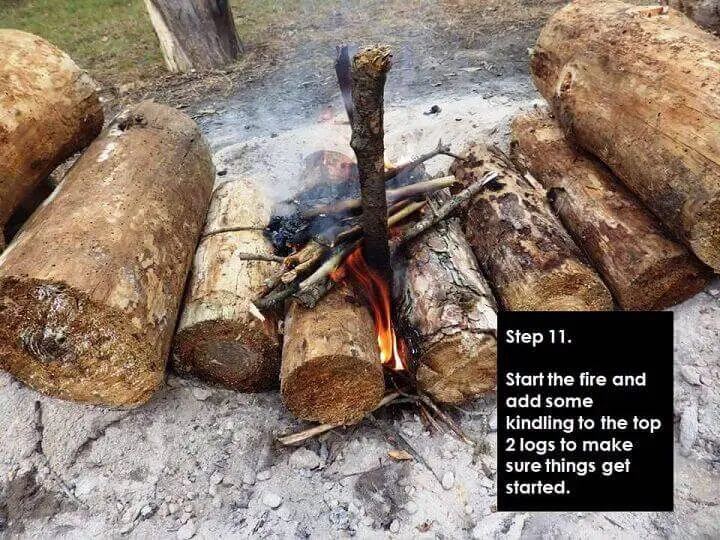
Start the fire and add some kindling over the gap in the center to get a good a little fire going. Add more sticks or kindling if you see any weak spots in the initial fire start. Getting the logs off to a good start is another critical success factor.
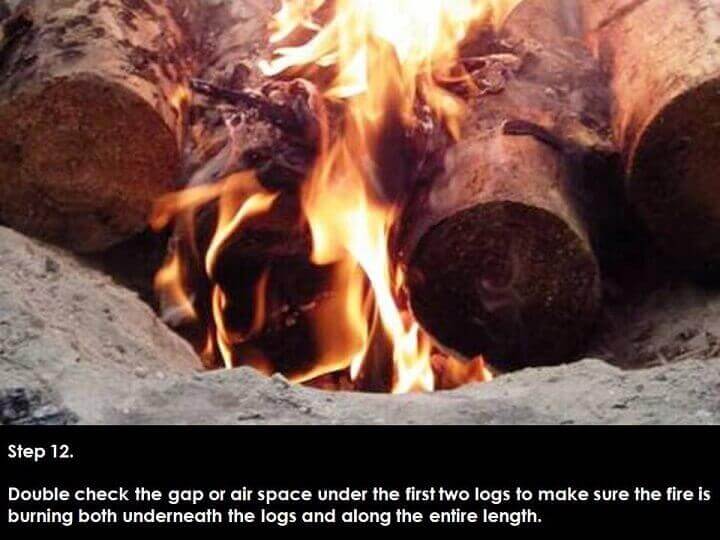
A good sign is when the fire is not only burning consistently but also along the entire length of the logs. Failure to get a full burn across the lengths of the logs is the primary fail point for a self feeding fire with an inclined design.

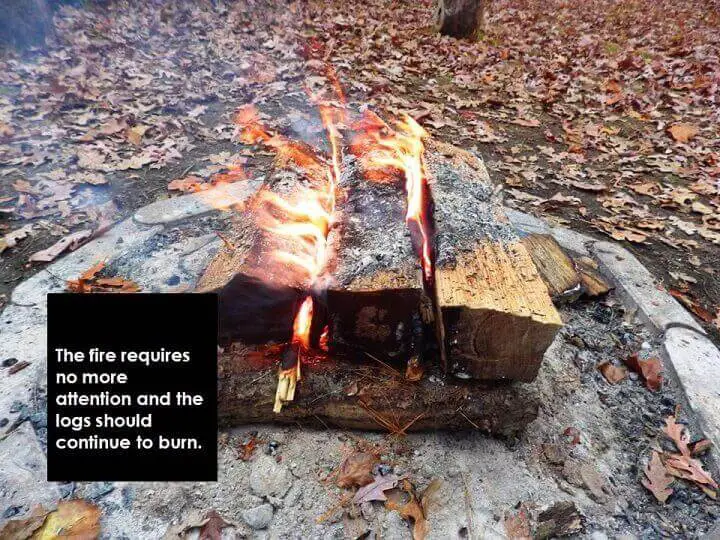
A robust fire in the center of your fire pit is a good sign that you can either return to other camp chores or get ready for bed. Either way you should have a self-feeding fire that will last through the night and into the next morning.
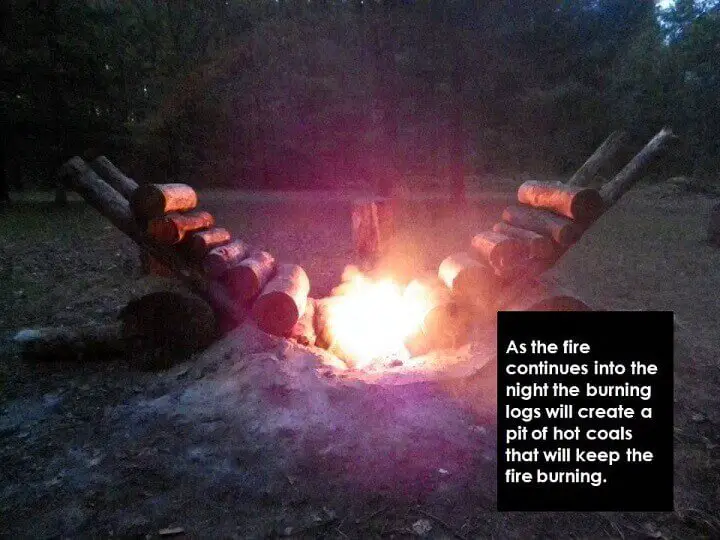
The growing bed of coals in the fire pit are another critical success factor. If for any reason the coal bed gets short on one end and doesn’t burn a log end you may need to add some more kindling to keep it going. We’re not having that problem here but it can happen.
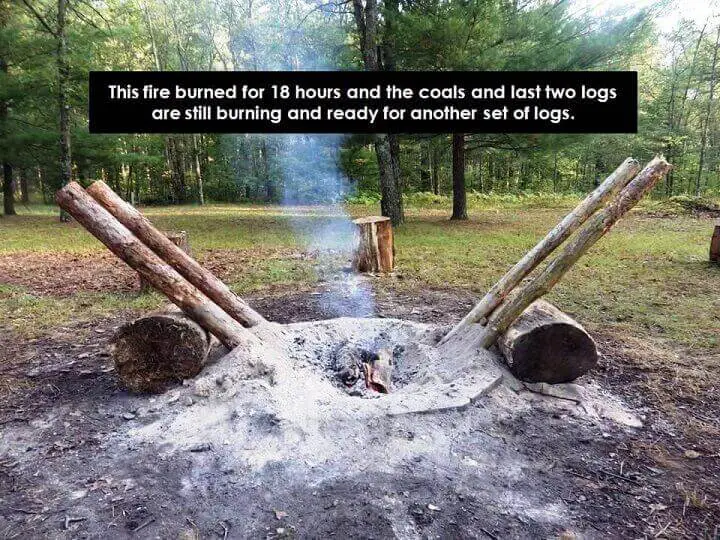
By morning you should have at least a flickering flame if not a good, hot bed of coals. Restarting the fire should be easy and if you want you can have another go at it by adding a fresh set of logs to the incline.
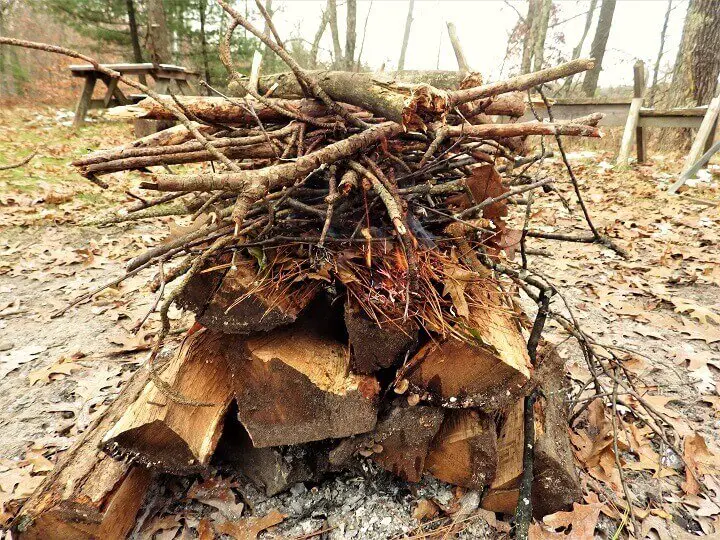
2. Building a Norwegian Upside Down Fire
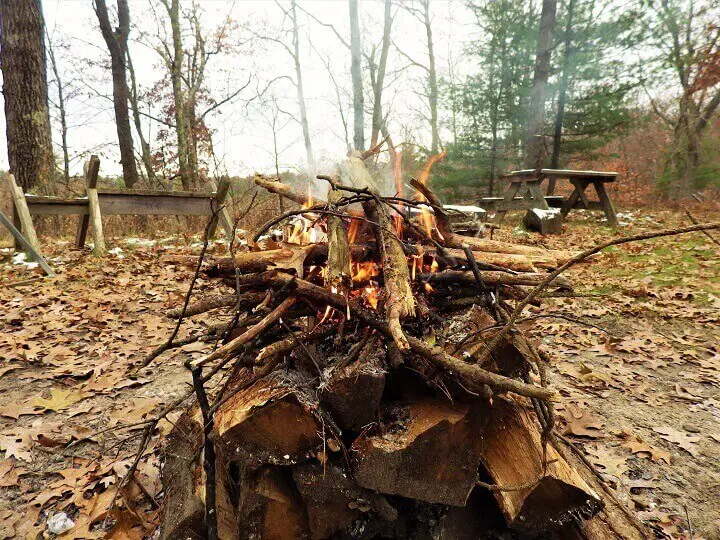
This fire design is believed to have emerged in Scandinavia and the Norwegians often get the credit. It’s essentially a fire built upside down with the largest logs on the bottom working up to smaller logs until a small fire of tinder and kindling is built on top.
The fire then burns down into the larger logs in the bottom layers. The coals from the initial fire built on top do a surprisingly good job of sustaining the fire and the gaps between the logs create convection currents as the radiating heat between the logs keep the fire going.
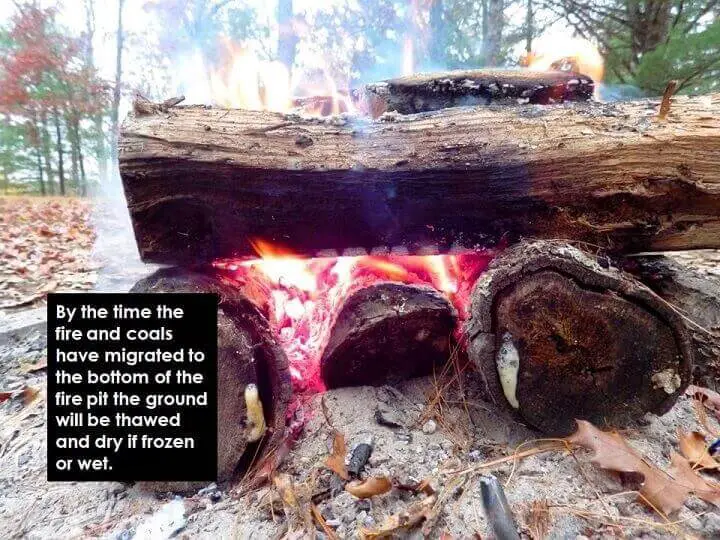
It’s the best approach for a self-sustaining fire when the ground is frozen or wet. As the heat of the fire works down towards the ground, the frozen or snow covered ground thaws and any water dehydrates. By the time the fire gets to the bottom logs the ground is dry and the fire doesn’t go out.
Here are the basic steps:
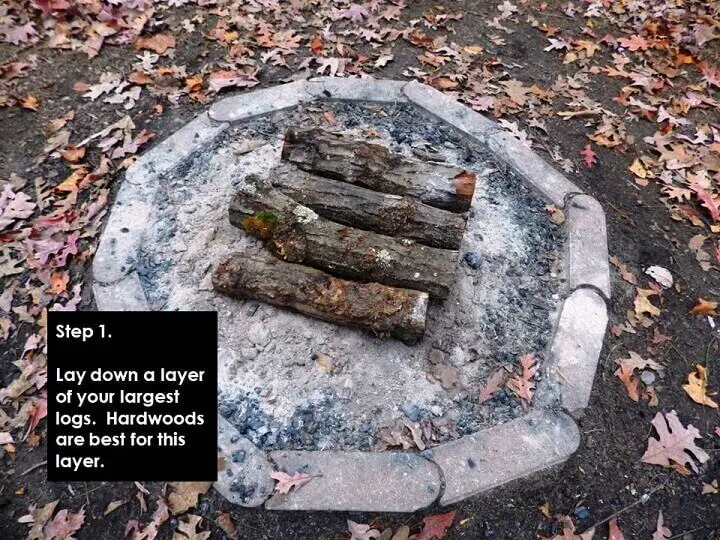
The first layer of logs are ideally hardwood. By the time the coals get to the bottom layer the fire is burning hot and steady. These logs can even be wet or snow and ice encrusted. The slowly descending layers of heat will thaw them out before the fire reaches them.
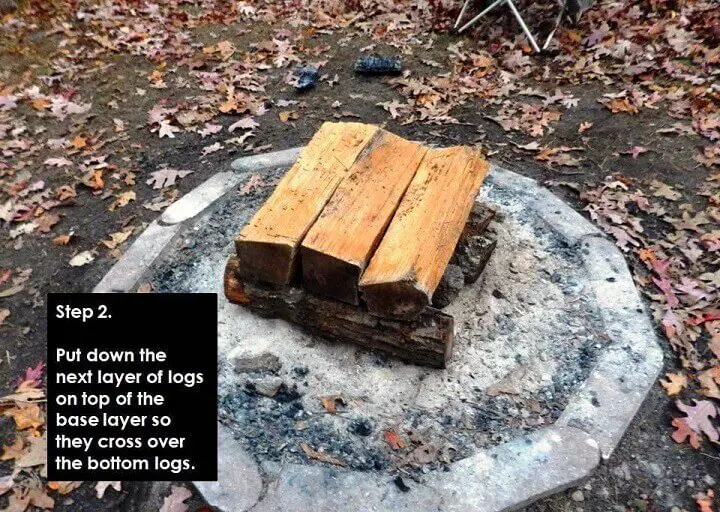
Ideally, these logs for the second layer are dry and if possible, softwoods like pine. Additional layers can be stacked on top but we’re going to stop at two layers to demonstrate the basic concept.
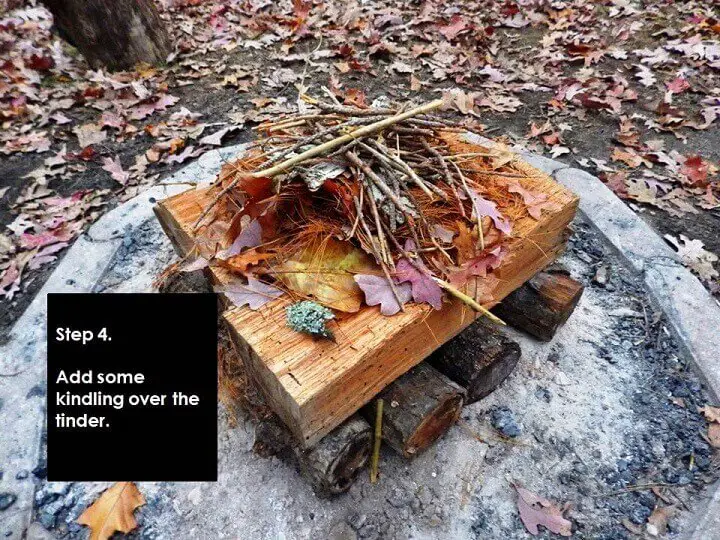
The most important thing is that the top layer of wood be as dry as possible and softwood if possible. Splitting the logs can help with wet wood or hardwoods.
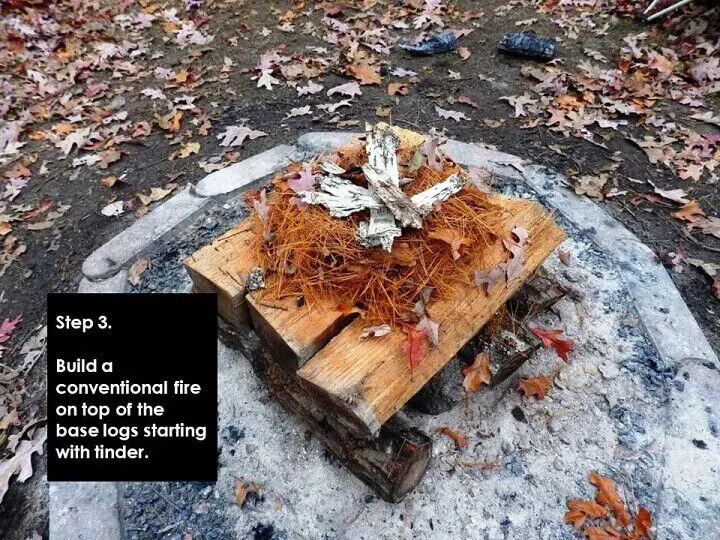
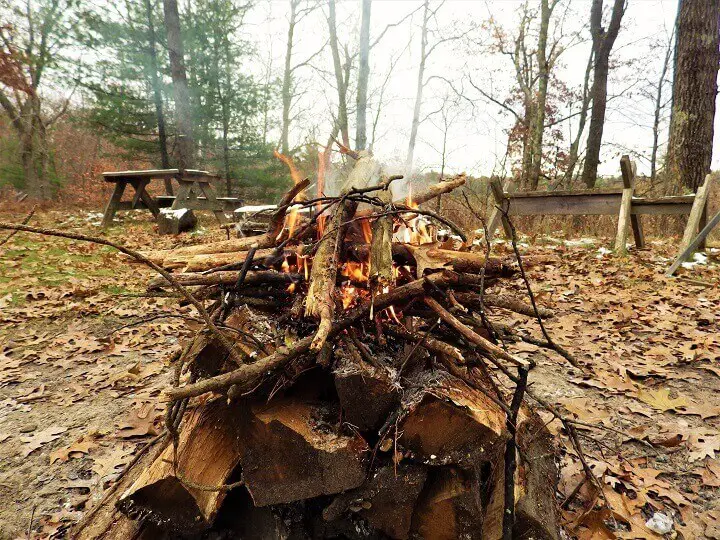
When the layers are done you’re going to start building a traditional fire like you would on the ground. Use dry tinder, kindling and dead branches. You want this to be a hot fire on top to get the lower layers of logs off to a good start.
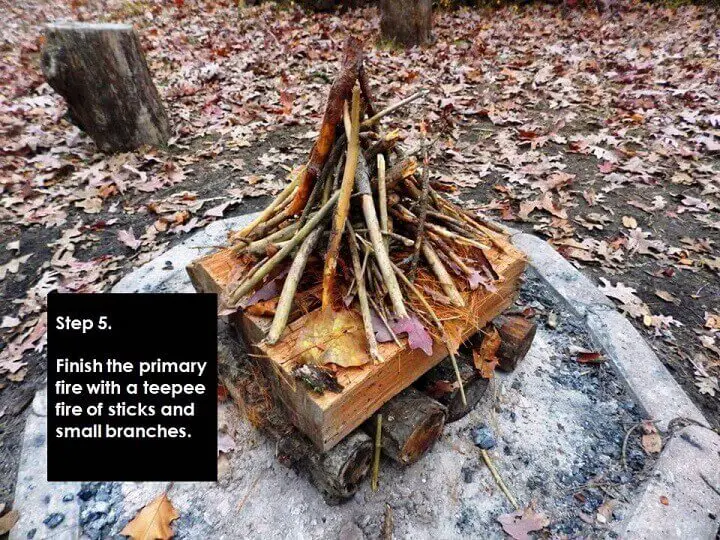
A traditional teepee fire configuration creates the best heat because its shape radiates the heat downward towards the log foundation.
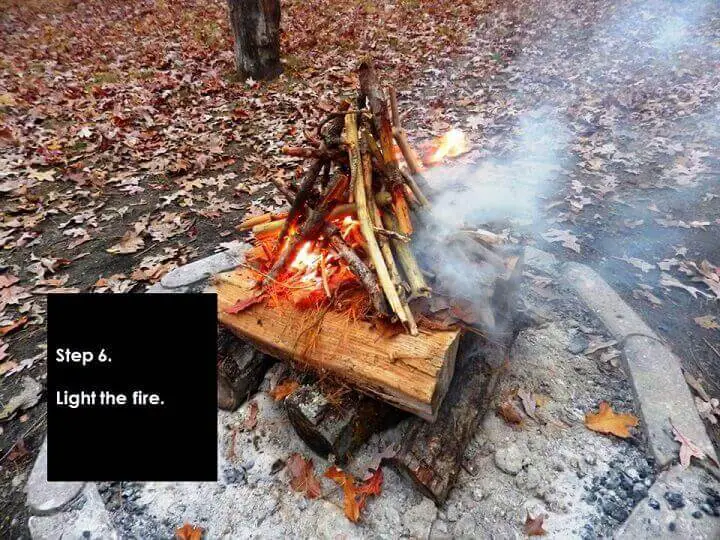
If constructed properly all you need to do is start the top fire and let the laws of physics and thermodynamics do their work.
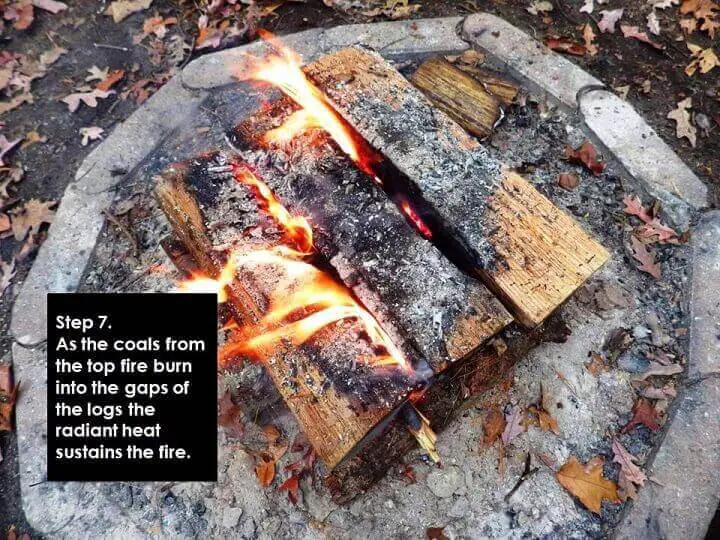
As the coals drop down into the grooves the radiant heat from the sides of the logs keep the fire going. This is similar to the thermodynamics of a Canadian candle as the hest reflects back and forth between logs.
The combination of logs in layers and the radiating heat keep the fire going and keep it hot. This fire burned for 5 hours. If you need to sustain the fire for longer you can always add additional logs to the top in as many layers as you can balance.
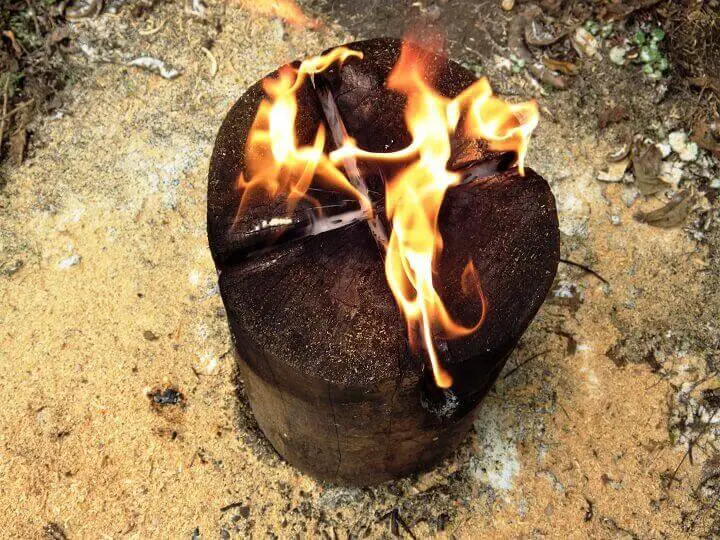
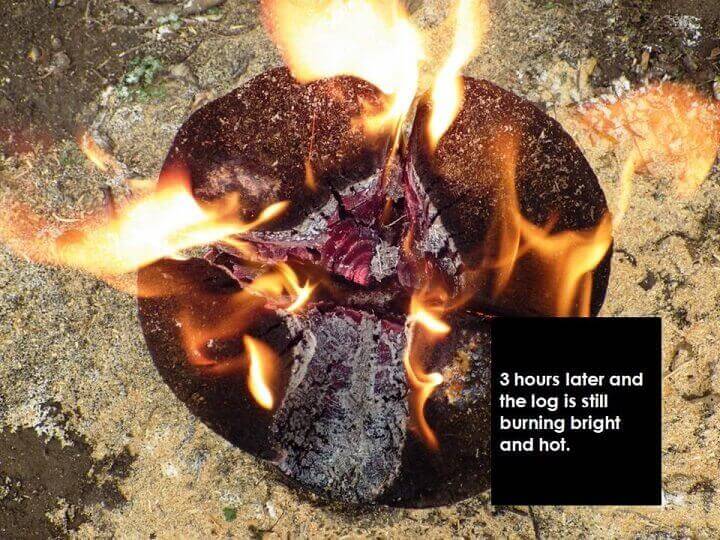
3. Building a Canadian Candle
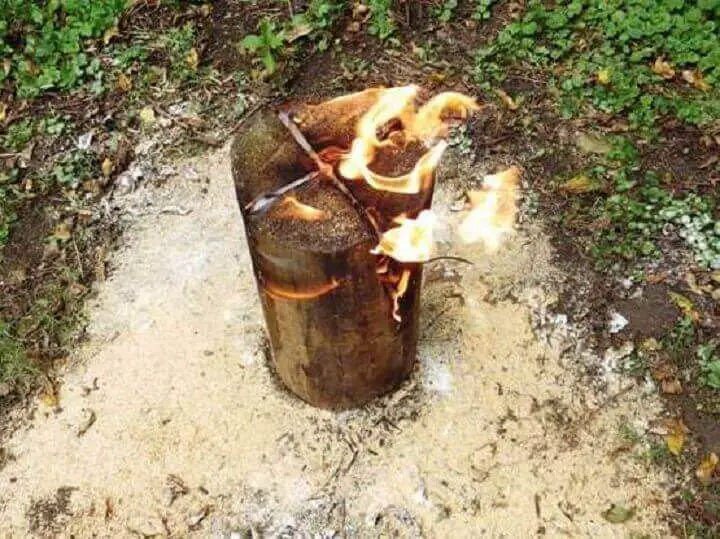
It’s hard to say who first came up with this idea, but it’s commonly referred to as a “Canadian Candle.” It’s nothing more than a log stood on end with grooves cut in the top. A chainsaw is the best and easiest way to cut these grooves and the concept works surprisingly well not only for a long-term burn but the flat surface at the top makes it ideal for cooking.
Here are the steps for constructing a Canadian candle:
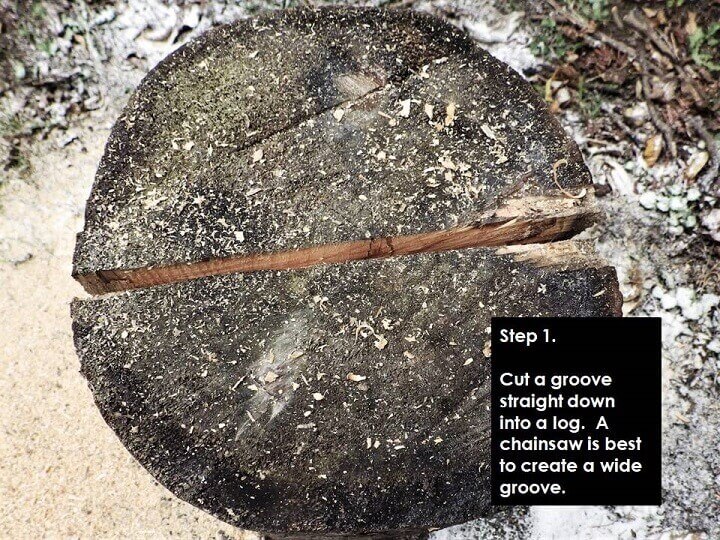
If you don’t have a chainsaw you can saw grooves with a handsaw but you might need to make closely aligned double-cuts. You want a nice, wide groove at least ¼-inch wide. You could also chop your grooves with an axe but make them narrow.
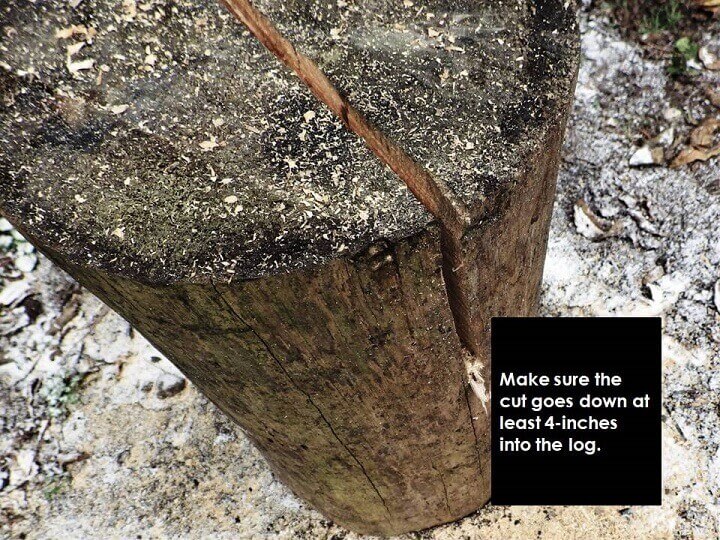
The grooves need to be deep into the log. 4-inches is about the minimum but you can go deeper although if you go too far down the log it will eventually split off so don’t overdo it.
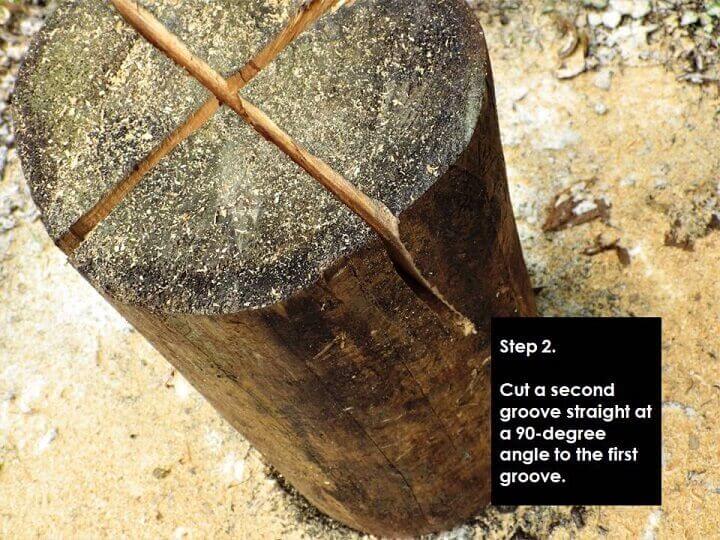
You can also cut more than a crisscross of 2 grooves. A lot depends on the size of the log. The larger the log the more grooves you can cut and may in fact need. Here again, don’t overdo it or your log candle will burn out quickly.

Starting a fire in a tight space is not the easiest thing but loosely packed and highly flammable tinder like birch bark, pine needles, some cattail fluff, or very small and dry pine twigs will get your candle off to a good start.
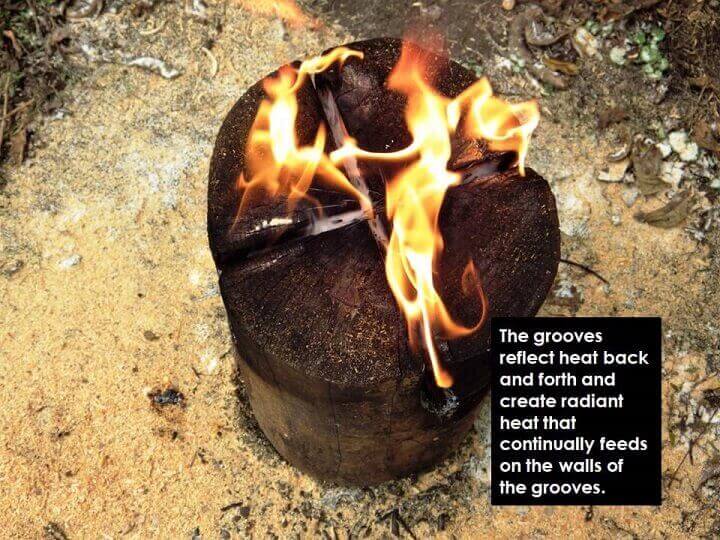
As the heat continues to radiate in the grooves the fire will burn surprisingly hot and long. In actual fact, this is a great way to get rid of a stubborn tree stump if it’s not too close to your house or an outbuilding.
Keep an eye on any Canadian candle because they will burn hot and long. Figure 4 hours for a 10-inch diameter log and up to 12 hours for a large stump.
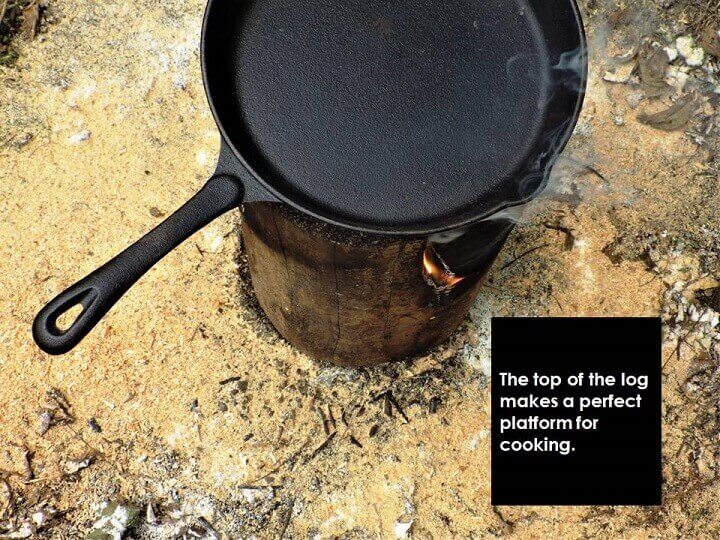
Cooking on a Canadian candle is the reason most people build this kind of flat-topped fire, but its long burn time is another factor especially for cooking anything that takes a long time like a stew or boiling down sap or stocks.
The grooves will eventually expand in size as they burn but the fire will continue hot, and as long as the platform on top is somewhat intact it can support even the heaviest cast-iron frying pan.
Self-Feeding Fire Fails
Most of these fires are goof-proof but there’s always room for surprises. Some of these fails are unique to a fire type or design but some apply to all types.
Green Wood
Green wood never makes for a good fire although using green logs for the support inclines on an inclined, self-feeding fire might be a good idea. The stacked logs on the incline actually protect them quite well regardless of the type of wood but if you’re short on softwoods, save the green wood for the supports.
A layer of green wood logs at the bottom of an upside down fire can work too. The radiant heat working down from the top that melts snow and ice will also dry the green wood as the bed of coals find their way down to the bottom layer.
A green log or stump could be a challenge for a Canadian candle but if you get the heat going in those grooves even a green log can work.
Getting the Gaps Wrong
Getting the gaps wrong on any of the fires we’ve covered can cause the fire to fail.
- The gaps in a log for a Canadian candle need to be large enough for the fire and heat to radiate. A ¼-inch gap is ideal.
- The gaps between logs and layers on a Norwegian Upside Down fire need to be wide enough to allow coals to trickle down but close enough to radiate captured heat. A ½-inch gap is ideal.
- The gaps between the first two logs on an inclined self-feeding fire needs to be about 1-inch between the first two logs with a trench running the length of the logs underneath to allow a fire to burn along their length.
Lack of Softwoods
Lack of softwoods can make fire starting a challenge. This is nothing new but for complex fires that are self-sustaining it’s critical to get the fires off to a good start and softwoods do that best.
Make Your Next Fire a Self-Feeding Experiment
The next time it’s time to build a fire, think about trying one of these fire designs. Some are simple, some a little complicated but all represent a skill worth knowing and mastering. Better yet, it’ll save you a little time and keep you warm in that lean-to the next time you need to throw another log on the fire.
You May Also Like: