Estimated reading time: 12 minutes
In a survival situation, having light and warmth can mean the difference between merely surviving and actually thriving. However, standard paraffin candles aren't always the best choice for light or heat.
If you want a bright candle that can also keep you warm and even cook food, it's better to just make your own. It just takes a few ingredients, some time, and a bit of experimentation. Plus, you can customize them for producing either high heat, high light, or both!
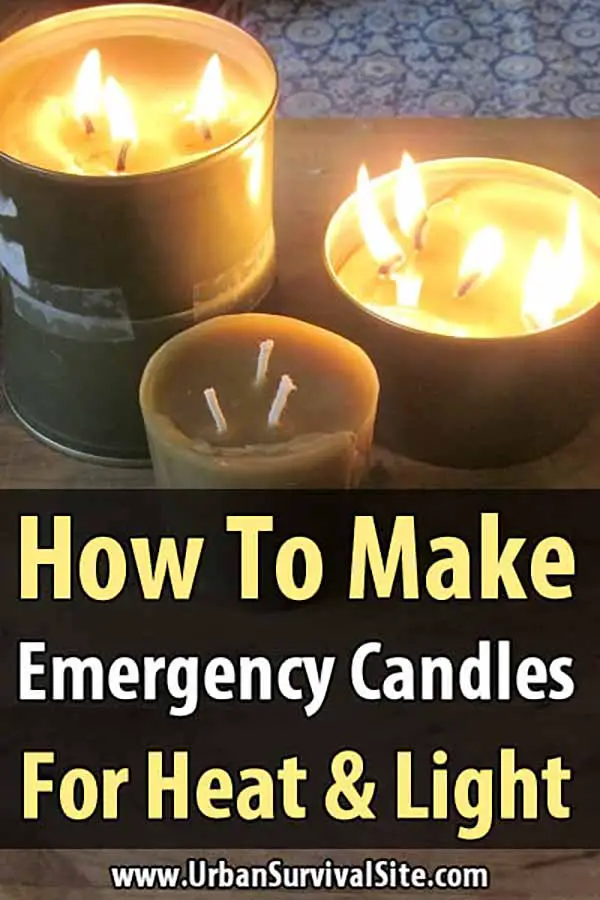
In this post, I'll be talking about three different types of candles. The first two are wick candles that can be customized for 3 to 5 wicks and made in a mold or a container. The third candle is sometimes referred to as a “Buddy Burner” and is excellent as a space heater, cooking candle, or emergency heat and light source.
This candle uses cardboard and wax, so no braided candle wick is required.
Want to save this post for later? Click Here to Pin It On Pinterest!
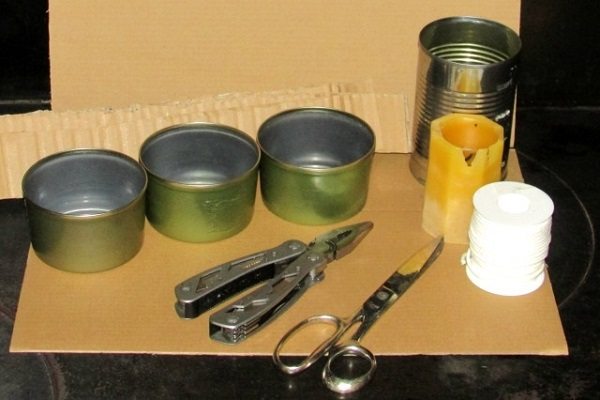
Candle Ingredients
Inflammable Containers – There are many options, but I prefer tuna or salmon cans. Any other low sided can is good for contained candles.
Removable or Shaped Containers – Small sized paper cups are great for for molded candles. Since the mold is removed before burning, the flammability of the container is irrelevant.
Candle Wicking – Get at least a #2 wick if you are working with beeswax. A finer wick is best for paraffin or smaller diameter candles.
Wax – I recommend beeswax as it provides one of the cleanest, hottest, and brightest burns. However, you can also melt down old candles, use paraffin wax, or use soy wax if you don't have beeswax on hand.
Cardboard – This is for the Buddy Burner candle. Use cardboard with clearly defined channels as the cardboard acts as the wick for this type of candle.
Double Boiler – This can be two pots, one inside the other, or a can inside a pot, or a proper double boiler. All you want is to diffuse the direct heat of your stove or burner so the wax will melt safely and hopefully not randomly combust.
Note: Never leave melting wax unattended. Wax is flammable, no matter what type it is, and if it gets too hot it will combust. Wax fires should be smothered, so keep your pot’s lid on hand, and never turn your burner past medium.
Making a Molded Light Generating Candle
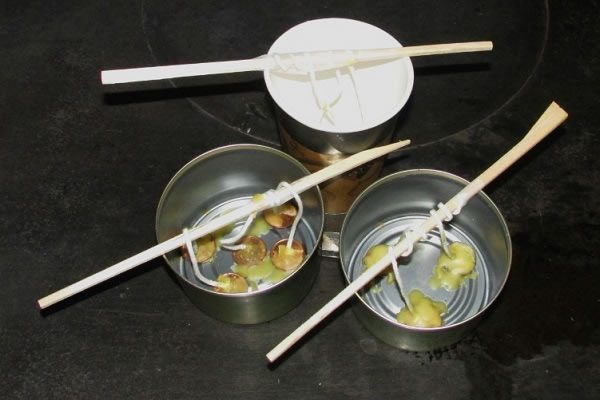
As a general rule of thumb, the more wicks a candle has, the hotter and brighter it will burn. For a fairly long-lasting light candle, I recommend three wicks. The wicks are set in a triangle shape inside your mold before the wax is added. In this shape, they will work together to burn most of your candle’s wax while providing enough light to read or work by.
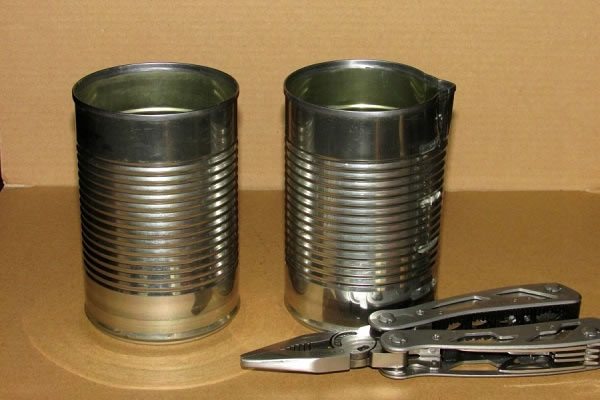
Step One – Take your double boiler, or your can, pot, and water contraption, and add your wax to the inner pot. Wax loves staying inside pots, so I highly recommend using a can. A 6-8 oz sauce can is a manageable size. I use a 3lb olive oil can for melting large blocks of beeswax, and then pour it into a smaller can for finer candle pouring. Before melting the wax, grab a pair of pliers and make a rough spout on one side of your can. This will make pouring your melted wax a lot easier.
If you are melting down old candles, trim the burned wick flush with the candle’s wax before melting. This will keep some of the dirt out of your wax. Excess dirt can clog the wick, preventing your candle from functioning if you light it, put it out, and try to light it again.
Watch closely as your wax melts.
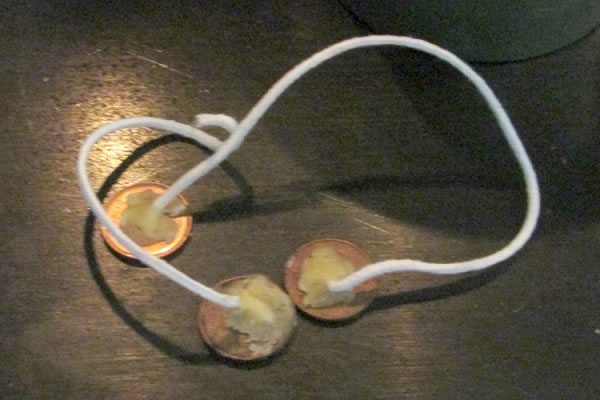
Step Two – While your wax is melting, grab your molds. I used a paper cup and some chop sticks to hold the wicking straight. Use small weights and a bit of slightly-warmed wax to secure your wicks into the bottom of the cup. I stuck my wick on pennies, then fastened the pennies in the mold with melted wax from a lit candle. Space your wicks evenly in the mold for the best burn.
Adjust the wicks so they are straight and secure by using tape on pencils, pens, knitting needles, or chopsticks resting across the top of the cup.
Step Three – When the wax is melted, turn off your burner. Grab hot mitts and carefully pour the wax into your molds. Fill to within half an inch of the top of the cup or mold. Make sure the wax is flat, and set your molds aside to cool.
Note: New wax will already be clean. However, if you are melting down old candles, you will have wicking, dirt, soot, and other grime in the bottom of your wax pot. When you notice grime in your wax, grab another container and pour the last ¼ to ½ inch of wax into it, then pull out any visible lengths of wick with a toothpick. You can use this grimy wax for the Buddy Burner candle, or for creating a general fire starter.
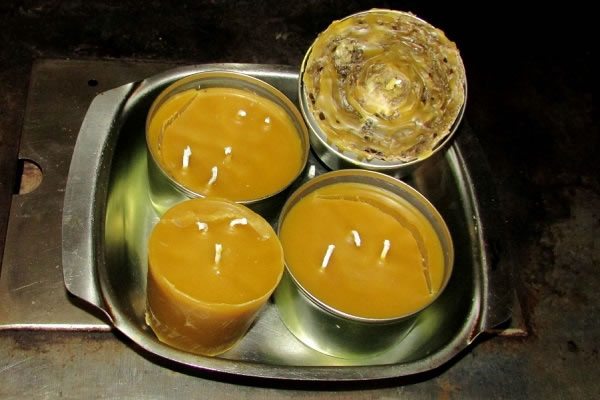
Step Four – When your molds are cooled and your wax is solid, rip the paper and unmold them. Unfasten the wicking from the pencils, and trim to within ½ inch of the candle top. To burn your new candle, set the candle on a non-flammable surface and light.
For the best burn results, candles should be permitted to rest, or proof, at room temperature for 2 or 3 days. If you cool your candle in the fridge or freezer, the candle’s rest time will be from when you removed it from the freezer to whenever it reaches room temperature.
Never leave a burning candle unattended.
Making a Contained Candle for Light and Heat:
This candle is contained in a tin can. I like using the slightly taller salmon cans, but shorter tuna cans will also work. A smaller can will give you a shorter burn, while a larger can will give a longer burn. Making a variety of candles can be beneficial as you can grab a shorter burning candle for a short use or a longer burning candle for longer use.
Step One – Melt your wax, as with the previous candle.
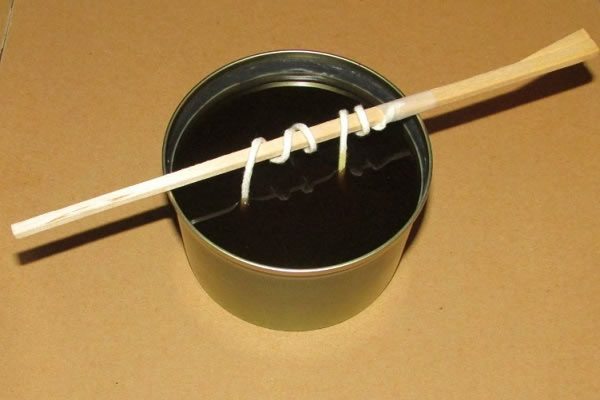
Step Two – Secure five short wick pieces in the bottom of the can. As with the previous candle, I used pennies and softened wax to secure the wick to the bottom of the can. Secure the wick to pencils, chopsticks, or something straight. For five wicks, put one wick in the center, and the other four evenly spaced in the quarters around it.
I recommend using short, single lengths of wick for multi-wick candles. Using doubled lengths puts the wicks too close together, creating uneven wax usage.
Step Three – Pour your wax to within ¼ inch of the top. Do not over-fill on a container candle. You want to have a bit of room for expansion and pooling. Once the wax has hardened, you can remove your wick supports and trim the wick.
With five wicks, this candle will give more heat and light than the previous candle. However, even though it is self-contained, it should still be burned on a non-flammable surface. This candle can work for cooking in a tin-can stove.
Making a Contained Buddy Burner Candle
Honestly, this is the simplest and most efficient candle ever. There is no finicky positioning, and since you will probably burn-out this candle in one go, you can use up your sub-prime and dirty wax. This type of candle is recommended for car emergency heaters (contain in another can, or on a tin plate), and produces enough heat to cook over in a tin-can stove.
Due to using cardboard as the wick, it is not as bright as the previous candles.
Step One – Set your wax to melting.
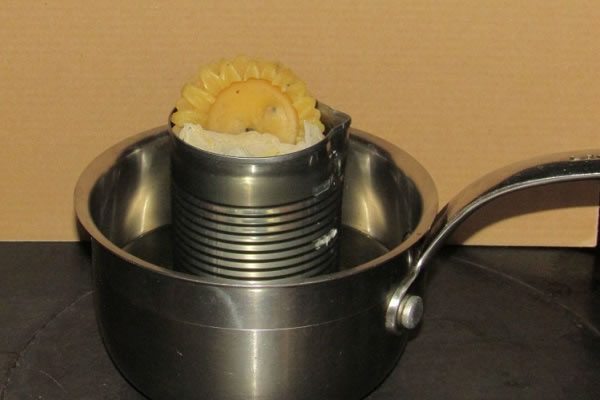
Step Two – While your wax is melting, grab and measure your can’s height. Then cut cardboard strips that are the same width as the height and as long as your cardboard piece will let you. My cardboard piece was roughly 18 inches long. Cut against the grain so that the channels are open and showing, these channels are your wick.
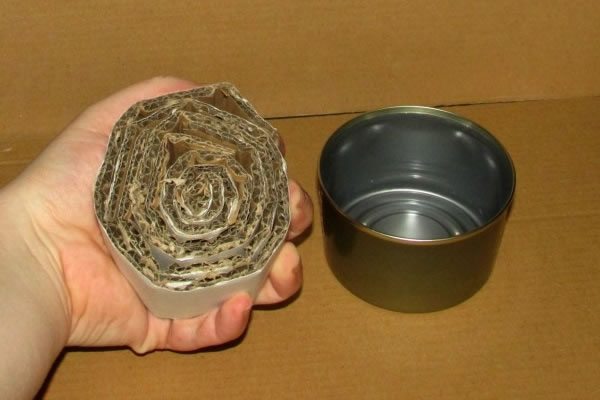
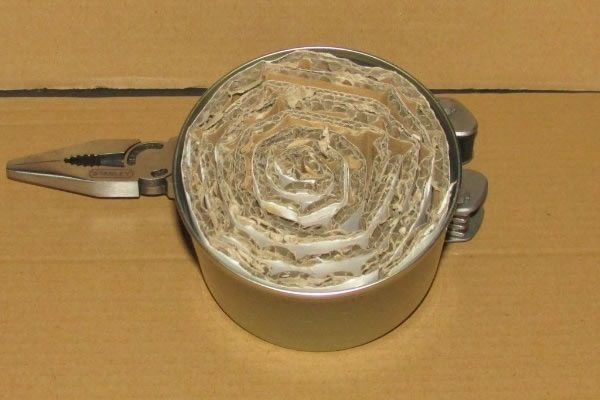
Step Three – Roll the cardboard and pack it into the can. Pack the cardboard close, but do not crush the channels. With 18 inch wide cardboard, my can comfortably held 3 lengths of cardboard rolled together. Roll the cardboard in your hand. Once your cardboard roll is roughly the size of your container, you can slide the cardboard roll into it.
If you are using beeswax, some recommend including a length of regular wicking in the center of your candle burner to facilitate lighting. Simply stick the wicking into the start of your cardboard roll, and roll as described. Beeswax has a higher combustion temperature than paraffin, hence the need for some assistance.
Step Four – When your wax is melted, carefully pour the wax over your cardboard filled can. Wait a few seconds for the wax to soak into the paper, and top up. Try to make sure that all the cardboard channels are filled with wax.
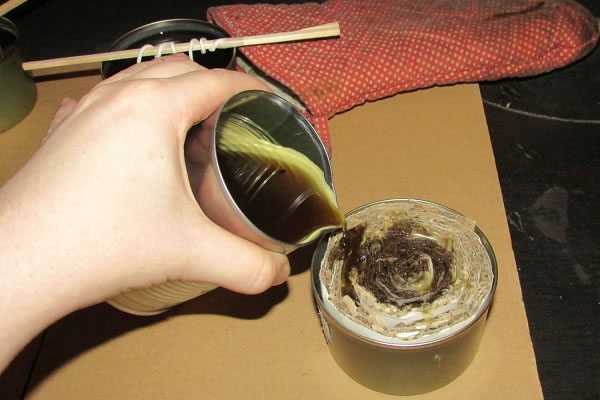
Note: You want your wax as hot as is safe for this pour because the cardboard will quickly cool the wax that is poured in. If your pouring wax is too cool (starting to re-solidify on the surface), the wax will cake on the top of the cardboard and not fully penetrate, lessening the effectiveness of your candle.
Step Five – Let your candle cool. To light this type of candle, either hold it sidewise so that all the visible cardboard can catch, or drop a piece of dryer lint on top and light that. The lint will then catch the cardboard. Of course if you’ve added a wick, just light the wick, turn the candle sidewise, and rotate to catch the cardboard.
Buddy Burners can also be made with tallow, or other types of oil and fat. However, wax is recommended as it won’t melt in summer heat if you are keeping the burner in your car, bug-out bag, or other emergency kit.
Candles are small, portable, and can provide a surprising amount of light and heat for their size. They also have the added benefit of being simple, quick, and easy to make. The longest part of the candle making process, unless you’re hand dipping taper candles, is melting the wax. With the basics presented here, you can easily make any candle variation you desire.
Candle making is a skill. Once you know the basics and how things work, you can create as many emergency candles as you want. The only potential challenge is the wick. A single roll of wick doesn’t take up much space, and can make a surprising number of awesome candles.
In next week's article, I'll use the Buddy Burner in a tin can stove.

You May Also Like: