Estimated reading time: 9 minutes
Most preppers already have alternative ways to cook in an emergency. For example, you might have a Solo Stove or something similar in your bug out bag. But what if your bug out bag has been lost or stolen? Or what if your cook stove gets destroyed? There are numerous reasons why you might need to make your own stove. But what materials should you use?
I like the concept of an emergency stove created out of tin cans. Not only is it an awesome way to repurpose cans, it's an exercise in inventiveness and creativity, two disciplines we all need to have in abundance if there's a widespread disaster.
A tin can stove works in one of two ways. For an indoor stove, the heat source is a candle or buddy burner, like the one I made in my emergency candle tutorial. An outdoor tin can stove, such as this rocket stove, uses what you have lying around the yard for cooking, and can function on a surprisingly small amount of fuel.
Materials Needed for a Tin Can Stove
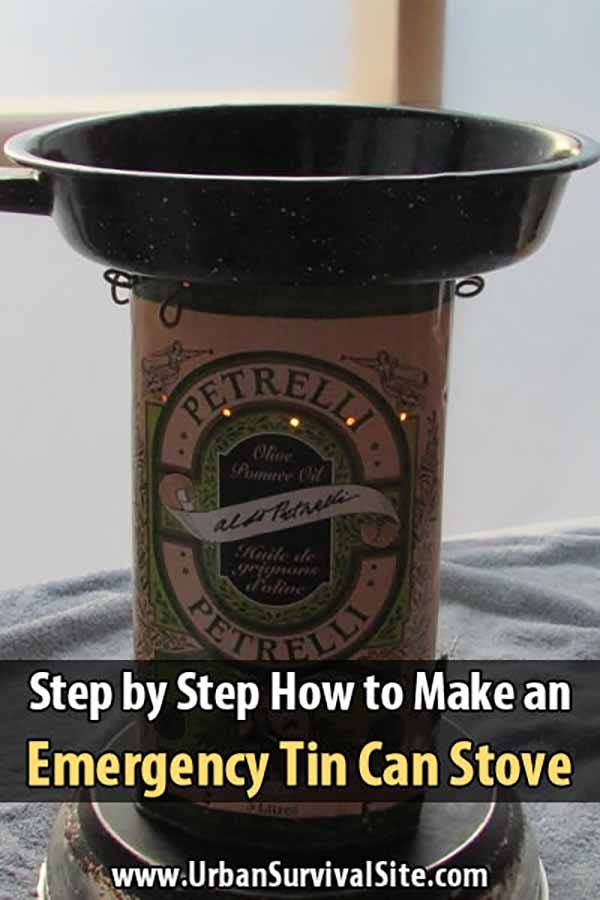
• One Large Tin Can – This can be a #10 can (3 lb size) like the ones used for bulk canned tomatoes or pizza sauce. I used a square 3 lb olive oil can. The main idea with a tin can stove is to use the cans you already have on hand.
• Tin snips for cutting a door on your stove, and for cutting air holes.
• A manual can opener to remove the top and bottom from the can.
• An awl and hammer for creating air holes.
• Lumber – You'll need a length of 2 by 6 lumber about 6 inches longer than your square can. You'll also need two short lengths of 4 by 4 lumber. You'll use the wood to provide support when hammering air holes, shaping the can, or exerting any kind of force on the tin. Specific lumber sizes are not actually needed. Firewood or smaller wood pieces will also work.
• Pliers for flattening down sharp tin edges, bending wire coat hangers, and anything else that pliers can help with.
• Leather Work Gloves, or the rubber coated gardening gloves. Cut tin is sharp, so make sure you protect your hands.
• A non-flammable surface to set your candle and stove on when using it, particularly indoors.
• A wire coat hanger to cut up for pan supports across the top of the can.

Making Your Tin Can Stove from a Square Oil Can
Step One: Remove the top and bottom of the square can and clean any old oil out of it.

Flatten any sharp edges with pliers. Wear gloves at all times when working with tin.

Step Two: On a square can, make air holes using an awl and your blocks of wood. Place the two lengths of 4 by 4 on the ground, with the 2 by 6 supported between them.

Put the can onto the 2 by 6. Make holes around both the top and bottom of the can, shifting the can around the board as you work.

Step Three: Once your air holes are created, choose one narrow side of your square can, and compare it to your candle heat source. Cut a door to fit your candle in that section of the can.
Make sure the door will permit a candle to be inserted. Due to the small size of a tin can stove, you can just cut the door as an air source and manually place your stove over your candle. Also, if your tin snips will not cut the tin, you may need to tighten them or find a pair of heavy duty blunt scissors to cut the tin instead.

Step Four: Once the door is complete, use your hammer, gloves, wooden blocks, and some creative force to turn your square can into a circle. Bend the top and the bottom seam zones first, and then shape the middle of the can with your hands. While you can use the square tin as-is, it will be less tippy if it is round. This is particularly relevant indoors, as you don’t want to lose your soup or cause a fire due to a tipped stove.

Step Five: Using the wire coat hangers, cut three lengths that will go across the top of the can as supports.

Use the awl to poke extra holes. Wiggle the awl on both sides to make the holes wide enough, and slide the rods through. Bend the outside portion of the rods to secure them inside the can and remove projecting ends. These rods will support your cooking pots and pans, permitting easy cooking over your stove and reducing the likelihood of tips and spills.

Step Six: Place your can stove over a ceramic plate or other non-flammable surface. Light your candle, and slide it inside.

Step Seven: Test your stove by putting a kettle or pot of water on it. Do all your candle wicks stay lit? Does it smoke? If the wicks go out or if it smokes without a pot on top, you need more air vents. Add another line of awl holes and see what your candle does. Good air ventilation will let all your candle wicks stay lit and burn without smoking.

Variation for a Round Can Stove
Step One: On a round can, your open end will be your base, and the closed end will be your top. Make air holes around the top of the round can using the hammer and awl, or a heavy duty bottle opener with a sharp point.
Step Two: Using your tin snips, cut a door up from the opened side of the can that will fit your candle of choice.
Step Three: Cut air holes around the lower edge with your awl and hammer. Use a piece of wood for stability.
With a round-can, the solid side acts as a cooking/burner surface, and you can actually cook some things (chapattis for instance) directly on the tin.
If you find working with a closed top challenging, cut the top off and make pan supports from a wire coat-hanger. No matter what type of can you are using, always flatten any sharp edges and wear gloves.
Trouble Shooting Your Tin-Can Stove
If your candle flickers, dims, smokes, or goes out when it's inserted, it means you need a few more air holes, or larger air holes. When adding additional air intakes, use your blocks of wood to keep the can from collapsing. Hot air rises, so adding a low line of air holes or widening your lowest line of air holes will be the best idea. Adjust the air intake until your candle burns with no smoke, even when a pot is on the stove.
Celebrate your successful stove making venture by boiling some water and having a cup of tea. If you like this stove, try making a variation using different cans, or a combination of cans.
The key with a tin can stove is learning to make what you need with what you have. So don’t be afraid to try different can combinations, build a multi-can stove contraption, and generally experiment until you find a tin-can stove that you like.
Next week I'll use my new tin can stove to make some survival bread.

You May Also Like: