

Estimated reading time: 29 minutes

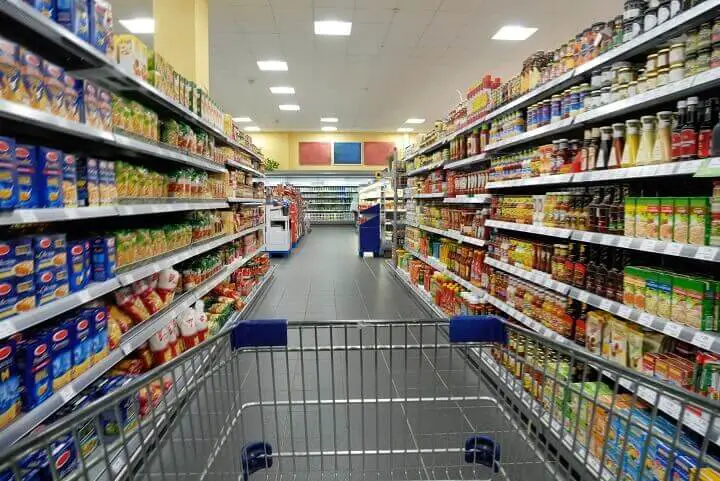
Having a large food stockpile is one of the main goals of every prepper. Unfortunately, many newbies think that all they have to do is run to the store and fill a cart with canned foods. This is a costly mistake. You need to take some time to figure out what foods to store and exactly how to store them.
Most of my readers already know the basics of emergency food storage, but I also have quite a few readers who are just getting started—people who have never used any food storage methods other than their refrigerator. This guide is my attempt to help them get started, and it's also a good refresher for more experienced preppers.
By the end of this guide, you will know the basics of food storage so you can start stockpiling the right foods in the right places to ensure your family has something to eat after a major disaster.
You will also know a little about the most common food storage methods, and you'll be able to avoid mistakes that could put your food supply in jeopardy. Remember, this isn't a race to see who can get the most food on the shelf. This is a methodical, lifelong process—not something you can do in one weekend.
Want to save this post for later? Click Here to Pin It On Pinterest!
Where To Store Your Food
Before you start buying food, you need to consider where you will put it. This will have a big effect on how much you're able to store. If you have a small apartment with little storage space, you are going to have to get creative. Here are 20 food storage locations for people with small homes.
Here are some features to look for in a food storage space:
- Airy, good ventilation.
- Dry – That means no moisture, no standing water or dripping water.
- No direct sunlight.
- Pest free, if possible.
- Temperature controlled – Needs to be below 80 degrees F (70 degrees or lower will make your food last a lot longer).
You probably already have some locations in mind. If not, here's a list of places that could make suitable food storage areas.
- Basement
- Closet
- Linen closets
- Pantry
- Root cellar
- Spare bedroom
Here are some more tips on where to store your food.
Storing Food in Limited Space
One of the most crucial food storage skills of all is knowing how to store a lot of food in a limited amount of space. This is especially important for those of you who live in apartments or condominiums, or those of you who simply have smaller pantries.
Fortunately, there are a variety of important tips that you can use to make the most out of limited space, including:
Shelves Under the Stairwell
Do you have any space under the stairwell? Don’t let it go to waste. You can clean the interior space out to place shelves in if you don’t have any already, and then you can store food and other supplies there. Normal food storage rules apply, so make sure the space is free of moisture and kept at a normal room temperature.
Shelves In Your Closet
If you have any extra space in your closet, you can take advantage of it. Just as you can add shelves under your staircase, you can add them to in closet as well.
Under The Bed
Do you have any extra space under your beds? So long as your bedrooms are kept at normal room temperature (which most are), you should be able to store food safely there.
Where To Hide Your Food
You don't want your food stockpile sitting out in the open for everyone to see. If a disaster wipes out the grocery stores and federal aid cannot get to your area, people are going to remember all those boxes of food you had stacked in your living room or kitchen.
If too many people know about your food, you'll either have to share it (which means it won't last very long) or you'll have to turn people away (which means they could become a lethal threat to you and your family).
Your food stockpile should be kept out of sight and only discussed with your immediate family. Your friend at work or neighbor next door doesn't need to hear about all the food you're storing. Remember, if nothing will stop you from providing for your family, nothing will stop them either. Don't put the temptation out there.
Keeping your food out of sight should be good enough. However, there is the possibility of extreme situations where looters or even government agents ransack your home in search of food. In case this happens, you should consider keeping some extra emergency food in unusual locations.
For example:
- At the bottom of potted plants.
- Behind the walls
- Inside lamps
- Inside old broken appliances
- Inside your box spring
- Under the stairs
Here are some other places to hide your food. This might seem paranoid, but it never hurts to be prepared. Just don't forget where you hide your food!
Where NOT To Store Your Food
Although you want your food stockpile out of sight, you don't want to put it just anywhere. There are several places you should avoid storing your food simply because the temperature and humidity levels can't be controlled. For example:
- Attics – These tend to get way too hot in the summer. And once again, humidity could be a problem.
- Garages – These are okay if you live in a mild climate and the garage will not freeze or exceed 80 degrees on a given day. However, it could be a problem if you live in a very humid area.
- Landry Room, Bathrooms – These are not good places because humidity tends to be a factor.
- Outside Sheds – Again, there's no way to control the temperature or humidity, and pests could be an issue.
Hot temperatures and humidity can cut the shelf life of your food in half or worse depending on how long you leave the food in those conditions. Here are some more things that will destroy your food storage.

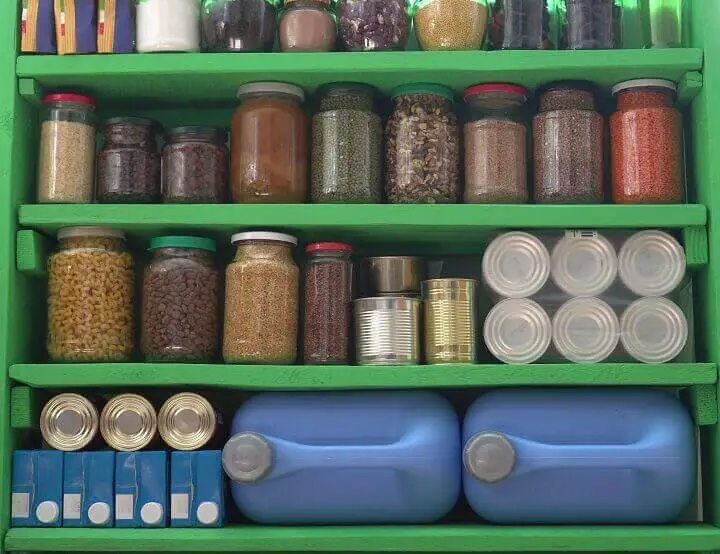
If possible, you should have shelves in your storage space. It just makes life easier. Metal shelves are the best and most durable, and they're easier to clean if a jar breaks or something leaks. They will hold up fairly well under the weight of canned foods.
Wooden and plastic shelves do not offer the same strength and your food storage could end up in a pile on the floor. On a side note, packages of food should never be stored directly on the ground. A minor flood could destroy it all.
Shelves are important to have because they make it easier to rotate your food. This is very important. If you leave food buried in the back of the closet or beneath a stack of boxes, then by the time you finally get it out, it will already be spoiled. People have been known to waste thousands of dollars worth of food this way. What a waste!
From now on, whenever you go shopping, most of what you buy should go straight to the back of your food storage shelves, and the stuff in front should be pulled out to use for the coming week's meals. Here are some tips on how to rotate your food storage.
Start Small
Don't compare your food cache to that of your friend who has been prepping for years. That's like comparing yourself to a marathon runner the day you start a jogging regimen. As with exercise, you have to start small and do a little bit at a time. If you don't stop, then you'll have a huge stockpile before you know it.
To help yourself stick with it, you should set goals.
3 Days
This is the recommended amount of food and water you should always have on hand according to the federal government. The average household already has this much food.
If you don't, then acquire it right away and use it as your jumping off point. If a disaster happens, remember that the food in the fridge should be eaten first, which means you can save your pantry food for the following day.
3 Weeks
Now you want to take that 3 day food supply and build on it. Figure out how much food your family eats on a typical day, multiply that number by 21, and you will know how much you need. You don't have to get into bulk items quite yet at this stage. Just build up your food storage at an even pace.
When you go grocery shopping, buy extra of anything that doesn't have to be refrigerated. Try to make sure you have a little variety, too. What's something you haven't had in a while but you know your family likes? Whatever it is, grab it. Keep doing these things until you have 3 weeks of food, and don't forget to rotate.
3 Months
This is where you are getting into the long term food storage items that are best purchased in bulk. Things like beans, rice, pasta, sugar, flour, and so forth. Consider getting a membership to a store like Costco or Sam's Club.
This is the stage where you'll want to learn how to cook from scratch. I know some people think cooking from scratch is a pain in the butt, but you'll save a lot of money that way. You'll also be a lot healthier. Try several different meals from scratch that you could make on your grill or camp stove if you had to, and when you find some that your family likes, buy the necessary ingredients in bulk.
6 Months
Your food supply should be double the last checkpoint with a variety of foods and snacks to keep your family healthy and happy. Again, be careful about relying too much on canned foods and boxed meals.
If that's all you have to eat, then your sodium levels will be through the roof which is hard on your health, especially if you're middle-aged or older. Make sure you have plenty of bulk dried foods and dehydrated foods (more on that below).
1 Year
This is generally the goal for most preppers, and it might take several years to get there, but it is very doable if you're patient and persistent. But once you get to this point, don't stop prepping.
You should continue rotating through your food supply and improving on it. You'll discover new foods, new recipes, new ways to store things, and so forth. The longer you maintain a year's supply of food, the better it will get.
Note: If you store this much food, make sure you pay attention to your food's shelf life. Some foods probably don't last as long as you think, while other foods last a lot longer.
What To Store
Now it's time to get a little more specific. So what foods should you store exactly? The short answer is: whatever your family eats. There's an old saying: “Store what you eat and eat what you store.” That might seem a little vague, but it is the one rule you need to keep in mind when you start buying extra food.
Never store food your family hates or food your family hasn't tried, no matter how great of a deal it is. You might be thinking, “If we're hungry, we'll eat anything, so who cares?” While this is true, you still want to focus on foods that everyone will enjoy.
During a long-term disaster, it's important to do everything you can to keep up morale, and disgusting foods that no one likes will only make that more difficult. This is especially important if you have children.
Below is a list of foods with a long shelf life (a year or longer). As I mentioned above, in addition to canned and boxed foods, you'll also want plenty of baking ingredients. You should also focus on foods that can be prepared in a variety of ways so you'll have more meal options.
Note: If you store a lot of bulk dry foods like flour and rice, be sure you also buy some diatomaceous earth, which kills pests but is safe to consume. Now on to the list:
- Baking Ingredients – Baking soda, shortening, sugar, etc. (Note: Yeast and baking powder only last a few months.)
- Bouillon Cubes
- Canned Foods – Soup, Chili, Spaghettios, etc.
- Canned Fruit
- Canned Meat – Tuna, Spam, Chicken, etc.
- Canned Vegetables
- Coffee and Tea
- Condiments – Ketchup, Mustard, Hot Sauce, BBQ Sauce, etc.
- Dried Beans – Pinto, kidney, white, and whatever your family likes.
- Dried Meat – Beef Jerky, Chicken Meat Bites, etc.
- Granola
- Granola bars
- Gravy Packages – Gravy makes everything taste better!
- Honey
- Instant Potatoes
- Jams and Jellies
- Oats
- Pasta – Spaghetti Noodles, Macaroni Noodles, etc.
- Peanut Butter
- Popcorn
- Powdered Milk
- Salt and Pepper
- Spices and Seasonings – Your meals will be very boring without them.
- Tomato Sauce
- White Flour – There are many other types of flour, but they don't last as long.
- White Rice – Brown rice may be healthier, but it doesn't store nearly as long.
There are many other long-lasting foods, but this list is just to get the gears in your head turning. If your family has a particular staple they just can't live without, add plenty of it to your food storage. Better yet, learn to make it from scratch and stock the necessary ingredients.
Some kids and even adults have a particular snack they absolutely love. Make sure you have plenty of those things, too, as long as it's something that will last a long time (such as candy).
Related Article: 15 Foods That Last Forever
Foods That Are Tough To Store
There are some foods that simply don't store on a shelf in the pantry very well. You'll need to either stop eating these foods or find a suitable alternative.
- Breakfast cereals tend to go stale if you don't eat them soon. The moment you open that package, it goes downhill quickly.
- Dairy products are not going to sit on a shelf for months. Things like milk, butter, eggs, and cheese need refrigeration. And even then, the shelf lives are limited.
- Dried fruit only lasts six months to a year. Not that you shouldn't store it–you should. But you'll need to quickly rotate through it.
- Graham crackers, saltines, and soup crackers only last a couple of months before they go stale. You may think you can still eat stale crackers, but it isn't pleasant. (Instead, make some hardtack.)
- Mayonnaise is a staple in many households, but once you open that jar, it needs to be eaten quickly (unless you're able to power a small fridge). If you have to have mayo, buy small jars that you can get through quickly before the good stuff spoils.
- Nuts, as with dried fruit, need to be rotated every half year to a year. They're a great source of fat and protein, but keep an eye on the expiration dates.
- Salad dressing like ranch isn't going to do well on a shelf for a few years. Kids tend to want ranch on everything. You would be better off storing dry ranch mix that you can whip into dressing once you learn how to make mayonnaise, which leads us to the next item on the list.
- Vegetable oil will go rancid after more than a year on the shelf. You can go with lard or coconut oil. These can still go rancid, but will give you an extra year or so of shelf life.
- Maple syrup, especially the cheap stuff, is going to mold after being opened for some time. Learn how to make your own with a little sugar and maple flavoring.

What About Nutrition?
Stockpiling emergency food isn't just about having enough to eat; it’s about making sure your family gets the nutrients they need to stay healthy during a disaster. While it's easy to focus on calories, you also need to think about the right balance of proteins, fats, and carbohydrates, as well as essential vitamins and minerals.
A diet lacking in any of these can lead to fatigue, weakened immune systems, and other health problems—things you can't afford to deal with in a crisis.
Carbohydrates like rice, pasta, and oats will be the cornerstone of your food supply because they’re inexpensive and provide quick energy. But you also need to store plenty of proteins such as canned meats, beans, and peanut butter. Protein helps your body repair cells and keep muscles strong.
Don’t forget about fats either. Fats from oils, nuts, and butter powder are essential for long-term energy and brain function. Just remember that they have a shorter shelf life than most other foods.
In addition to macronutrients, vitamins and minerals are also crucial. Fruits and vegetables—whether canned, freeze-dried, or dehydrated—are necessary for getting the vitamins and fiber your body needs.
You might also want to consider storing multivitamins to make up for any gaps in your diet. A well-rounded food stockpile will help you thrive even when fresh food is hard to find.
Freeze-Dried Food
If you went through that first list and were a little surprised not to see freeze-dried anything, there is a reason for that. Freeze-dried foods deserve their own special section. They are foods that you can only buy commercially packaged.
So how are freeze dried foods different from other dried foods? Basically, they are flash frozen. This process allows the food to retain more nutritional value than the canning or drying process. It also keeps the food pretty close to its original look and flavor once it has been reconstituted with a little water.
In fact, it takes less water to bring a freeze-dried food back to its original appearance than it does dehydrated foods. In a post-disaster situation, this is a very big deal when water is scarce.
The only drawback to freeze-dried food is the cost. This tends to be a deciding factor for many preppers. If you can only afford to add a few freeze-dried items to your food storage, start with the items below since there aren't many other ways to store them long-term.
- Butter
- Cheese powder — life will be better with cheese
- Milk
- Pilot Crackers — These will still taste great after years, unlike Saltines.
- Scrambled Eggs
There are a ton of freeze-dried meals, like beef stroganoff or chicken teriyaki, that come in cans or pouches. Mountain House even makes emergency food buckets that come with a variety of meals. To be honest, they don't taste nearly as good as home-cooked meals, but they're still a great option if you want to be able to whip up a meal quickly and easily.
If you do buy freeze-dried food, keep in mind the servings per can are based on a calorie-specific diet. The servings are probably going to be significantly smaller than your average meal today. If you know you have some big eaters, plan accordingly and don't assume a can that says 40 servings will really amount to that much.
How to Rehydrate Freeze-Dried Food
Freeze-dried food is easily to rehydrate. All you need is a little water and time. To rehydrate most freeze-dried foods, simply place them in a bowl or pot and add enough warm water to cover the food.
Stir occasionally and wait for the food to absorb the water, which usually takes about 5 to 10 minutes, depending on the food and temperature of the water. Once rehydrated, the food will return to its original texture and be ready to eat or cook with.
For freeze-dried meals like stews or pastas, it's often best to boil water, pour it over the food, and let it sit for about 10 minutes before serving. If water is scarce, remember that freeze-dried foods typically require less water than dehydrated foods, which makes them a great option for situations where every drop of water counts.
Related: Home Freeze Dryers for Emergency Food Storage
What About MREs?
If you've visit many survival sites, you've no doubt seen ads for MREs. Personally, I don't recommend buying many of them, and for three reasons:
- They don't taste good. There's a reason some people call them “meals rejected by Ethiopia.”
- They're very expensive. I'm talking about $10 per 1000 calories. It's just not worth it.
- They're not healthy. Processed foods high in sodium, preservatives, and carbohydrates.
As you can see, MREs aren't something you want to spend a lot of money on. You could buy a few of them to put in your bug out bag, but that's all. Or better yet, you could make your own.
Food Storage Tips
There are several tricks that will make your food storage a success. We've talked about where and what store, so now let's get into all the miscellaneous tips.
- If you are going to store flour, put it in the freezer for a few days before you seal it up and add it to your food storage. The freezer temps will kill off weevil eggs so you won't have to worry about them hatching and hanging out in your flour while it sits on the shelf.
- Use Mylar bags – Yes, they do cost a little money, but they can extend the storage life of your food by years, even decades. When sealed properly, Mylar bags can keep out all oxygen and moisture.
- Get at least a couple sizes, such as 1-gallon Mylar bags and 5-gallon Mylar bags. There are other sizes, but these two should be all you need.
- Don't forget to buy oxygen absorbers to get rid of as much oxygen left in the bag as you can. You'll need 300cc absorbers for your 1-gallon bags (one per bag is usually enough, but I use two if it's pasta or beans, which have more air in them) and 2000cc absorbers for your 5-gallon bags (again, use two if it's pasta or beans).
- If you have absorbers leftover, don't leave them out or they will become useless. Instead, put the extra ones into an airtight mason jar as quickly as possible.
- Place your hot-iron-sealed Mylar bags into a 5-gallon storage bucket with a lid to protect them from bugs and rodents. This also gives them another layer of protection against flooding.
- Add bay leaves to buckets of rice, flour, and beans. This is especially important if you are not using Mylar bags. The bay leaves stink far too much for ants and other pests and they will stay away.
- Label everything with a big black marker. You want to put the date on things so you'll know when you added them to your food storage. If you are using Mylar bags, you can buy labels to stick on each bag. This is very helpful and prevents you from breaking the seal to see what is inside. Label the buckets as well. I personally use masking tape to make labels because it's cheap and easy to remove.
- Keep a running inventory, whether it's an app on your phone or a paper notebook. An inventory will make your life so much easier, believe me. If you're storing months worth of food, you're going to forget what you have. But with an inventory, you'll be able to head to the store and know exactly what to get.
- Keep similar foods together. Canned fruit goes in one section and canned veggies in another. This will make it easy for you to find exactly what you want without having to shuffle things around and mess up your rotation.
- Many preppers have learned over the years that food stored in glass jars lasts much longer than food in plastic containers. Plastic is semi-permeable, meaning air can get to the food and speed up the breakdown of the ingredients. If you can, either buy things in glass jars or remove the item from the original packaging and put it into clean, glass jars that you can seal.
In addition to learning these food storage tips, you also need to learn these food storage mistakes.
Food Storage Mistakes
Here are the primary food storage mistakes you’ll want to avoid:
- Storing food outside of Mylar bags or food-grade containers.
- Not including desiccant packs in your food containers.
- Not labeling the date you stored the food in your containers.
- Storing food outside or in sheds.
- Storing food in rooms where moisture is more likely to accumulate, such as attics, bathrooms, or utility rooms.
- Storing food under direct sunlight.
- Not rotating your food as needed.
- Storing food you don’t like or are not likely to eat.
- Leaving canning rings on your canned foods.
- Not thoroughly drying your food before storage.
- Failing to properly seal your mylar bags with heat.
- Storing your older food in the back (you should store older food upfront so you eat it first).
- Storing all of your food in the same location.
- Omitting comfort foods (there’s nothing wrong with storing comfort foods such as candy or sugar to help boost morale).
- Failing to include condiments or spices (you’ll want these later to help boost flavor).
Preserving Your Own
If you are getting a little panicked at the thought of buying a lot of food that you won't be serving to your family right away, try to relax. Prepping doesn't mean you have to live on Ramen noodles while you stash away all of the good stuff. Just look for ways to save money elsewhere and do what you can.
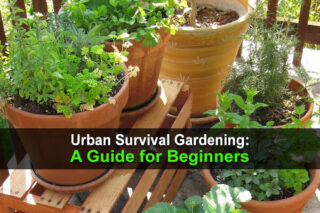
You should also consider starting a garden and preserving whatever food it produces. Or if you have neighbors that are always offering you their excess produce, accept it and preserve it, too.
There are 2 main methods of home food preservation: canning and dehydrating.
Canning
Canning is an excellent way to preserve everything from fruits and veggies to your favorite soups and stews. It's possible to can most of the things you serve your family in a typical month. There are literally hundreds of canning and preserving recipes out there.
There is something really satisfying about canning food for your family to eat. You know you are packing it with love as well as making sure they are only getting the good stuff. You are in complete control of the quality of the food you put on the shelves, and you don't have to worry about the cleanliness of the processing plant or finding something gross in a jar of green beans.
To can food at home, you will need some basic supplies. Expect to pay about $200 for the initial investment. It will pay for itself very quickly. The following list includes the things you will want to start looking for.
Don't be afraid to hit yard sales, check Craigslist, and secondhand stores. If you buy a used canner, make sure the seal around the inside of the lid is in good shape. Any nicks or signs of wear means you are going to need to replace the seal. Investing in a canning guide that provides you with all the important details as well as recipes is a very good idea.
- Pressure Canner
- Canning Rack (optional but a nice tool for water bath canning).
- Canning Salt
- Jars – Quart or pint
- Jar Funnel
- Jar Lifter
- Lids and Bands – wide mouth and regular. Only buy new lids. Never ever reuse lids.
- You can get several of these as part of a home canning kit
The pressure canner is going to be your biggest investment. Expect to pay anywhere from $50 to $150. They can be expensive, but they're absolutely essential for safe canning.
You can get away with using a water bath canner for some fruits, but nothing else. A water bath canner is basically a large pot. The fruits, jams, and jellies are boiled for about 10 minutes in the jars and then they are safe to put on the shelf. Fruits are high in acid, which kills off the bacteria.
Home canning is fairly straightforward. It generally involves picking fresh produce when the fruit is ripe and juicy and when the veggies are crisp. The produce is thoroughly washed before the blooms are cut away, and a blanching process is used for veggies to stop bacteria growth. Blanching is where you boil the vegetables in water for a few minutes before dunking them in an ice bath for the same amount of time.
Anything else you prepare at home, like chili, soup, or even meat can be put into a glass jar and processed in your pressure canner. You will be amazed at how quickly you can fill your shelves with just a single day of canning. I recommend checking out this step-by-step canning guide at SimplyCanning.com for more info.
Dehydrating
Dehydrating foods is another great option. The process removes moisture from the food to keep it from growing bacteria. Dehydrating is a method that has been around for centuries, but it is much easier and safer for us nowadays with the benefit of electric dehydrators. Fruits, veggies, meats and spices can all be dried and safely stored on the shelf for years. There are hundreds of dehydrating recipes to try.
A good dehydrator will run you at least $80. A high-end dehydrator could cost as much as $250. To dehydrate your food, you will need to wash and dry it thoroughly before slicing it into very thin strips.
Thin strips of fruit and meat will dry quickly and you won't have to worry too much about them turning chewy and tough to eat. However, with a thin strip, you run the risk of the food becoming crunchy and falling apart when handled.
Dehydrating food is something that takes practice, so you might want to consider getting a dehydrator cookbook to help you along the way. You will quickly get the hang of cutting certain fruits, veggies, and meat. You will also learn just how long they need to sit in the dehydrator.
There are a ton of different seasoning mixtures and marinades you can use on meat to give them additional flavor. When food is dehydrated, it does tend to lose some of its flavoring as well as nutritional value. Fruits are often a little better when sprayed with lemon juice or citric acid before the drying process to help them retain a more natural color.
Related Article: How to Dehydrate Food for Emergencies
Smoking
Smoking meat is another ancient preservation method. It is essentially drying, but it is done over wood chips that give the meat additional flavor. This is something many hunters get a real thrill out of doing.
Harvesting meat from the wild and then making jerky in their own smoker is very satisfying. They get to experiment with a variety of flavors that are enhanced by the type of wood chips that are used.
When smoking is used to preserve meat so that it doesn't need refrigeration, it is referred to as hard smoking. As you probably know, you can buy smoked hams and whatnot at the grocery store. That is a different process and a ham or other cut of meat that has been smoked still requires refrigeration. Your goal is to store meats and other food without the need for your big freezer.
If you're interested in trying this method, here is a picture guide to smoking meat.
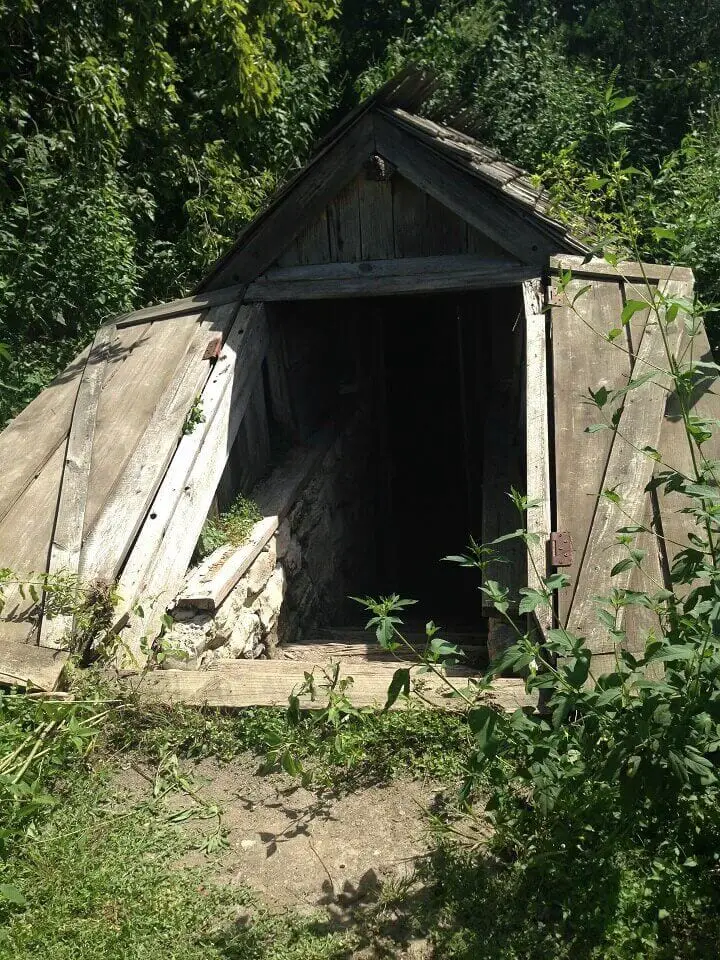
Root Cellars
It would be a very wise decision to build or dig a root cellar on your property if you can. This is an excellent way to store fresh produce for months. Fresh is absolutely best and anytime you can eat fresh food over canned or dried, you will want to.
Root cellars keep the food at a nice, cool temperature with just the right amount of humidity. There is very little you need to do after you put your food in a root cellar. Nature takes care of it all for you.
The only real concern you will have is making sure you use wood shelving and allowing plenty of space between the produce in the cellar. Wood shelving will not retain heat or cold that could throw off the temperature in the root cellar like metal shelving, and the food will need good air circulation.
Crops that store well in a root cellar include:
- Apples
- Beets
- Cabbage
- Carrots
- Garlic
- Onions
- Leeks
- Pears
- Potatoes
- Pumpkins
- Squash
- Tomatoes (When picked before they ripen, they will ripen in the root cellar and be good to eat for a good month or two after harvesting.)
- Turnips
The key to keeping root crops fresh in storage is to harvest them and leave them as is. That means don't wash the dirt off. The soil helps preserve them and keep them cool.
Keep a close watch on the food in your root cellar. If a potato or one of your other bits of produce looks to be going bad, get rid of it quickly. One bad apple really can ruin an entire bunch. Don't store your produce in buckets or bags. Lay it all out flat. When harvesting, make sure the produce isn't bruised. A bruise leads to quick rotting.
If you don't have or can't build a full-size root cellar, I have good news. There are many root cellar alternatives that work just as well, from burying a trash can to burying an old freezer. As long as you have a little space in your backyard, there's no reason you can't store some food underground.
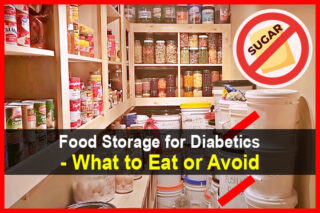
What About People On Special Diets?
If you or a family member has special dietary needs, it’s important to plan your food storage accordingly. Whether you're dealing with gluten intolerance, dairy allergies, or low-sodium requirements, there are plenty of ways to build an emergency food supply that fits your needs. The key is to focus on the foods you know are safe and to make substitutions where necessary.
For example, if you need to avoid gluten, stock up on grains like rice, quinoa, and buckwheat instead of wheat-based products. Many gluten-free flours like almond flour and coconut flour can be stored long-term as well.
If dairy is an issue, look for powdered milk alternatives, like coconut or soy milk powder, that have similar shelf lives. You can also find freeze-dried fruits and vegetables that are naturally gluten- and dairy-free, giving you more variety in your meals.
If you're on a low-sodium diet, be extra careful with canned and processed foods as these tend to be loaded with salt. Instead, focus on dried beans, rice, and pasta that you can cook from scratch. When building your spice collection, include low-sodium seasoning blends and bouillon alternatives.
Recommended Books
Remember, this article is just an introduction to food storage. If you really want to be a food storage guru, I highly recommend you pick up some books on the topic.
Here's a list of books I mentioned above along with some other favorites of mine:
- The Pantry Primer: A Prepper's Guide to Whole Food on a Half-Price Budget – This is my favorite all around guide to food storage. A lot of guides leave you with more questions than answers, but not this one. Daisy explains step-by-step how to go from nothing to a year's supply of food, and even includes info for people with dairy, gluten, and other allergies. Fantastic resource!
- Better Homes and Gardens Complete Canning Guide: Freezing, Preserving, Drying – If you want to focus most of your food storage efforts on canning, you need to get this book. You will get detailed instructions on preserving butters, condiments, fruits, jams, jellies, relishes, soups, stews, vegetables, and more. This isn't the kind of book you read cover to cover; it's a reference that you'll refer to time and time again.
- The Ultimate Dehydrator Cookbook: The Complete Guide to Drying Food – If you want to focus more on dehydrating foods, you should definitely get this book. It explains everything you need to know about dehydrating and rehydrating foods, and includes nearly 400 recipes.
- The Complete Root Cellar Book: Building Plans, Uses and 100 Recipes – If you have the means to build a root cellar, do it. But if you're not sure how, this book will teach you. It explains how to plan and build a root cellar, what food to store in it, how to properly store that food, how to cook with it, and everything else you might need to know.
Like this post? Don't Forget to Pin It On Pinterest!
You May Also Like: