Estimated reading time: 11 minutes

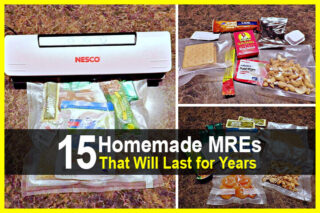
Food storage is one of the most critical parts of homesteading and emergency preparedness. Meals Ready-To-Eat, also known as MREs, are a common staple when it comes to survival. The military uses them to help feed soldiers in the field, and they are often used for those going out for long hikes and backpacking.
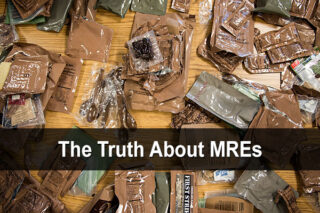
We’ve all seen those MREs on store shelves at outdoor stores, but have you ever tried one? Don’t get us wrong, MREs do a great job of fueling up the body and providing a lot of caloric energy in a small package. However, they are usually anything but delicious.
Making your own MREs allows you to choose the ingredients and make meals you know you'll enjoy. MREs are quite expensive, but you can make the same, if not better, product at just a fraction of the cost when you do it yourself. It is easy to collect items on store shelves to make your very own MREs that are shelf-stable and lightweight.
Learn more about how to make your own MREs with these tips.
Want to save this post for later? Click Here to Pin It On Pinterest!
What Is An MRE?
To make your own MREs, you first must understand the features of a typical MRE.
Lightweight
MREs are commonly used in survival situations where people are walking or running. Lightweight MREs are a must so that you can conserve as much energy as possible. Carrying around a heavy MRE kind of defeats the point of having a ready-to-eat meal if you burn more calories carrying it around due to its weight.
High Caloric Content
Again, in a survival situation, your body will consume more energy due to the physical terrain. This is no time for watching your waistline. MREs should include a big bang for your buck when it comes to high density and caloric food in a small package.
Different situations will require different amounts of caloric intake, but the usual rule of thumb is to make each MRE between 1,000-1,500 calories.
Shelf Stable
MREs are made with items that have a longer shelf life. Including foods like fruit, dairy, or high-fat meat is not a good idea. It is important that each MRE contains food that doesn’t need refrigeration. Using a vacuum sealer to help remove air helps with both transportation and preservation.
Little to No Preparation
While MREs can be eaten cold, it is always nice to have warm food after a long day in survival mode. All of the food within your MRE should only require added water or heat at a maximum.
Remember that both water and fire may be scarce in a survival situation, so make sure to choose a variety of MREs so you can choose which one is best in the situation. You can also order some MRE heater bags that will heat your meal without the need for fire.
No Special Tools Needed
When relying on MREs for survival, you will likely have only one or two tools with you. Make sure to choose foods for your MRE that don’t require any special tools like a can opener or utensil like a spatula. Include foods that can be eaten with your fingers or slurped in a cup.
Foods to Include in Your MRE
There are many different kinds of foods that you can include in your homemade MRE. Many of these items you may already have in your pantry.
Crackers
These lightweight carbs are a staple when making your own MREs. They are often used along with some protein or as a side item. Choose crackers packaged in a sealed plastic sleeve that are easy to add to the MRE. Crackers also contain plenty of salt, which is an important element when surviving the outdoors.
Peanut Butter
While adding a tub of peanut butter isn’t lightweight, many manufacturers now produce smaller peanut butter packages that are perfect for making your own MREs.
Choose those peanut butter companies that make small single-serving tubs or packets of peanut butter. These containers are already MRE friendly, and you can add a few to the package to help boost the caloric content.
Tuna
Many food manufacturers now have individual tuna pouches that are perfect for making your own MREs. Using a can of tuna is not only heavy, but it also requires a can opener of some sort.
Adding a pouch of tuna to your MRE adds much-needed protein to the meal. You can also get these pouches of tuna in various flavors, which helps to dress up this protein and make it more desirable.
Beef Jerky
Many of us homesteaders have freezers full of meat, either from our own land or purchased from a neighbor. Making your own beef jerky is a great way to save money and make sure the jerky is to your liking. Adding beef jerky to your MRE adds essential protein to the meal and packs a punch with lots of calories and flavor.
Dried Noodles
Packing dried noodles in your MRE is a great way to add carbohydrates without a lot of weight. Consider using packages of ramen noodles that are small and easy to transport.
The noodles only need water and heat, and you can get many different flavors to help mix things up. You can also make your own pasta packets using dried pasta and storing it in a sandwich bag.
Instant Rice
Many food manufacturers have made instant varieties of food staples. Adding a package of instant rice to your MRE adds carbohydrates and nutrients to help you fill up. They also come in a variety of flavors and are easy to make.
Oatmeal
One of the best breakfast MREs includes oatmeal. Not only is it a high caloric food that tastes good, but it also helps create a solid source of energy for the long day ahead.
While you can eat oatmeal raw, it is better consumed when using water and heat. Remember that MREs are meant to be quick and easy to consume without too much work. Get some oatmeal packets with oatmeal that is fully cooked and ready to eat.
Dried Fruits
Using dried fruits in your homemade MRE is a great way to add nutrients and flavor to any meal. Many dried fruits come in their own package that is easy to throw into an MRE. You can also break up packages of dried fruit into sandwich bags.
Consider making your own dried fruit using fresh fruit that you have on hand. Use a food dryer to dehydrate apples, bananas, berries, and pears that would do well in an MRE. Removing the water from the fruit preserves the food and helps prolong its shelf life.
Instant Drink Mixes
A warm coffee, tea, or hot chocolate can bring a lot of comfort in a survival situation. Instant drink packets are easy to add to an MRE and only require warm water. Choosing those varieties with more sugar can also boost your energy intake and help the body relax after a long day outdoors.
Freeze Dried Vegetables
Using any freeze-dried vegetable in an MRE helps add essential vitamins and minerals to the meal. They only require water to help bring them back to life and can easily be added to pasta or rice for flavor. Freeze-dried vegetables often come in powdered form, which is easy to store and add to your homemade MRE.
Granola Bars
There are so many different granola bars available these days. While you can make your own, buying a box or two of high-calorie energy bars is a great idea. You can easily add them into an MRE that needs extra calories or have them on hand as an easy snack.
Seasonings
Again, when making your own MREs, you want the meal to taste good. Include packets of salt and pepper in every meal. You can also add extra seasonings that you already have in your pantry like oregano, chili pepper, or seasoning salt. While you can order individual packets of these spices, you can also make your own using small snack-size bags.
Try saving the sauce packets that you get from fast-food restaurants to add to your homemade MREs. Such items like ketchup, mustard, mayonnaise, ranch dressing, and honey are all great options to easily add flavor.
How to Put Together an MRE
When assembling your homemade MRE, it is crucial to remove as much air as possible to make the item easy to pack and lightweight. Place all of the items into a vacuum sealer bag and make sure to include items that have similar expiration dates. Add in some heavy-duty plastic utensils needed to eat the meal. Use your vacuum sealer to remove all of the air within the package.
If you have items like ramen noodles that have some air in their own package, consider puncturing it to help the bag seal better. Write the name of the contents on the outside of the container and possibly what meal you plan on using it for. Make sure to include the date that you packed it as well.
Store your homemade MREs in your survival or emergency bag where it is dry and cool. Remember to make enough for yourself and any family members who would need meals in an emergency.
Making your own MREs is a great way to make sure you will actually like the meals and cost a fraction of the price. Stock up on these items and make a set of MREs to put away for an emergency.
12 MRE Recipes
If you're not sure what to put in your MRE, here are some ideas you can try.
1. “Tuna Ranch Crackers” MRE (No-cook)
- Tuna pouch (plain or flavored)
- Crackers (sleeve pack)
- Mayo or ranch packet
- Pickle relish packet or mustard packet (optional)
- Dried fruit (raisins, cranberries, apricots)
- Trail mix or peanuts
- Electrolyte drink mix packet
Why it works: protein + salty carbs + fat packet = super satisfying without heating.
2. “Chicken & Rice Bowl” MRE (Hot water or heater bag)
- Instant rice packet/cup (plain or flavored)
- Chicken pouch (or salmon pouch)
- Olive oil packet or butter powder packet
- Freeze-dried veggies (peas/corn/mixed) in a small baggie
- Soy sauce packet or seasoning salt packet
- Dessert: pudding cup (shelf-stable) or cookies
- Instant tea or coffee
Prep: add hot water to rice, stir in chicken + veggies + oil, season.
3. “Ramen Upgrade” MRE (Fast hot meal)
- Ramen (break the brick in half to pack flatter if you want)
- Jerky (beef/turkey) or meat stick
- Peanut butter packet (sounds odd—PB on the side is great calories)
- Freeze-dried veggies (small portion)
- Hot sauce packet or chili flakes packet
- Granola bar
- Hot chocolate packet
Prep: cook ramen, toss in veg + jerky, hit it with hot sauce.
4. “Oatmeal Power Breakfast” MRE (Hot or cold-soak)
- 2 oatmeal packets (high-cal flavored if possible)
- Peanut butter packet or almond butter packet
- Honey packet
- Dried fruit
- Nuts (small pack)
- Instant coffee packet + creamer/sugar packets
Prep: hot water is best, but you can cold-soak longer in a cup.
5. “Beans & Tortillas” MRE (Hearty, minimal tools)
- Ready-to-eat bean pouch (refried or seasoned beans—pouch, not can)
- Tortillas (2 small; they pack better than bread)
- Hot sauce packet
- Cheese powder packet or shelf-stable cheese spread (if you use it, rotate)
- Corn chips (small bag) or crackers
- Drink mix packet
Prep: eat cold, or warm the pouch near coals/heater bag and make wraps.
6. “Mediterranean No-Cook” MRE (High morale meal)
- Pouch of chicken or tuna
- Single-serve olive pack (olives) or olive oil packet
- Crackers or pita chips
- Hummus powder packet (add a little water) or shelf-stable hummus single (rotate)
- Dried fruit
- Dark chocolate square(s)
Why it works: feels “real” and has fats + salt + protein.
7. “Soup & Sides” MRE (Cold day favorite)
- Instant soup packet (ramen-style soup, miso packets, or dehydrated soup mix)
- Instant mashed potato packet/cup
- Jerky or meat stick
- Crackers
- Candy (hard candy or chocolate—depending on heat)
- Tea packet
Prep: hot water. Soup first, potatoes as the “filler” side.
8. “PB & Honey Trail Lunch” MRE (Ultra simple, high cal)
- 2 peanut butter packets
- Honey packet
- Crackers or tortillas
- Trail mix (bigger portion)
- Granola bar
- Electrolyte drink mix
Why it works: nearly zero prep, extremely calorie dense.
9. “Instant Pasta + Protein” MRE (Comfort meal)
- Knorr/Lipton pasta side packet or instant mac-style cup
- Tuna/chicken pouch
- Olive oil packet or ghee packet
- Parmesan packet (shelf-stable) or cheese powder
- Italian seasoning packet
- Dessert: cookie pack
Prep: hot water + stir. The oil packet makes it taste way better.
10. “Breakfast-for-Dinner” MRE (Morale booster)
- Instant oatmeal packet
- Shelf-stable breakfast bar or granola bar
- Beef jerky
- Dried fruit
- Hot chocolate
- Instant coffee (optional)
Why it works: comfort foods + protein, great when you’re tired.
11. “Spicy Peanut Noodles” MRE (Fancy without effort)
- Rice noodles (instant vermicelli style) or ramen
- Peanut butter packet
- Soy sauce packet
- Sriracha/hot sauce packet
- Freeze-dried veggies
- Cashews/peanuts
- Candy or chocolate
Prep: cook noodles, stir in PB + soy + hot sauce for a quick “satay” vibe.
12. “Snack-Only Emergency MRE” (No heat, no mess)
- 2 energy bars (higher calorie)
- Jerky or meat stick
- Trail mix
- Dried fruit
- Peanut butter packet
- Electrolyte drink mix
- Candy (quick sugar)
Why it works: when water/fire is scarce, this is the easiest “fuel pack.”
Like this post? Don't Forget to Pin It On Pinterest!
You May Also Like: