

Estimated reading time: 7 minutes

Dehydration is a fantastic way to preserve food for the future. There are many reasons why I like dehydrating food: it's safe, it's easy, and it's cheaper than buying dehydrated food. Better yet, the food itself is more nutritious, it's lightweight, it doesn't take up much space, and some of it is absolutely delicious (like banana chips).
Of course, if you want to dehydrate your own food, you'll need a good dehydrator. This one–which I've used a lot–is about $60. It's not one of the high-end dehydrators like the Excalibur, but it definitely gets the job done.
Before you jump in and start throwing everything you can find into your dehydrator, there are a few things you should know. Here are 13 things I've learned along the way.
Want to save this post for later? Click Here to Pin It on Pinterest!
1. Start by learning your dehydrator and reading the instructions.
Dehydrators can be split into three categories: bottom fan, top fan, and back fan. Most people would recommend a back fan dehydrator since it encourages even drying. However, even with a back fan you will need to move trays around to ensure even and consistent drying.
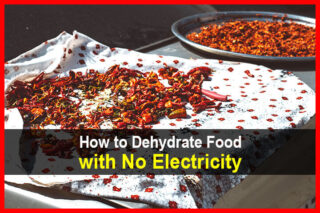
2. If you don’t have a dehydrator, you can use your oven or air dry.
Any leafy green–mint, lemon balm, sage, oregano, lettuce, or even carrot tops–can be air dried. Herbs are particularly easy to dry. All you have to do is hang them up in a dry room. If you try this method, make sure direct sunlight does not strike the herbs.
Depending on the size of the herb bunch, it can take anywhere from a few days to a week to fully dry. Herbs should be crisply dried and should crumble easily.

3. Some vegetables should be blanched before you dehydrate them.
It's not required, but doing so will keep the colors brighter, help retain the vitamins, and make your dehydrated food taste fresher after you rehydrate it. All you have to do is lower your food into boiling water for a few minutes, then put it in ice-cold water to stop it from cooking. Here's a guide to blanching vegetables.
4. Dehydrate only one family of foods at a time.
If you are dehydrating tomatoes, you can also do hot peppers, but be aware that the tomatoes will end up being spicy. Any brassica should be dehydrated on its own, otherwise the sulfur taste will permeate into the other foods. Fruits can be mixed together, but mixing them with strong tasting or smelling vegetables is not recommended.
5. While drying in the same family of food, there are a few tricks to make sure the drying process is even.
Always aim to have fruits and veggies sliced to the same thickness. And never overlap fruit or veggie pieces, as it will block airflow and prevent the food from drying. The exception is greens, as they are loose and dry easily even with a few light layers on the tray.
6. You can dehydrate any fruit or vegetable, regardless of quality or ripeness.
If something is too ripe and soft, you can always puree it and dry the puree. Although using the best quality fruits and veggies will result in the best quality dried goods, remember that the goal here is preservation, not perfection.
So don’t be afraid to dehydrate the bruised, overripe, and slightly damaged goods. Just make sure not to put mold in the dehydrator as it can spread and infect the rest of the foods.
7. Fruit purees are an awesome way to store and eat overripe, funny shaped, or otherwise damaged fruits.
Small apples are awesome turned into fruit leather, and overripe plums, peaches, and berries also work amazing in fruit leather. You can combine most other fruits with apples to make a flexible leather that is perfect for snacks and keeping on hand for emergency energy.
If you do not have a dedicated puree tray as an accessory with your dehydrator, it is very easy to cover the normal tray with some cello wrap and dry on that. However, if you are using cello wrap, always make sure to flip the leather once the top is dry so that it dries completely on both sides.
8. If you intend to dry hot peppers or onions, keep your dehydrator outside in a well-ventilated area.
And be prepared to scrub the dehydrator trays with soap and water afterward. With peppers, the oils will become airborne in the first part of the dehydrating process and can be an eye irritant. The oils will also remain on the trays, so take care when cleaning them and packing the dried peppers away.
Onions are more airborne than peppers, so make sure there is plenty of ventilation around the dehydrator when working with them.

9. Berries, like blueberries or grapes, can be a challenge on the dehydrating front.
They are small, but a contained unit. Most berries are small enough to be dried whole, but large grapes should be cut in half. If you want to dry seeded grapes, you can cut them in half to remove the seeds and then dry them. Berries can easily over-dry, so you want to watch and make sure that they remain slightly supple, and not too crispy.
10. Different foods will require different dehydration temperatures.
Check your dehydrator thermostat and make sure it is accurate before beginning to dry meat or fish. Also, always remember to clean your dehydrator between families of items, or between doing meat or fish and any fruit or veggie.
11. You can also use your dehydrator to make special foods, like kale chips, for snacks or storage.
If you are making something like kale chips, which have oil and spices on them, you will want to ensure the trays get washed before drying fruit or something that doesn’t go well with garlic.
12. With a dehydrator, you don’t have to waste much of anything.
One fun way to get the most out of your summer harvest, and your dehydrator, is to dry and powder items you’d normally get rid of. Have an over-abundance of late-season lettuce, chard, beet greens, or carrot tops? Dry them all and powder them in a food processor–it makes an easy to store vitamin powder for late winter soups and stews.
If you’re making tomato sauce, take the skins you’d normally throw away and dehydrate them. Then powder the skins and you have your own tomato powder that is perfect for mixing into sauces or breads. You can dry tomato skins and hot peppers at the same time if you want a spicy tomato powder.
13. Storage is very important for any preserved food, and dehydrated foods are no exception.
Store either in heavy-duty zippered bags in a metal container, or store in dry, sterile, glass jars. If you choose to store in plastic bags within a larger can, keep food families separate.
For example, don’t try to store the broccoli in the same can as peaches. If you do, each will pick up hints of flavor from the other, which wouldn't taste very good. For long-term storage, I recommend using Mylar bags.
To learn more about dehydrating, watch this video series by Dehydrate2Store. If you're looking for ideas, check out these dehydrating recipes.
Like this post? Don't forget to Pin It on Pinterest!
You May Also Like: