Estimated reading time: 10 minutes
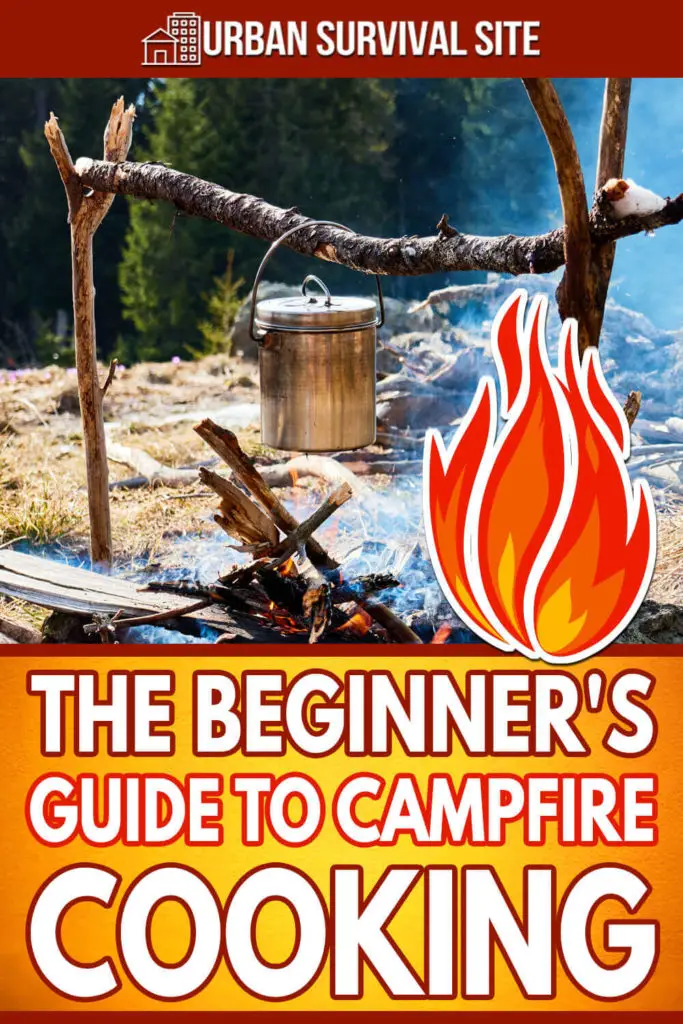
Cooking over a campfire is a highly underrated cooking method, and it gives food a taste that can't be found in any restaurant or kitchen.
For campers, outdoor cooking provides fresh air, sunlight, and the opportunity to enjoy time with friends and loved ones. For people in survival situations, there isn’t much of a choice and this task may become a necessity.
Campfire cooking can be as simple as throwing food directly onto the coals, or it can be as complicated as you want it to be by building specific types of fires and adding an assortment of tools and cookware.
If you have never cooked over an open flame campfire, this guide will help you to get started by providing step by step instructions on everything in the table of contents below.
Want to save this post for later? Click Here to Pin It On Pinterest!
How To Start A Fire
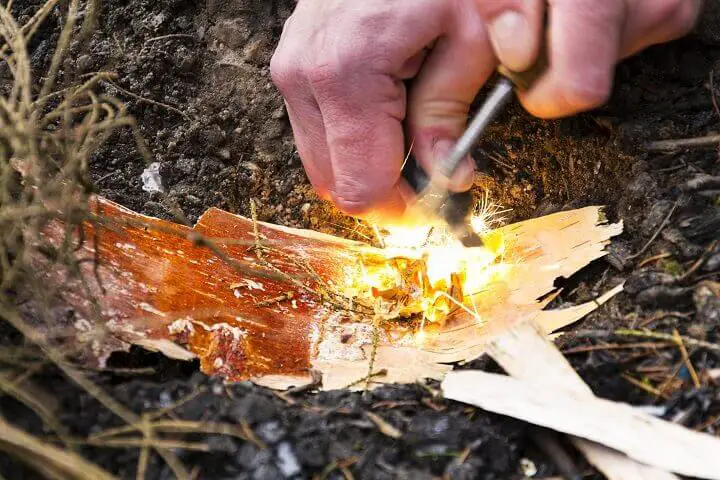
Starting a fire may seem like a simple task, and sometimes it can be, but it can also prove quite difficult. The first thing to be aware of is what is called the fire triangle. It consists of three things that are needed for a fire to be created. They are oxygen, an ignition source, and fuel.
Too much oxygen will blow a flame and ember out, too little oxygen will also cause this to happen. Ignition sources are anything that will generate enough heat, sparks, or a flame to provide combustion. Fuel is the material that burns to sustain a fire.
Oxygen, Ignition Sources, Fuel
Below are a few tips and examples that will help out with the fire triangle.
Oxygen
- Be sure that there is enough room around the base and side of a fire to allow airflow
- Invest in a blowpipe to provide more oxygen to embers in hard to reach places
Ignition Tools
There are a ton of different ignition sources available and here is a list of a few common ones to use.
- Lighters
- Matches
- Ferrocerium rod and magnesium rod
- Chemical reactions
- Magnifying glass
- Bow drill
- Hand drill
- Pump drill
- Fire plough
Fuel
Fuel can be broken down into four subcategories :
- Fire starting aid – Any material that easily ignites and holds a flame to get a fire going.
- Tinder – Dry, fibrous material with a lot of surface area that easily ignites by a spark or flame. Think cattail fluff, shredded bark, grass, fatwood, etc.
- Kindling – Pieces of wood that are no thicker in diameter than your fingers or thumb.
- Fuel – Any wood that is larger than kindling.
Putting It All Together
Before getting started plenty of tinder, kindling and some fuel needs to be collected and ready to go. Create a tinder bundle with the tinder and place it in the center of your firepit. Small kindling can be placed on top of the tinder bundle, leaning against it or around it.
Use an ignition source to light the tinder bundle and feed it with small pieces of kindling until it gets going. Add larger pieces of kindling as needed and when a good firebase is established, fuel can be added to it. When adding material take care not to crush any flames or embers.
Different Types of Fires
Teepee
Probably the most recognized style of fire, this design uses pieces of wood to make the shape of a Native American teepee. This style of fire is good for sitting around and directs most of the heat into a single upward point. It works well cooking a singular item at high temperatures but when you want to regulate the temperature it can be tricky.
Dakota Fire Pit
This design is for someone who desires to keep their fire concealed or who wants to keep it smaller and more manageable. To create it, simply dig a hole into the ground of the size fire you want. Next to it, dig a smaller hole with an adjoining tunnel that is angled.
The first hole is where the fire will be kept while the tunnel provides proper airflow. Since the fire will be underground level, the flames will not be seen, it will be easier to control, and a small grill can be set on top of the ground for cooking.
Swedish Fire Log
The Swedish fire log can be fun to cook on for camping trips and to show to friends and family but it is a little impractical for anything else due to the preparation.
To create this, use a saw to make several cuts parallel to the end of a log. Then, shove tinder and kindling into the cuts and ignite them. The fire will burn within the log and flames will come out the top where cookware can be placed.
Log Cabin
Depending on the size of wood that is used, this type of fire can provide a framework for a grill, food, and cookware to be set upon. To create it, simply lay two pieces of wood parallel to each other onto the ground with enough space between them for the firebase. Then lay two pieces of wood on top of the first pieces and in a perpendicular fashion.
Continue this building method until the desired size is achieved. Place tinder and kindling in the center and feed the fire as needed.
StarFire
To create a Starfire first start a small fire with tinder and kindling. Then feed larger pieces of wood into the fire end first with the body of the wood point away from the fire. Doing this with several pieces of wood around the fire will create the shape of a star.
This design allows the size of the fire to be controlled by pulling the larger pieces out to reduce the flame or pushing the wood into the fire for a larger flame.
Keyhole Fire
To create this type of fire, you need to make the fire in the shape of a keyhole. Choose whatever style you want to initially start the fire, this will be the larger section of the keyhole shape. Once a good firebase has been created, start pulling coals to the side. This will create the skinnier part of the keyhole shape.
Keep adding fuel to the main part of the fire to keep producing coals and it will also have a higher temperature for faster cooking. The coals that are pushed off to the side can be used for cooking at lower temperatures.
Tools That Are Needed
There are a lot of tools that can be used for cooking over a campfire and while not all of them are needed, they can make the process much easier and enjoyable.
Cookware
Pots and pans come in all shapes, sizes. They also come in different materials such as steel, copper, aluminum, titanium, and cast iron.
Cast iron is traditional, affordable, and durable cookware that offers great heat retention and taste. The downside is that it is extremely heavy. Steel is also durable but it is also heavy.
Copper and aluminum are extremely lightweight and affordable but they are more susceptible to being dented or bent. Titanium cookware is extremely lightweight and extremely durable but it is also costly.
Grills are another popular option for times when you are not cooking stews, soups, or any other types of liquid-based meals. Grills can be a single piece of metal that can be placed over a fire or a slightly more complex adjustable grill and stake setup that makes temperature regulation more convenient.
Utensils
Many of the utensils that you use in the kitchen will be helpful in cooking over a fire such as spoons, long forks, spatulas, and tongs. Choose ones that are appropriate for the meal you are cooking and ones that are made out of metal or wood tend to hold up better for cooking for an open flame.
Cooking Methods
The method that you use will depend on the type of food you are cooking and the tools available to you. Overall, there are three different types of cooking which involve regular cookware, grills, and cooking without any modern tools.
- Using regular cookware entails using pots and pans that your food is cooked in, and this isn’t any different than how you would cook on a kitchen stove.
- Cooking on a grill is very similar to cooking on a gas or charcoal grill, but you will have to get used to how to regulate the temperature of the fire under the grill.
- Cooking without modern tools is sometimes very intimidating to people because it is so different than what they are used to. However, many people agree that this type of cooking provides an exceptional flavor to food. Examples of this include using a spit, cooking food on a hot rock near the fire, or placing food directly onto coals.
Best Food To Cook Over A Fire
What food is best to cook over a fire is a subjective topic and anything that can be cooked on a kitchen stove or in the oven can be cooked over a campfire.
Generally speaking, the food that tastes the best are foods that are not cooked in a pot or pan. Meats, vegetables, and bread that have no barrier between the food, and the fire and coals absorb a flavor that is out of this world. If you have never tried it, I highly recommend doing so.
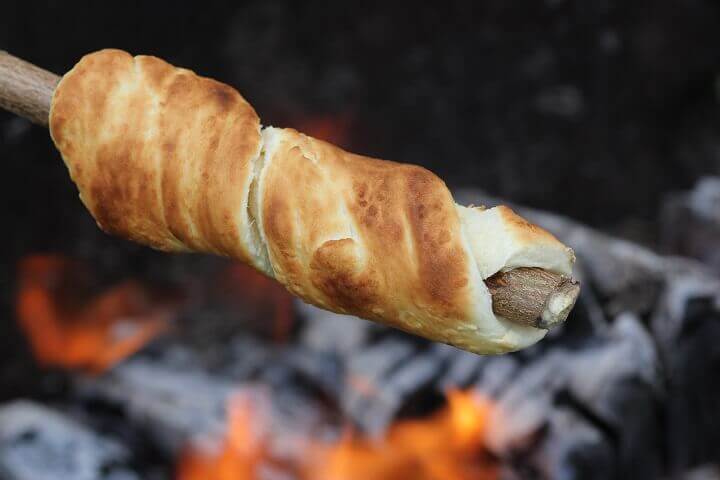
A simple recipe to try for the first time is campfire bread. Take some flour and mix enough water into it to create a non-sticky dough. Pinch some dough off and twist it around a stick and hold over the fire until it is browned on the outside.
Clean Up And Safety Measures
The reason that cleaning up after cooking is annoying is that most people wait too long to do so. As a result, food has time to harden and adhere to cookware and utensils. The best time to clean up is when the food left on cookware is still warm because it will take much less effort.
When packing for a camping trip, pack a sponge or washcloth, a small bottle of soap, and a jug of water. After you are done cooking, eat the meal and immediately rinse off cookware and utensils. If you do not have any soap, salt can be substituted as a cleaning agent as it is abrasive and will help to sterilize. The water can also be heated over the fire to provide hot water for cleaning.
When you are all done cooking, it is extremely important to be sure that the fire is properly extinguished before leaving the site. One of the best ways to extinguish a campfire is to pour water onto it and use a stick to stir the water and embers into a muddy slurry. If there is any smoke or if you feel any heat emanating from the base, the fire is not out and more water needs to be poured onto it.
Conclusion
Campfire meals are some of the best meals you can have, not only because of the improved taste but also because they are often enjoyed by others. Please be sure to always practice proper outdoor fire safety measures by not having a fire in high winds, in dry regions that are susceptible to wildfires, and make sure that a fire is fully extinguished before leaving the area.
Like this post? Don't Forget to Pin It On Pinterest!
You May Also Like: