Estimated reading time: 8 minutes
When the world falls apart, you'll be on your own. You won't be able to run to the hospital to treat an injury or an illness. You have to be prepared to handle life’s little emergencies on your own.
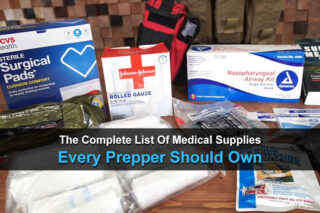
Having an emergency medical kit is crucial to survival. You can buy a medical kit that’s been put together for you, but you’re going to pay a lot for someone’s time. You can build your own medical kit that not only suits your needs but is much cheaper. You can put together a good medical kit for under a hundred dollars.
Before you can build your emergency medical kit, you need a bag to keep all your medical supplies together. Preferably, a bag that’s easy to grab and run with. We’ll list out a few things you’ll want to look for when you are searching for the right backpack or duffel. The bag you choose will likely be your biggest expense.
Want to save this post for later? Click Here to Pin It On Pinterest!
- The bag should be something sturdy. Nylon isn’t a great option. It will snag and tear easily.
- Zippers are great for the main closure space, but you don’t want a bunch of zippered pockets. Look for Velcro to make it easy for you to get into in a hurry.
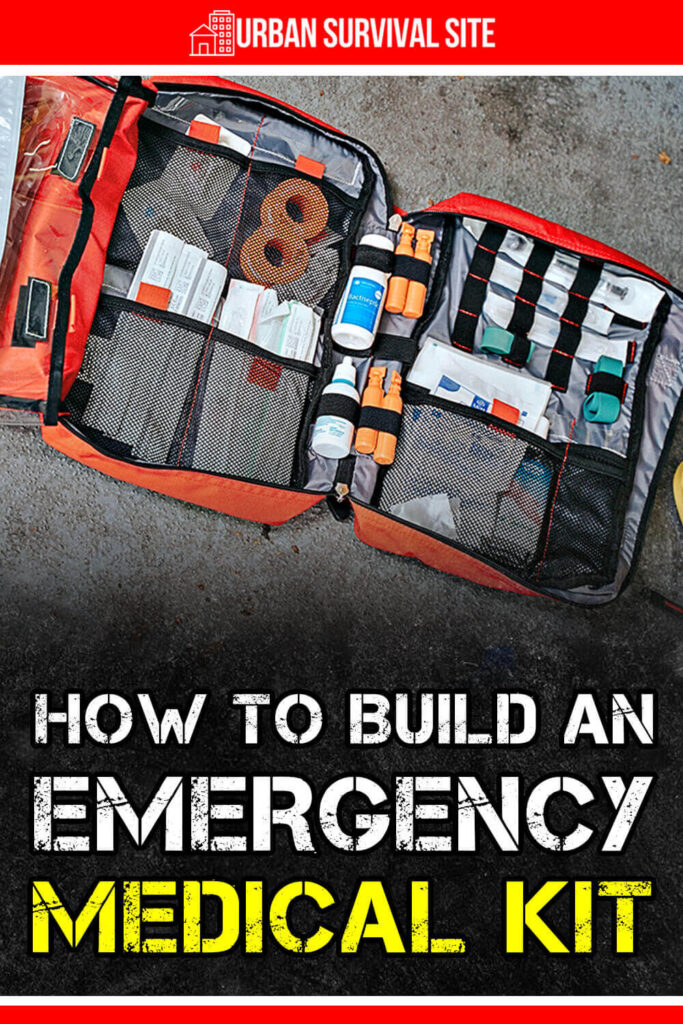
- Pockets are a must! Your medical kit should resemble a bug-out bag with plenty of pockets on the outside for easy access to little things like band-aids. You don’t want to have to rummage through your entire bag looking for a single band-aid. This is a sure-fire way to lose stuff, get it dirty, or struggle to get it all packed back in.
- The color of your bag is up to you. Some people prefer a red bag to make it obvious what it is. If you’re in a hurry, you don’t want to be sorting through bags to find the right one. Seconds count when it comes to saving a life.
- You can find a large assortment of backpacks at secondhand stores for next to nothing. It doesn’t need to be a name brand. It just needs to be durable and functional.
- A bag with padded straps is going to make carrying it a little more comfortable. Adjustable straps are best.
- Duffels are not as convenient due to the lack of pockets, but in a pinch, they’ll do. You can buy bags that medics use. They can be costly, but finding a used or steeply discounted bag is possible.
Once you have the right bag, it’s time to start shopping for supplies. The following will outline where to buy cheap medical supplies.
- Amazon is a great place to get bulk items. When you buy in bulk, it will be cheaper.
- Dollar stores are perfect for stockpiling. Just be sure to compare quantity with other stores. You might pay less but end up with less than you would at a typical store.
- Walmart and similar stores have some pretty inexpensive items.
- Garage sales, especially estate sales, are a good way to pick up medical supplies of all kinds. It sounds a little dark, but often hospice patients leave behind unopened packages of bandages, diabetic supplies and so on. Family will put them out just to get rid of them.
- Secondhand stores will be a little tougher to find sterile bandages and stuff, but look for other medical equipment like stethoscopes, BP cuffs, and occasionally some sealed bandages.
- Natural food stores have homeopathic and natural medicines for your medical bag. They can be a little more expensive than somewhere like Amazon or other online retailers, but being able to buy from a reputable retailer is sometimes worth it.
- Pharmacies are an option, but oddly enough, their goods tend to be more expensive.
- Military surplus stores will often have some good finds. Suture kits, clotting meds, and tourniquets from the military will find their way into these stores.
- Conventions. If there is a survival and prepping convention, there are always retailers. This is where you can get some good deals without paying shipping.
- Farm and ranch stores have things like syringes and some antibiotics.
What should you pack in your emergency medical bag? Every family’s bag will look a little different. If you or someone in your family has a specific medical condition, you’ll need to pack for that. There are also some basics that will cover the bulk of emergencies.
While it’s easy to get carried away with this, you can’t ever have too much. Pack your bag and put the extras in your bug out bag or on your shelf. You need to be able to move easily without being weighed down.
- Activated charcoal capsules can be used to treat the ingestion of poison. Creating a poultice and rubbing on bee stings and bug bites can help stop itching and pain. Charcoal applied directly to a wound and covered with a bandage is used to cut down on the odor associated with wounds.
- Aloe vera gel to aid in healing, bug bites and burns.
- Antibiotic ointment
- Antihistamine tablets
- Antiseptic wipes for cleaning around a wound.
- Aspirin
- Baking soda. Steal a little from your home supply and put in a Ziploc bag. A baking soda paste on bee stings and insect bites can stop the pain and itching. It’s also a good remedy for poison ivy and itchy rashes in general. Itching leads to skin breaks which lead to the potential for infection.
- Band-aids. Don’t get cute with the designs. Just buy what works.
- Bandanas or old shirts and towels can be used in place of a tourniquet. Tourniquets are a valuable tool in your bag, but the kits can be pricey when you can get the same effect with a strip of cloth.
- BleedStop. This powder helps your blood clot so you can stop bleeding.
- CPR mask. In a survival situation it might not be entirely necessary, but it is nice to have when dealing with strangers.
- Duct tape or something similar can be used for a variety of medical emergencies. It’s not always pretty or pleasant, but wrapping a cut finger with duct tape will keep it clean. Use it to create a splint or to wrap a sprain. It can be used as a chest seal or to keep a gauze pad in place. Use it with a combination of a wadded-up shirt to create a pressure bandage. Israeli bandages are great for applying pressure to an injury, but they are expensive. The possibilities are endless for duct tape in a medical capacity.
- Emergency blankets might be a part of your basic bug out bag, but they should also be used to keep an injured person warm to prevent shock.
- Garlic pills. This is a natural antibiotic for when you can’t get the real stuff.
- Gauze pads in various sizes.
- Gauze, gauze and more gauze. It’s cheap and a necessity.
- Gloves. Nitrile are best. Put them in individual sandwich bags to keep clean without carrying a box.
- Hand sanitizer
- Hydrocortisone cream
- Ibuprofen
- Iodine
- Medical tape. This can be used to hold a bandage in place. Get the wide width to use to create a splint with things like a couple of sticks.
- Moleskin
- Paint sticks from your local hardware store to use as a makeshift splint.
- Pillowcase. This will suffice as a sling. You probably have a couple extra hanging around the house.
- Plastic wrap is a cheap sling, bandage cover, and could be used in a pinch to treat a chest wound. Plastic wrap could be removed from the box to make it easier to fit in your kit.
- Raw honey. Seriously, look at the health benefits. It is one of the most valuable items you can pack in your kit. Separate it into smaller containers to make it easier to container.
- Rubbing alcohol. Wipes are easy to pack and light. They are also very cheap at the dollar stores.
- Scalpel. An important addition to your kit. They are less than a dollar when bought in bulk.
- Scissors
- Super glue is good for a quick wound closure. You can buy the medical glue, but super glue does the trick for a fraction of the price.
- Suturing kit. A needle and thread would do in a pinch, but the actual thread designed for stitches is better.
- Syringes for irrigating
- Tea tree oil has many uses. It is powerful and can be too much to tolerate without being added to water or a cream. Add a drop to antibiotic cream and apply to a wound for quick healing. It is also a good bug repellant when mixed with a little water. It’s important to keep the bugs from settling into a wound.
- Tweezers
- Vet wrap. Yes, it’s used on animals but it’s great for humans as well. It can be wrapped over gauze to keep it in place and the gauze underneath clean. Use it to wrap sprains or to cover cuts. It sticks to itself and eliminates the need for tape.
- Washcloths (get a pack for a dollar) can be used to absorb blood, use as pressure bandages, or as padding for a makeshift crutch or splint.
When you think about first aid, you might automatically think of a paramedic with a stocked ambulance. That may not be an option. It would be better to think back to our ancestors and how they treated emergencies. Combine that with the modern things we have to create an effective emergency medical kit.
Like this post? Don't Forget to Pin It On Pinterest!
You May Also Like: