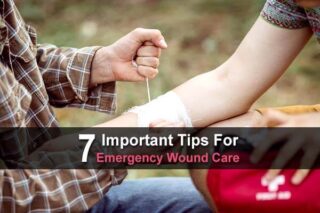
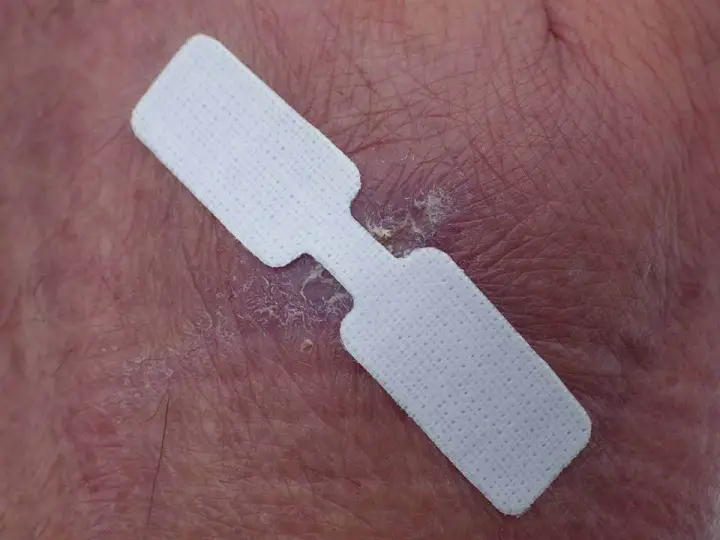
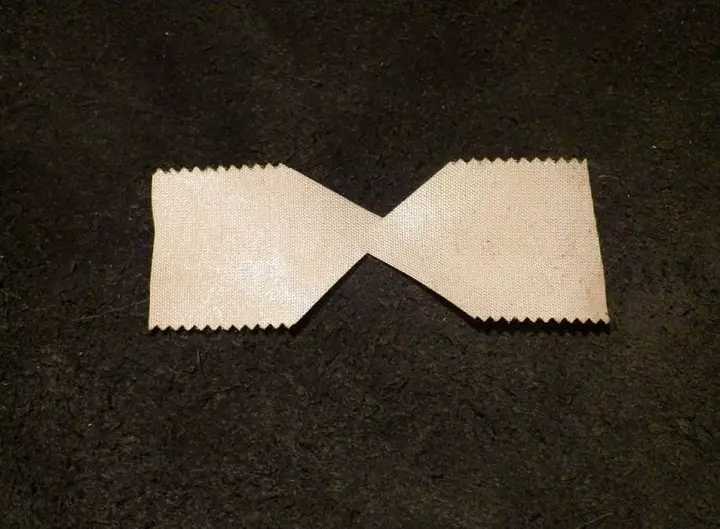
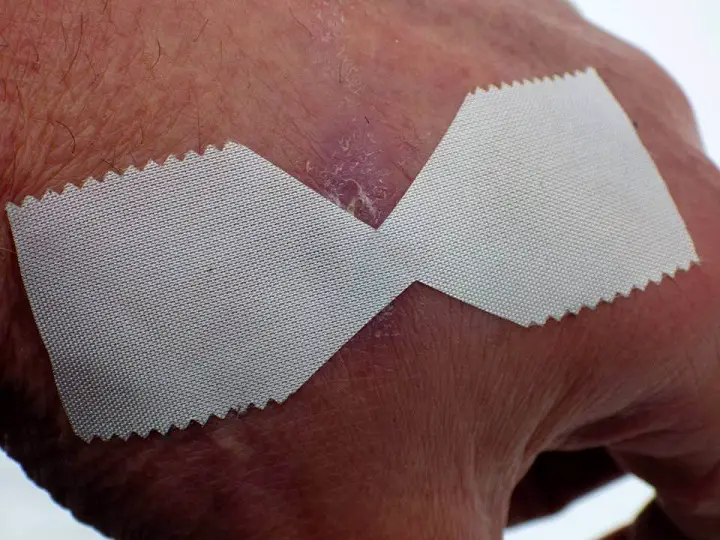
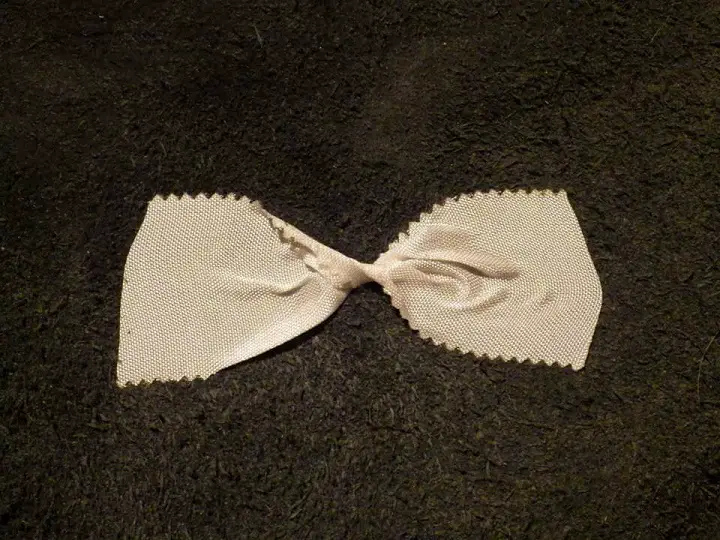
A butterfly bandage looks like its name. It consists of two wings of adhesive tape with a thin band in the middle. The idea is that the larger pieces of adhesive grip the skin to pull the skin together, closing the wound under the small strip in the center.
There’s very little about the history of butterfly bandages, although it’s a good bet it was developed after 1900 when adhesive tape became popular and widespread. It seems reasonable to assume that it first showed up in the trenches of World War I, but it’s still used today as a standard treatment for cuts, wounds, and even after simple surgical procedures.
While it’s an effective way to close a wound, it doesn’t take the place of stitches for extremely deep or long cuts. In those instances, it’s an optional way to keep the wound closed and reduce bleeding until an injured person can get professional medical help and stitches.
On the other hand, it can be all that is needed for smaller cuts that are not deep or bleeding profusely.
Want to save this post for later? Click Here to Pin It On Pinterest!
But Butterfly Bandages Don’t Always Work
Butterfly bandages won’t work if the cut is large or gaping, has ragged edges, or won’t stop bleeding. In those cases, they can be used as a quick stop-gap measure on the way to the emergency room but are not a long-term solution.
However, if the bleeding is not profuse, a conventional bandage can be used instead of a butterfly bandage if it’s large enough to cover a ragged or gaping wound, and assuming there is an additional treatment related to cleaning the wound and the use of topical antiseptics.
Butterfly bandages also won’t work on some parts of the body, especially elbows, knees, ankles, and the palm and finger joints. The constant bending causes the adhesive tape to come loose so stitches would be necessary, although here again a butterfly bandage could work for the short term until the injured person can reach professional medical care.
Butterfly bandages also fail when applied to any part of the body that is hairy like legs or the head. This is another situation where professional medical care and stitches would be required.
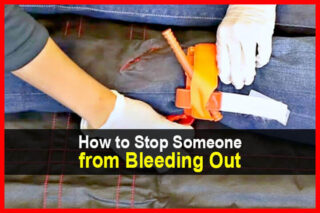
Related Article: 4 Tips To Stop Someone From Bleeding To Death
Making a Basic Butterfly Bandage
You’ll need some tape and scissors. The best tape is sterilized surgical tape that you can buy at any pharmacy or online. In a pinch, any tape that adheres strongly to the skin will do, even duct tape.
In fact, duct tape will adhere to the skin very strongly. The biggest challenge with a duct tape butterfly is taking it off. Duct tape may stick to the skin so well that removing it tears open a wound that’s still trying to heal.
Regardless of the tape, what’s most important is cutting the basic butterfly shape. There are other factors related to wound care that we’ll cover later.
Step 1
For a basic butterfly bandage, cut a piece of tape about 2 inches long.
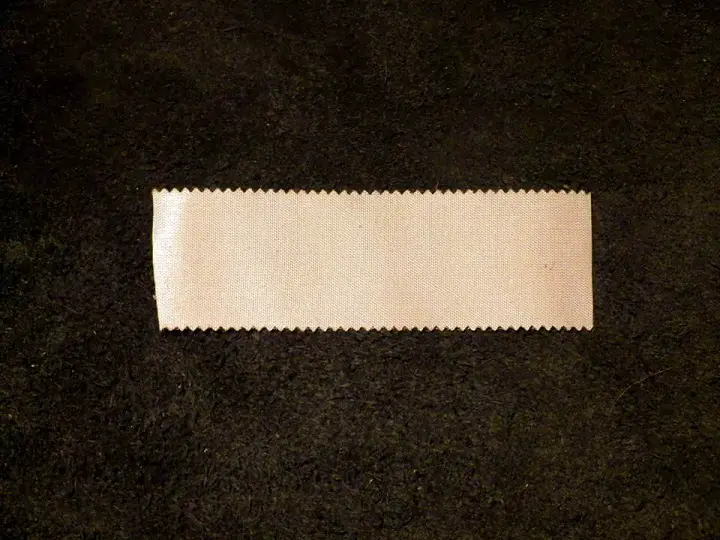
You can cut it shorter or longer depending on the location of the wound.
Step 2
Start by cutting a V-notch towards the center of the tape.
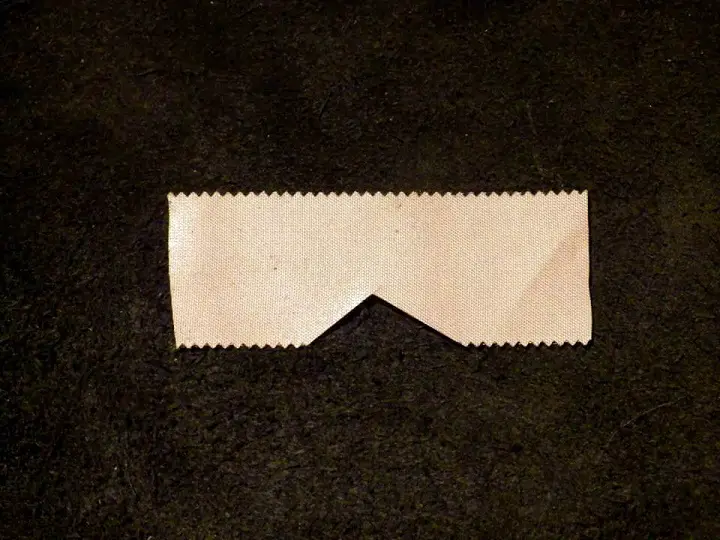
Make sure you leave room for a narrow gap in the middle.
Step 3
Cut the second notch on the opposite side.
Step 4
Apply the bandage where needed. The great thing about cutting your own butterfly bandages is that you can customize the size of the bandage to the part of the body where the wound has occurred.
If you’re in an area or location where you don’t have scissors or any way to effectively cut the wings, you could twist the adhesive tape to create a narrow band in the center, giving you the two wings.
You would then either wait to get home to cut and use a better butterfly bandage, buy some, or go to the doctor and get stitches.
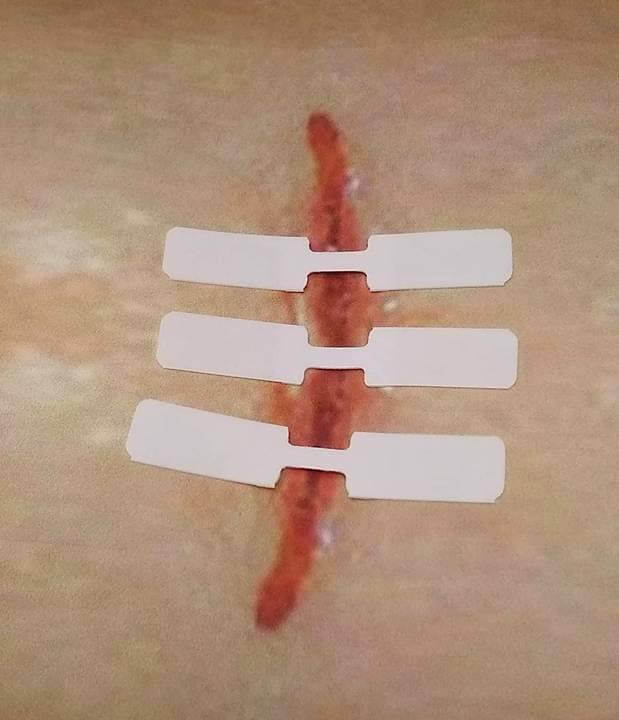
And don’t try to make one large butterfly bandage to close a long wound. Use multiple butterfly bandages much like a doctor would use multiple stitches.
The concept looks easy once you understand the basics, but there’s much more to wound care than closing the cut.
Total Wound Treatment
Here are the steps to wound care requiring a butterfly bandage recommended by numerous medical resources including the Mayo Clinic:
- Wash your hands. This helps avoid infection.
- Stop the bleeding. Minor cuts and scrapes usually stop bleeding on their own. If needed, apply gentle pressure with a clean bandage or cloth and elevate the wound until bleeding stops.
- Clean the wound. Rinse the wound with water. Keeping the wound under running tap water will reduce the risk of infection. Wash around the wound with soap. But don't get soap in the wound. And don't use hydrogen peroxide or iodine, which can be irritating. Remove any dirt or debris with tweezers cleaned with alcohol. See a doctor if you can't remove all debris.
- Apply an antibiotic ointment or petroleum jelly, carefully. You want to keep the skin on either side of the wound dry so the adhesive tape will stick to the skin. Apply a thin layer of antibiotic ointment or petroleum jelly to keep the wound area moist and help prevent scarring. Certain ingredients in some ointments can cause a mild rash in some people. If a rash appears, stop using the ointment.
- Apply the butterfly bandage by gently pressing one of the wings onto the dry skin on one side of the wound. Gently pull it towards the skin opposite the first wing to hold the wound closed and press down gently on the skin.
- Cover the wound. Apply a conventional bandage, rolled gauze, or gauze held in place with tape. Covering the wound keeps it clean.
- Change the outer dressing. Do this at least once a day or whenever the bandage becomes wet or dirty, but leave the butterfly bandages in place. You can apply more topical antiseptic onto the wound and over the thin strips of the butterfly while the butterfly is still in place.
- If you feel the need to replace a butterfly bandage, remove one tab from one side gently pulling towards the wound until you reach the cut. You then grab the other end of the butterfly and pull that gently towards the wound. You don’t want to tear the wound open while removing the old butterfly bandage.
- Apply a new butterfly the same way you applied the original one and redress the wound with antibiotic ointment and outer cover bandage.
- Get a tetanus shot if you haven't had one in the past five years and the wound is deep or dirty.
- Watch for signs of infection. See a doctor if you see signs of infection on the skin or near the wound, such as redness, increasing pain, drainage, warmth, or swelling.
Alternatives to Butterfly Bandages
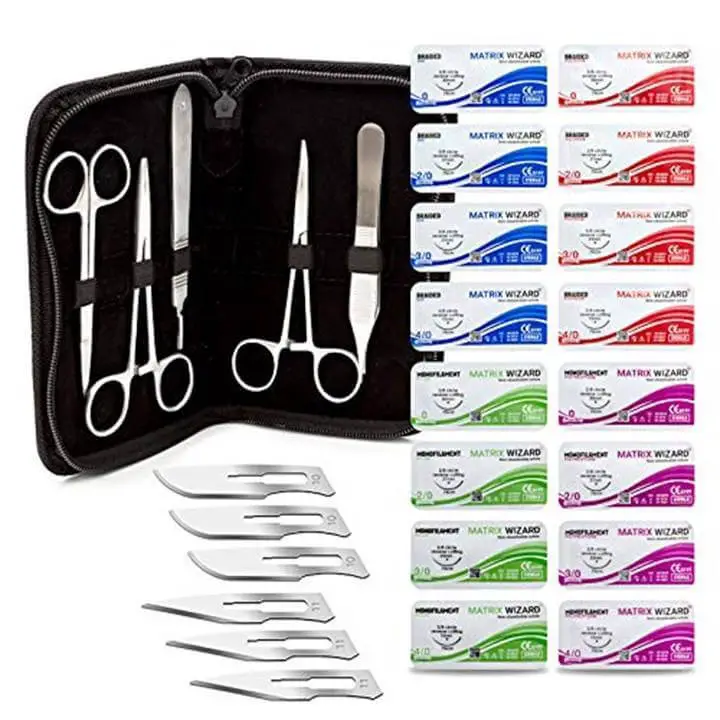
The obvious alternative to butterfly bandages is stitches, but it’s not something most people can do at home. If you’re so inclined, there are suture kits you can buy online and even training or suture practice kits for those steely-eyed, home surgeons. One thing they never cover when talking about or selling home suture kits is the lack of any injected pain killers to take the edge off of home suturing.
Some better alternatives have popped up recently, but be sure to read any product description carefully so you clearly understand their intended usage.
Tissue Adhesive
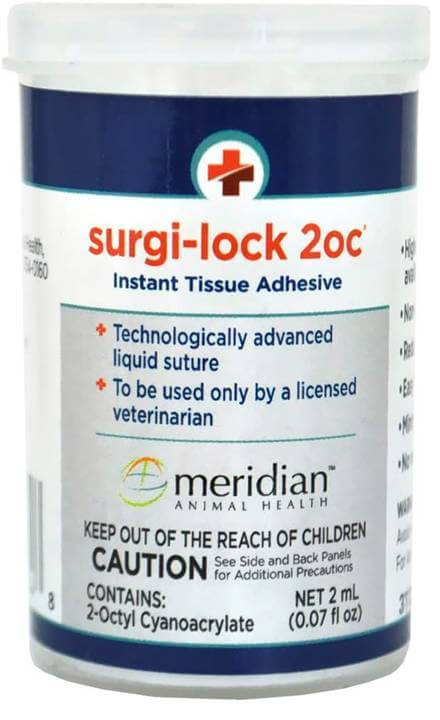
Think of it like super glue for cuts. One of the products out there is called Surgi-Lock Instant Tissue Adhesive. Many of these products were developed for veterinarians, but they’re sterile and could work in a dire emergency.
Another tissue adhesive is called Mastisol, although the manufacturer states that it was designed to ensure the integrity of dressing, tapes, and certain devices over an extended period of time.
Suture Strips
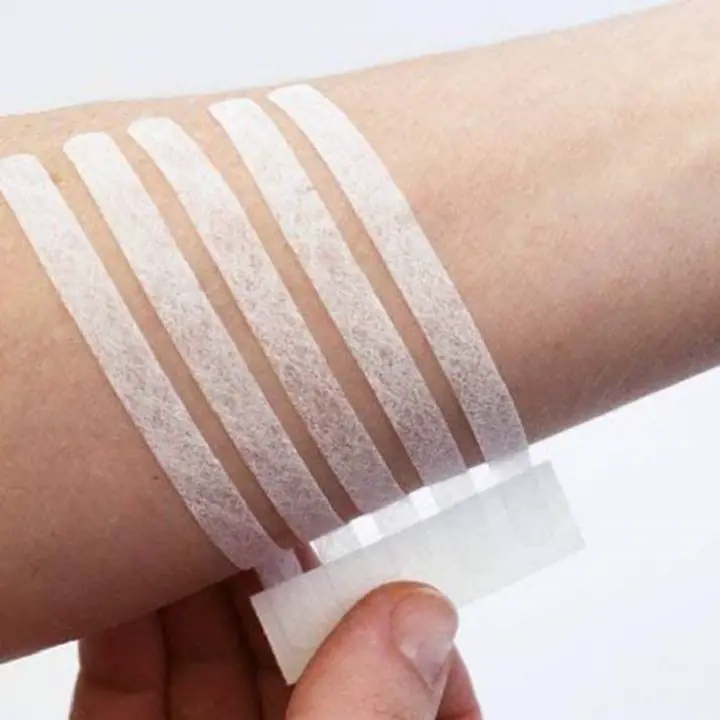
Butterfly bandages without the wings. These are thin strips of highly adhesive, flexible tape designed to be used as a butterfly bandage or in combination to close long cuts. The strength of the adhesive on the tape makes the large wing of a standard butterfly bandage unnecessary. A popular brand is called Eurosuture.
Butterflies by the Box
You don’t have to do-it-yourself. You can buy a box of butterfly bandages and just toss them in the first aid kit. There are also butterfly bandage variations that you can use on your palm, fingers, and knuckles.
Wound Care is Serious Stuff
Even the smallest cut can lead to infection, and deep cuts that require stitches or butterfly bandages increase the risk. Don’t assume that simply using a butterfly bandage solves all problems. It’s simply designed to close a wound to help it heal and prevent significant scarring. Make sure you follow all of the other steps related to wound care and treatment before using a butterfly bandage.
Like this post? Don't forget to Pin It On Pinterest!
You May Also Like: