Estimated reading time: 26 minutes
Fire was the Spark that Fueled Primitive Civilizations, and They Didn’t Use Matches.
We’ve all seen the survival shows where someone starts a fire without matches and they always make it look so easy… It’s not. It takes time, the right materials, and in some cases a fair amount of physical exertion.
There are some contemporary methods that are a bit easier like the use of magnesium fire sticks or a battery, but the primitive friction methods are going to give you a bit of a workout. More to the point, none of the methods are as easy as you see in some YouTube videos, especially when they’re selling something.
The good news is that the more you practice these techniques, the easier they become. They’re really good skills to master if you have any interest in survival methods, and they'll help you create one of the most important elements for effective survival anywhere: fire.
Want to save this post for later? Click Here to Pin It On Pinterest!
There Are 3 Fundamental Approaches
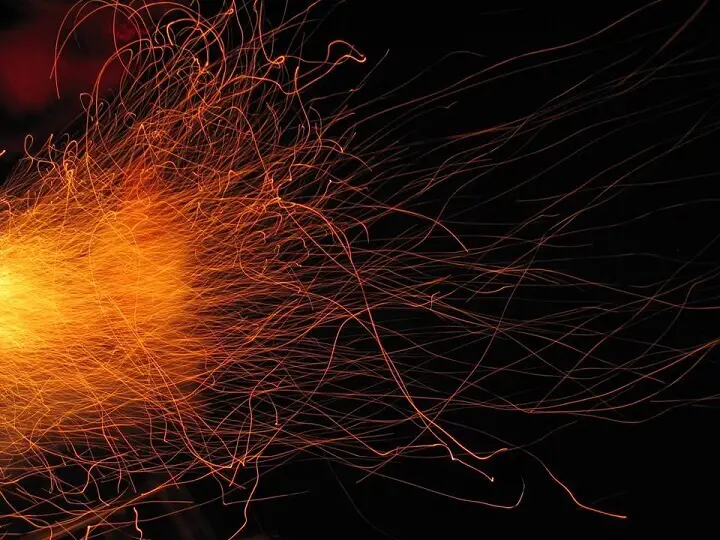
Primitive fire starting methods create one of three possible results: sparks, small, glowing coals, or focused and intense heat.
- Friction methods like the bow and arrow drill or the plough drill create hot coals.
- Spark methods like flint and steel and magnesium fire sticks create sparks.
- Concentrated heat methods from batteries and magnifying glasses cause materials to burst into flame.
There are a variety of ways to get these results and all 3 of the basic approaches are effective, but which one you use and how you do it depends on the availability of certain materials and the quality of your tinder for turning your coals, sparks, or intense heat into a flame. Some are simple and others require a set of certain materials and some engineering.
Tinder 101

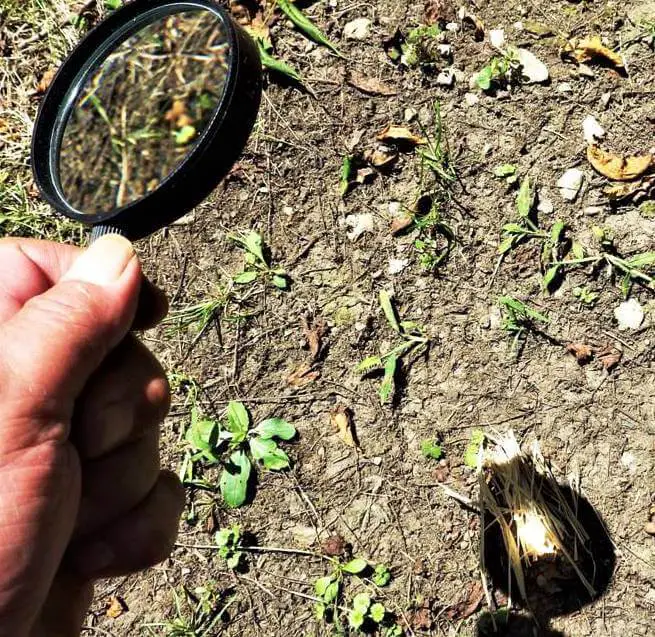
Before we get into the techniques to create enough heat to start a fire, it’s worth considering tinder sources and characteristics that will make your fire starting a success.
Your first step before using any technique to start a fire should be to collect and evaluate your tinder possibilities. Some techniques won’t work without certain kinds of tinder.
Knowing what is available as a tinder source can help you determine whether you should use a friction approach to create small, glowing coals; a spark approach which will create varying sizes of sparks, or the concentrated heat method. That assumes that you do in fact have options. You may just have to tough it out with the friction method as your only approach.
Tinder Has To Be Dry, Dry, Dry
Sparks, hot coals, and concentrated heat are fussy and weak. They’re also fleeting and will disappear quickly. You need something to quickly and effectively capture the energy and create a flame, and any material used as tinder should be totally dry. Even the smallest amount of moisture will resist your efforts.
It Has To Be Small
Think in miniature. Tinder materials should be thin, dry and brittle and dwarfed by your very small coals, sparks or heat. You’re trying to overwhelm some dry, fragile materials with heat or a spark to get a flame. Think small when collecting tinder.
Think Of Tinder Combinations
The time of year and your location can affect your tinder choices. A deciduous forest in late fall or early spring will abound with tinder options. A jungle during monsoon season will make you wish you had a blow torch. Mountainous regions can also be a challenge, and winter anywhere can leave you scratching your head while you shiver.
That’s a good reason to think of tinder combinations. You may not find a lot of one particular tinder source, but you may find enough of a few to create a decent catalyst for a fire.
Tinder Possibilities
Cattail Fluff
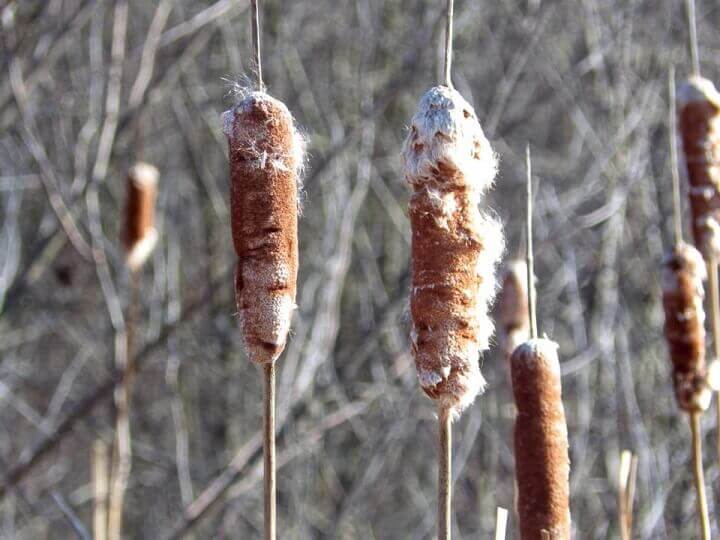
In the fall through winter, you can easily spot cattail stalks sticking up around the perimeter of lakes and ponds. The fluff on the cattail heads is an ideal tinder, and if you break them open you’ll often find the inside dry even in wet weather. Grab as many cattail heads as you can and bring them back to your camp.
Thin Pieces Of Bark
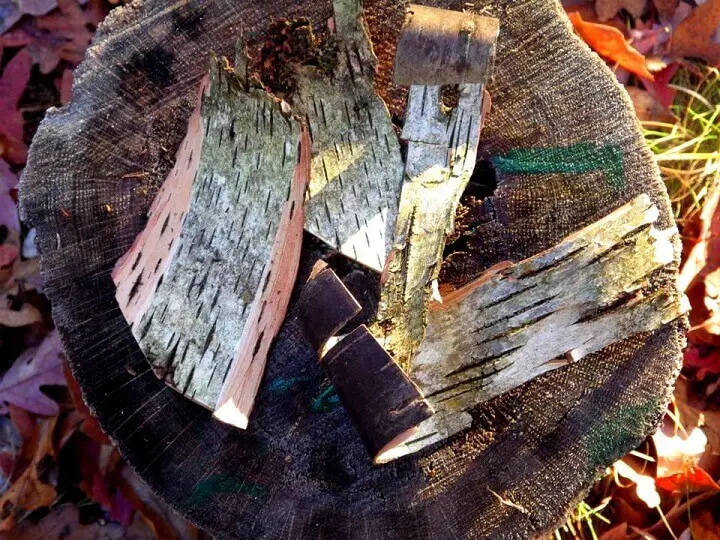
Think birch bark, aspen, cedar, pines, or any other tree that presents peels of bark in thin layers. Birch bark is gold when it comes to tinder and the thin peels of the outer bark are a good addition to any tinder nest.
Another benefit of bark is that it’s off the ground and presents itself vertically to the elements. That allows it to be less prone to moisture and the sunny side of the trunk (south) is a good place to start on any tree that seems to be showing good tinder possibilities.
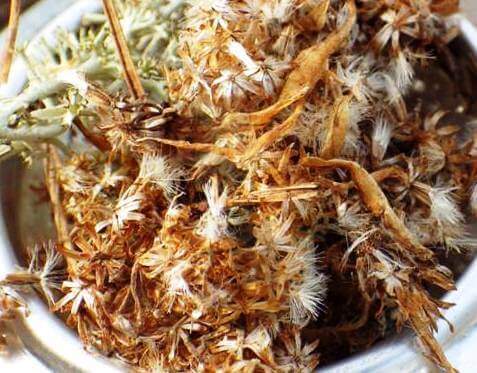
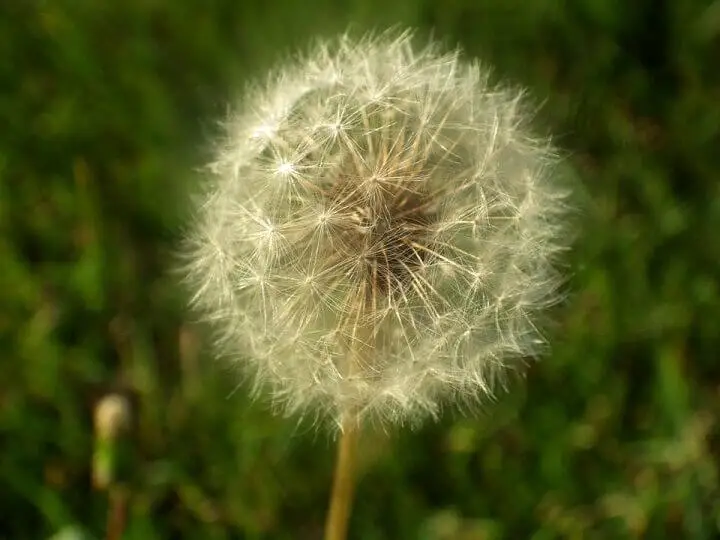
Plant Fluff

Many plants create a fluff to allow their seeds to be carried by the winds. You don’t have to know the specific species of plant, just look for the fluff.
You’ll see it at certain times of year on goldenrod, dandelions, milkweed, on the ground around cottonwood trees, and other plants that depend on the winds to spread their seeds. Collect it carefully in a dry container or pocket, or a few folds of bark.
Fabric
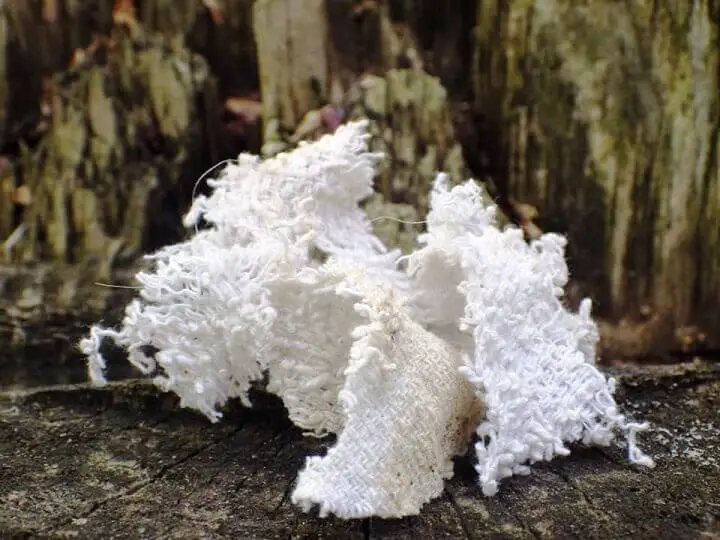
Contrary to the title of the survival show, most of us don’t find ourselves stranded in the wilderness naked and afraid. We’re wearing various items of clothing and tearing or cutting a small piece of fabric from a t-shirt or shirt tail can give you instant and possibly very dry tinder.
You may need to pull it apart a bit to open the weave and create some threads but it’s worth the effort if natural tinder is scarce.
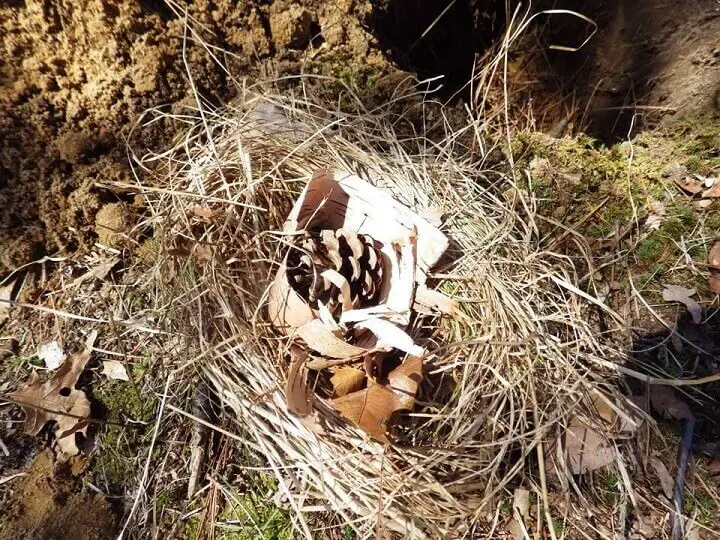
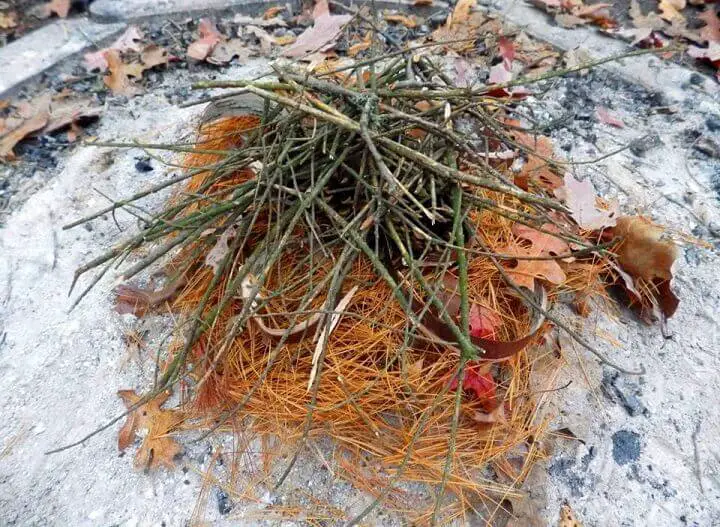
Dry Grasses
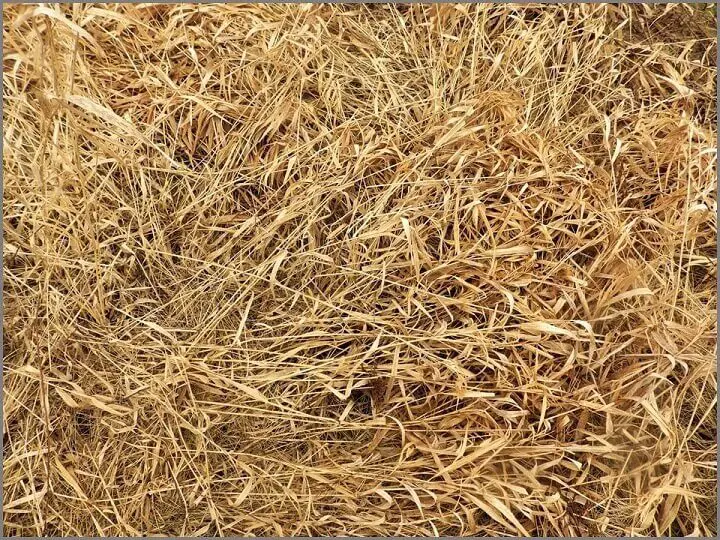
It’s possible to find dead, dry grasses at any time of year. A classic technique is to bundle dry grasses into a tinder nest to contain other tinder sources and to serve as additional tinder.
A tinder nest also makes it easier to hold and contain your tinder while you blow onto glowing coals to raise the temperature to get to a flame.
Other Dead And Dry Plants

It’s not just about dry grass. If you spot other dead and dry plants, gather them as well. One thing to think about is to twist, break, bend, and tear apart the stalks, stems, and leaves to open up the dry plant fibers.
Remember, think small and do what you can to reduce your tinder to the thinnest and most fragile level you can. The best analogy is the difference between paper and cardboard. Even if you have matches, it’s easier to light a thin piece of paper than a thick slab of cardboard.
Speaking Of Paper
If you have any paper on you in your wallet, purse or pocket, add it to your tinder nest. Tear it up first and try to soften it up by bending it to expose any fibers. It’s the first choice for tinder for our backyard campfires and it might be with you in the wilderness as well.
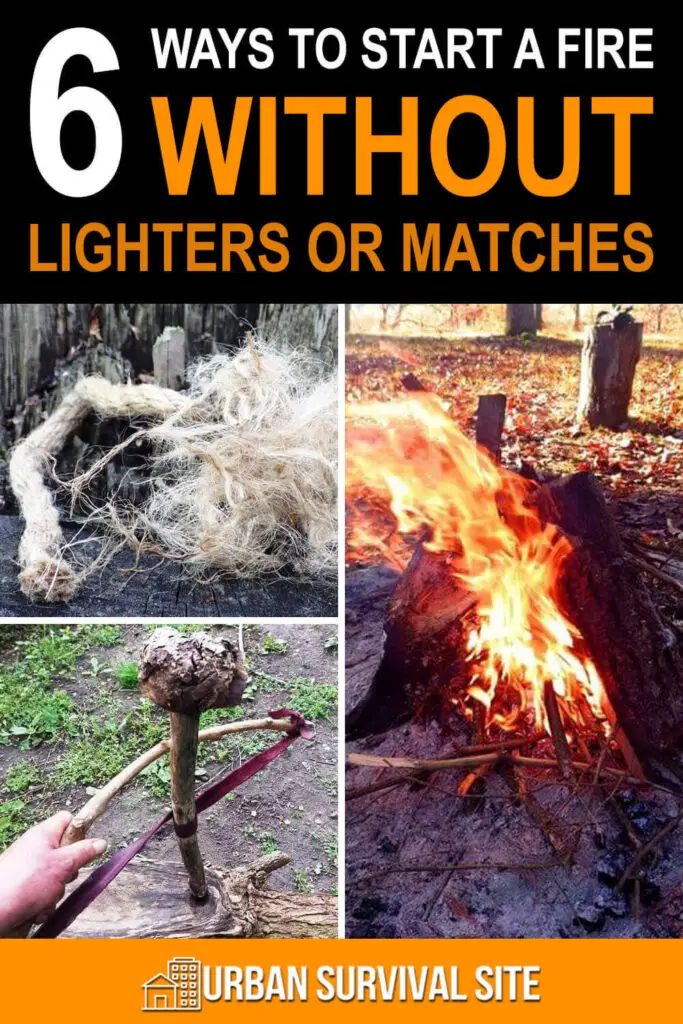
Rope
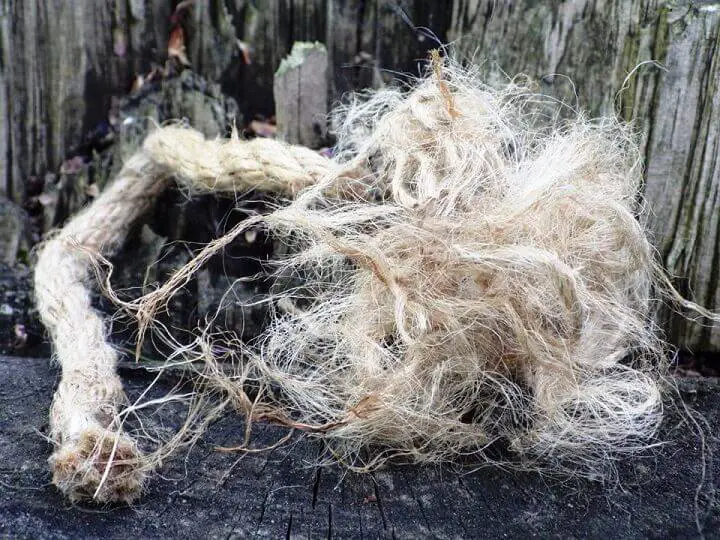
It’s also possible that you might have some rope with you. A plant based rope like hemp or cotton is best. Nylon or polyethylene ropes seem to burn well once started but can be difficult to light with sparks, small coals and even concentrated heat. It melts but never gets hot enough for a flame.
It’s best to fray the end of the rope and pull it apart to expose the thinnest fibers. And don’t forget, a short length of a cotton shoelace can work too.
Reindeer Moss
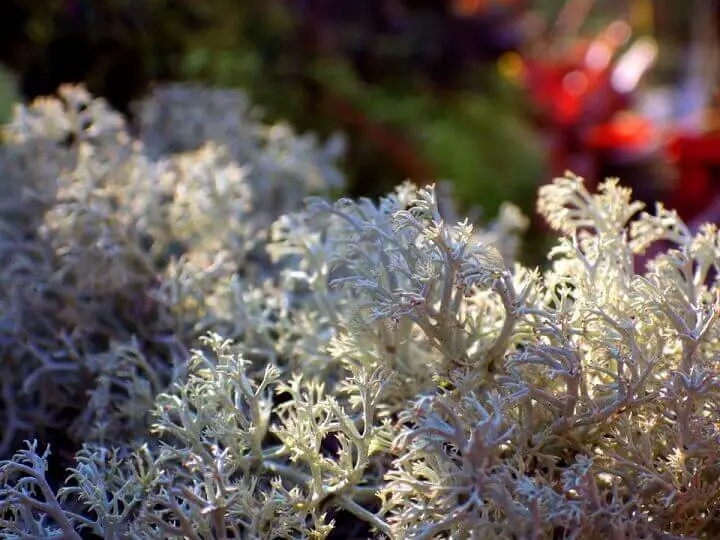
Dry reindeer moss is brittle and dry and can make an effective addition to a tinder nest. If you can’t find any dry grasses or plants, it can become the foundation of your nest.
Dry Leaves And Pine Needles
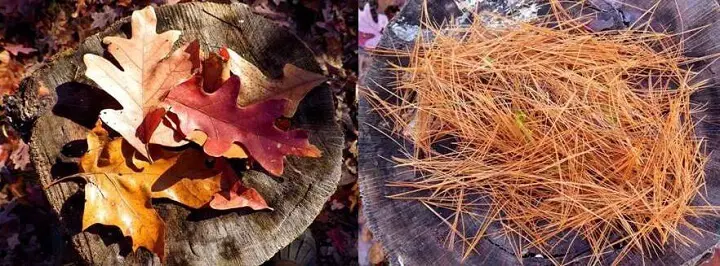
They’re actually not the best, but if all you can find are dry leaves and pine needles, do what you can to crush them up. Rub the leaves in your hands to break up the fibers. Do the same with pine needles. If you’re adding them to other tinder in your tinder nest, put them at the bottom. Your fluffy plants, dry grasses, and other tinder sources will ignite before leaves and pine needles.
Matching Up Tinder To The Methods
The weakest method for starting a fire is any spark method. The sparks from a fire stick are impressive, but the videos never seem to reveal how highly flammable the tinder happens to be. It almost looks like they’ve sprayed their tinder with a flammable liquid because the fire is too robust and too immediate.
Fluffy materials and tinder in thin strands like dry burdock stems crushed and twisted or frayed fabric or rope are excellent as a catalyst for any spark method.
The hot coals that result from the friction method can work with a variety of tinder materials, but you really need a tinder nest so you can lift the coals on the tinder to your face and blow them into flame.

Fluffy plants, fibrous materials and even dry grasses can ignite fairly quickly with any hot coal method.
Concentrated heat from a magnifying glass or battery can light most any dry tinder. The only limitation is that it requires tools or items like batteries or magnifying glasses that aren’t found in nature or may not be in your possession in a survival situation, although some people have effectively created a magnifying glass out of a piece of clear ice.
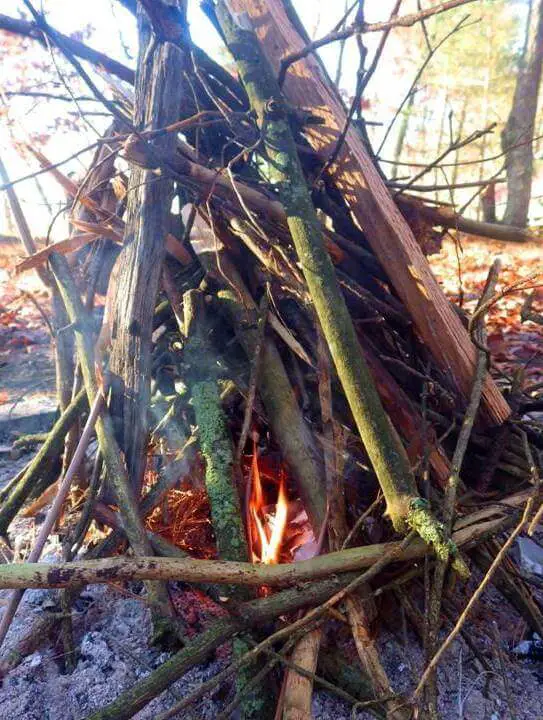
Don’t Forget to Assemble Your Fire First
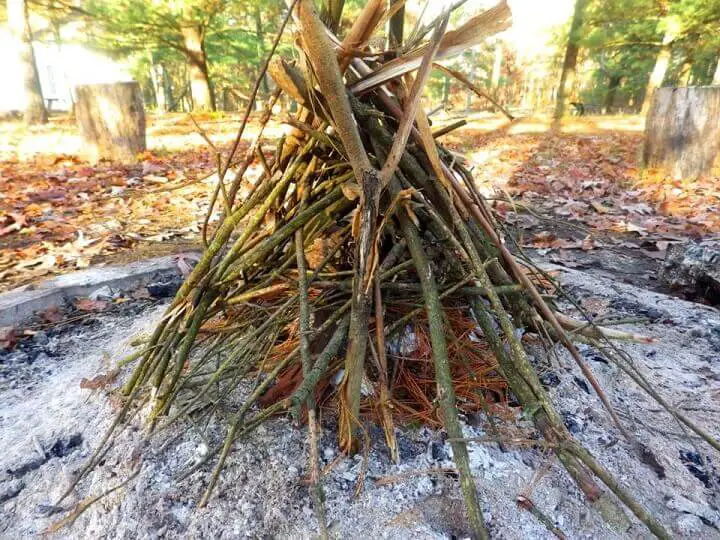
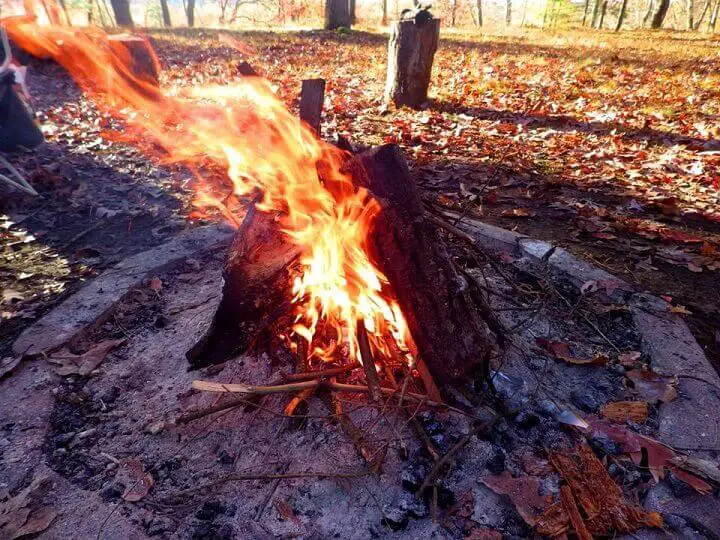
Before you work so hard to create a flame, make sure you have a fire built with tinder under kindling so you can quickly and easily move your flame to the tinder at the base of your assembled fire. A teepee fire construction is best, and you can always add more sticks and logs.
Implementing the Methods: Friction to Glowing Coals
Friction methods use wood rubbed together in various ways to create small, glowing coals. Unfortunately, it’s not as simple as rubbing two sticks together. It requires a bit of engineering to create a basic construction that will allow you to exert pressure and motion to create the friction.
As you would suspect, some woody materials are better than others for friction methods. They include:
- Cedar
- Cottonwood
- Willow
- Basswood
- Juniper
- Aspen
- Poplar
- Buckeye
- Dry Yucca stalk
These are all classified as medium-hard woods. Soft woods like a dead pine branch don’t create quite as much friction and can snap when you exert pressure. Hard woods like oak and maple can create good friction, but the woody parts creating the friction don’t slough off small pits of wood to help make the coals. The wood is just too hard.
The assumption is that regardless of the type of tree or plant, all of the materials are from dead trees or plants and very dry.
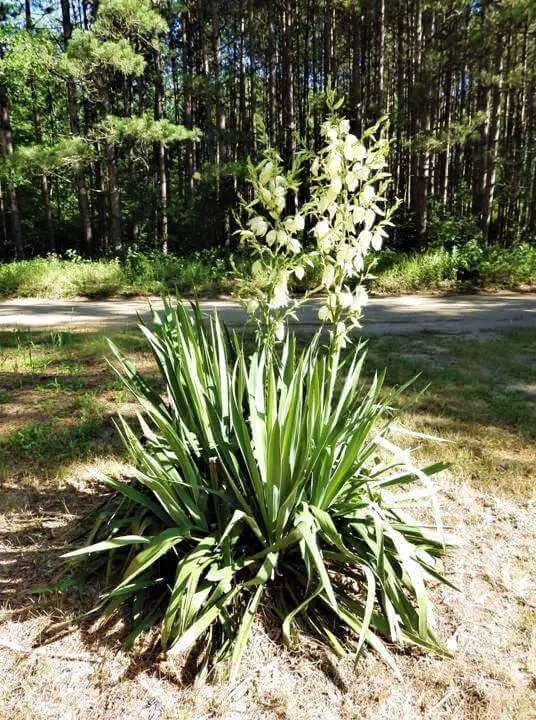
The yucca stalk may seem to be a bit of a surprise, but it’s actually the best material for creating hot coals with friction. However, it’s a desert plant and not found growing in the wild in most of North America, although many Internet “experts” will demonstrate how easy it is to start a fire and neglect to tell you they’re using a very rare yucca stalk to do it.
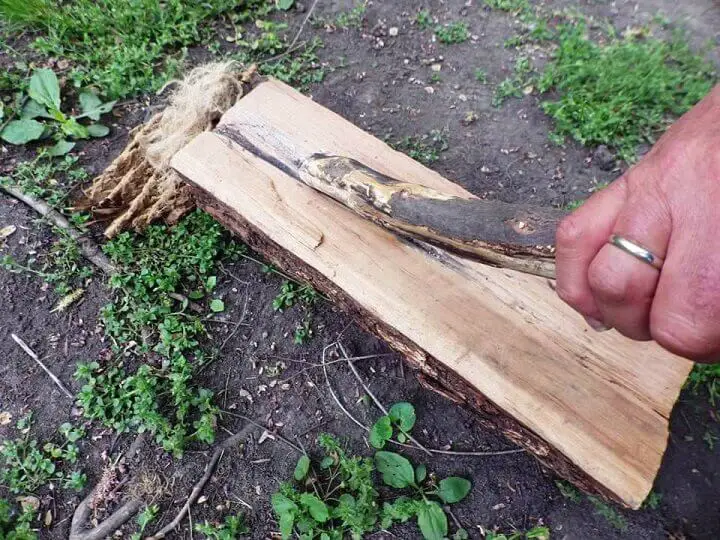
1. The Plough Method
This is believed to be one of the oldest fire starting methods. It’s also the most physically intensive. You may have seen that in the Tom Hanks movie Castaway when he worked his hands to blood forcing a branch up and down a groove to create a small, hot coal.
You don’t have to work your hands to blood, but you will want to cushion one of your hands to protect it.
Materials:
- 1 piece of wood about 2 feet long and 4 inches wide that can lay flat on the ground in a stable position with a curved groove carved cut down the center to serve as the base of the plough.
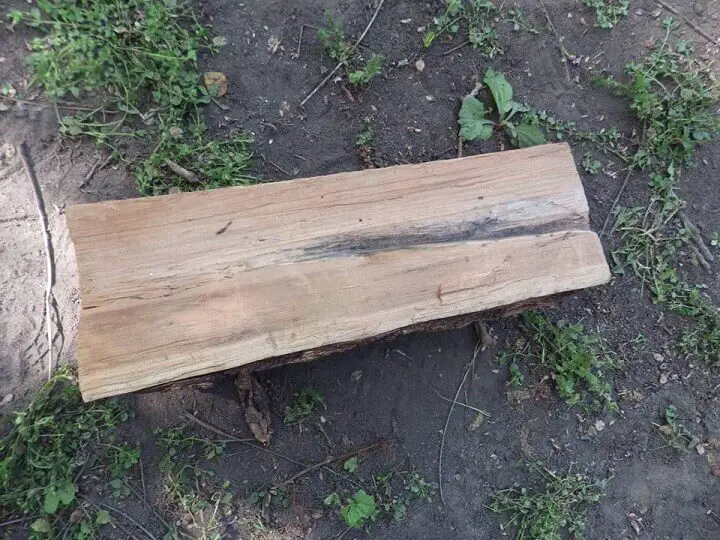
You can use a rounded and smooth piece of sandstone or limestone to improve the shape of the groove.
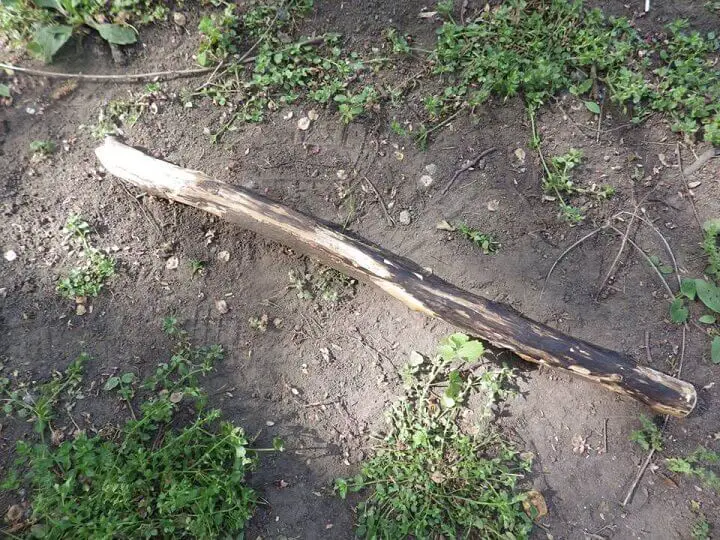
- A second piece of wood (usually a branch) about an inch thick and a foot to two feet long with a rounded tip that fits tightly into the curved groove.
- A piece of fabric or folded bark to position against the end of the branch (plough) to protect your hand as you rub the rounded tip back and forth in the groove.
- Some sawdust or fine pieces of tinder placed in the groove.
- Tinder piled at the top end of the plough base.
Method:
- Sprinkle a small amount of crushed tinder along the length of the groove. Use sawdust or crumbled bark or straw.
- Place the end of the plough into the groove on a 45 degree angle.
- Place your cushioned hand over the end of the plough and hold the middle of the plow at the top.
- Lean over the apparatus and push back and forth rapidly and repeatedly exerting downward pressure on the plow with both hands.
- Occasionally add more tinder and work any glowing coals down and into the tinder nest.
- Lift the tinder nest from time to time and see if you can blow any coals into flame.
- Lift the nest and use it to light your teepee fire.
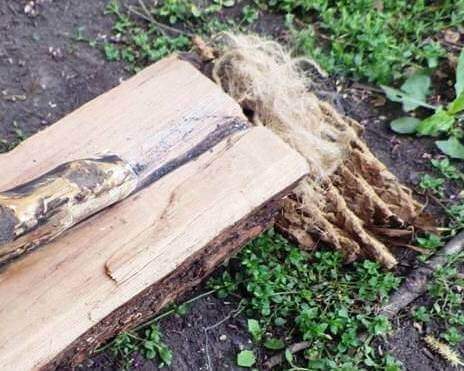
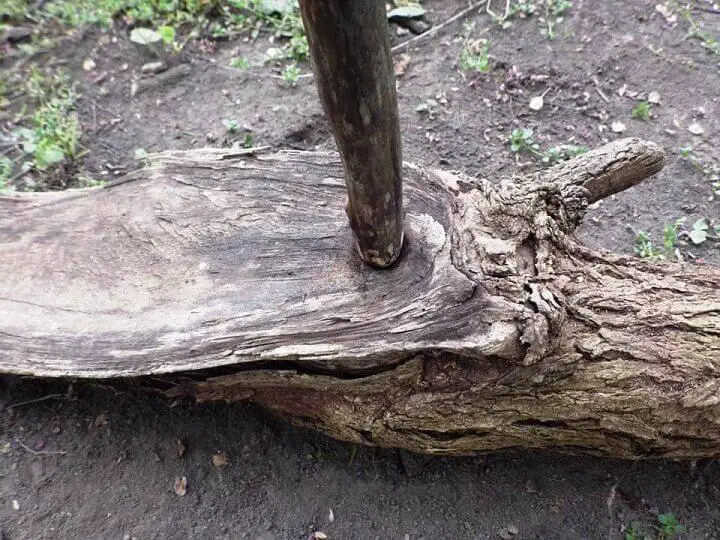
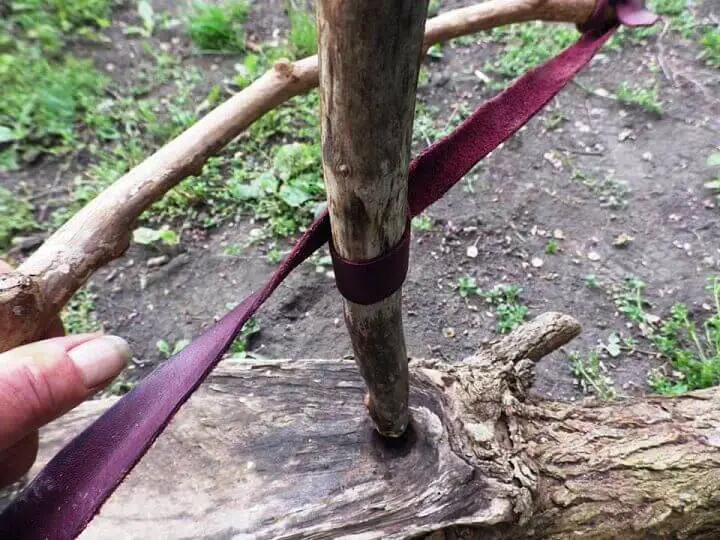
2. Bow and Arrow Drill Method
This is another fire starting method that has been around for a long time. You see it often on survival shows and it’s much easier than the plough method because it uses some simple engineering to create more friction and small, hot coals with less effort.
Materials:
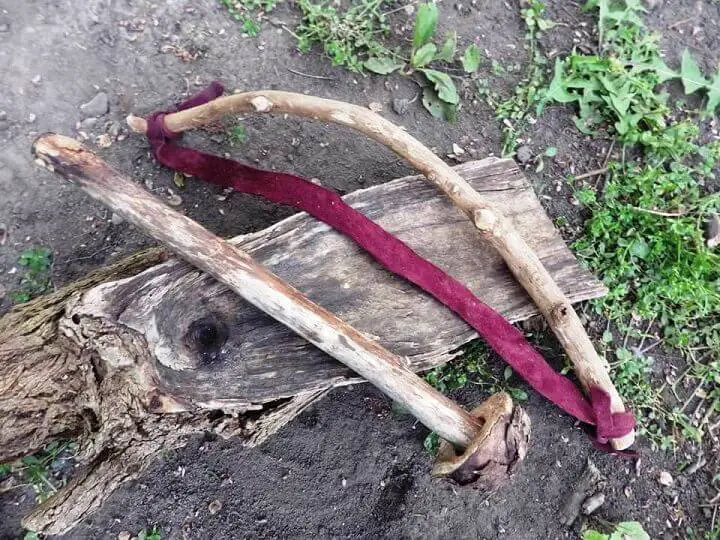
- A strong but somewhat flexible branch that is slightly bowed about a ½ inch thick and about 1 to 1 ½ feet long. Pine and willow are best, but any tree will do and the branch can be green or dead.
- A strip of leather or rope about a few inches longer than your bow. You can use leather shoes laces, cut a strip from your belt, even a piece of fabric if it’s strong. Attach your leather or rope to both ends of the bow. You should have a little slack.
- A second stick as straight and vertical as possible about a foot in length and ½ inch to one inch in diameter. This is your drill and it should be dead and as dry as possible and from one of the trees we mentioned in the friction method description above. One end should be a rounded, smoothed curve and the other a smoothed, blunt tip.

Twist the drill into the bow leather once so you can make the drill turn and twist as you move the bow back and forth.
- A tree knot or rock you can hold in your hand with a natural impression or indentation you make.
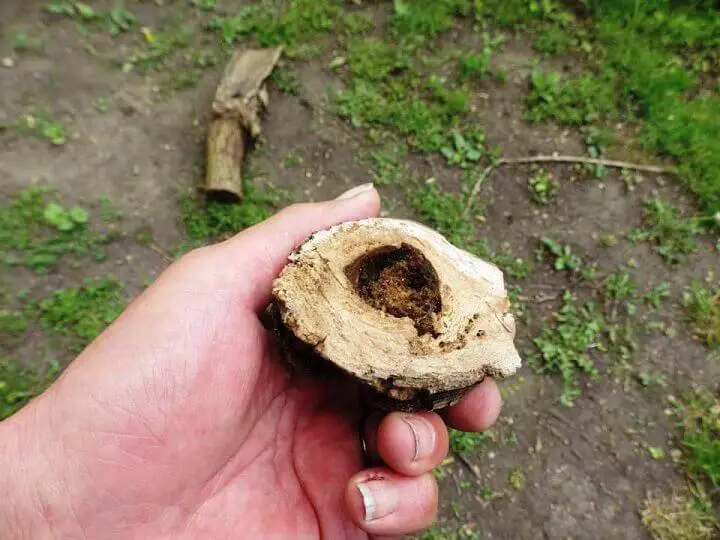
You need something to put on top of the drill on the end. You’re going to be applying pressure to the top of the drill with one of your hands so the knot or rock should have a cavity that will hold the drill in the place while you apply the pressure. Many tree knots will surprise you with a natural cavity in the knot.
- A lubricant can help. Animal fat or even oil from your face or hair rubbed on the top of the drill can allow the rock or tree knot to work better.
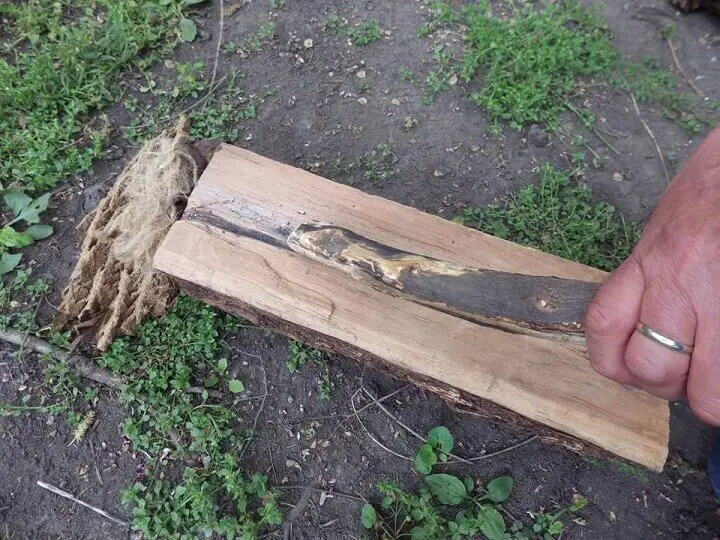
- A wood platform or stage with a hole or impression to hold the blunt point of your drill. This is the friction zone and you want a good fit for this socket to fit the tip of your drill.
When you have coals, drop some tinder on top of them and blow them into flame.
Method:
1. Sprinkle a small amount of sawdust or crushed tinder into the hole in the platform.
2. Twist your drill into your bow leather once.
3. Place the drill into the hole in the platform or stage and place the rock or tree knot on top and press down with one hand to hold it firmly in place.
4. With your other hand, grab the bow and begin moving it back and forth to spin the drill to create friction.
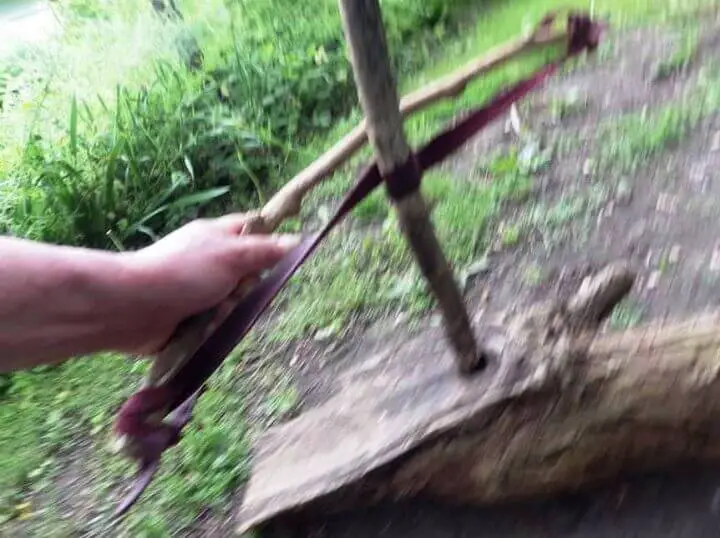
5. Continue this action until you see smoke from the stage.
6. Lift the stage off the tinder nest and lift the nest to your mouth and see if you can blow the coals into flame.
7. Repeat until you have fire.
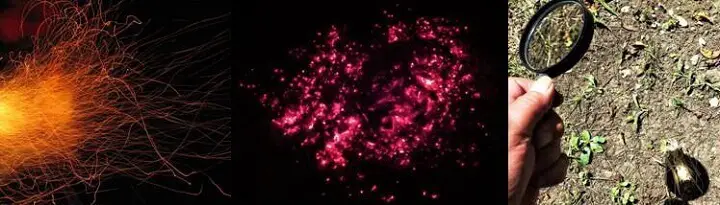
Implementing the Methods: Sparks
This is another ancient method that was originally done with two pieces of flint and evolved to include the use of flint and steel. Contemporary versions have emerged as the fire stick. It’s a thin length of magnesium about an inch or two long and a knife blade or thin flat piece of metal is rubbed down its length to create sparks.
Many classic lighters use sparks to ignite a wick saturated from a reservoir of lighter fluid. The Zippo lighter is a good example, but using sparks to light tinder is not as easy as a Zippo.
You’ll also find that the sparks from flint are somewhat disappointing compared to the shower of sparks from a fire stick, but be forewarned. This is another method that’s not as easy as a lot of the Internet videos make it appear to be.
It seems that some of the commercial manufacturers of fire sticks are using rope material saturated in a flammable liquid to create their “easy” fire from their fire sticks. It’s the Zippo concept on a stump. Anyone who has used a fire stick knows that you need a perfect pile of tinder to get those sparks to cause a flame, although a fire stick will still give you a better shower of sparks than a raw chunk of flint.
3. The Flint and Steel Method
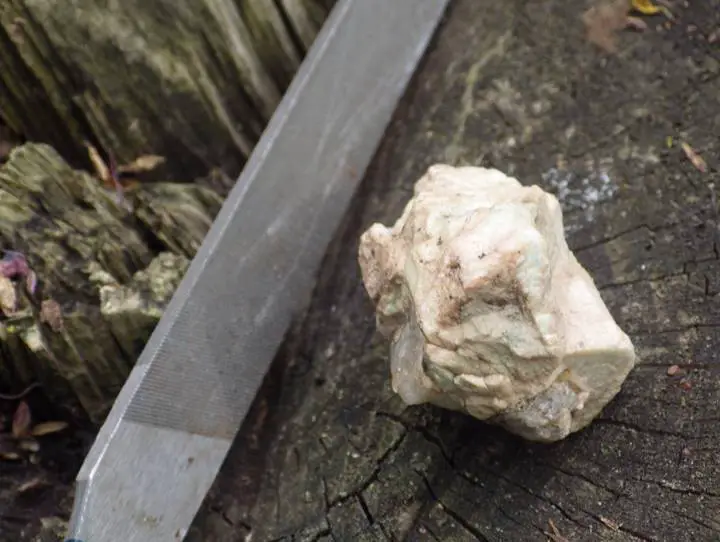
Flint is a naturally occurring rock that can be found in some areas of North America. It has a conchoidal or curved fracture and varies in color from tan to beige to shades of light red and orange. Chert is similar and can also produce sparks, but flint is best.
It’s possible to strike two pieces of flint together to make sparks, but iron or steel seem to work better. An iron file is best, but it's unlikely you’ll have one in a survival situation, although a fingernail file is a thought.
4. The Fire Stick Method
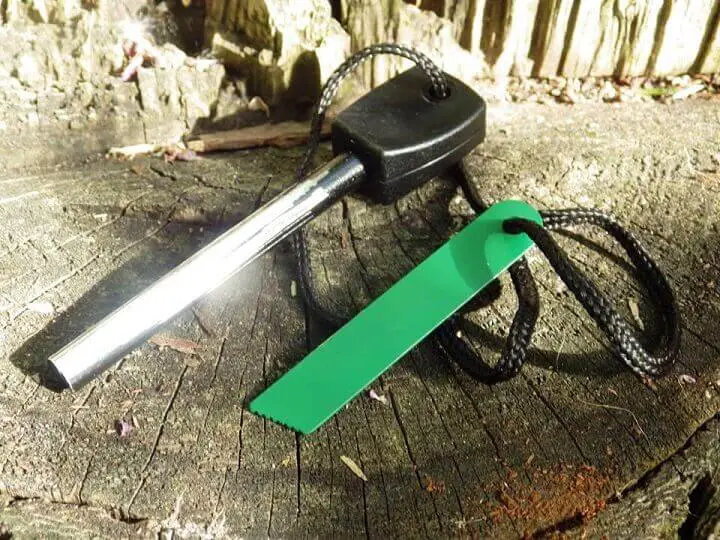
It’s hard to say when the first magnesium fire stick showed up, but it’s become quite popular as a survival fire starting tool. It consists of a thin stick of magnesium about one to two inches long. Sometimes they have a small handle or tab that you can hold.
The idea is that you rub a flat piece of metal along the length of the magnesium rod to create sparks. Sometimes the fire stick comes with this tool attached, or you can use a knife blade of any other piece of flat metal.
Unfortunately, it’s not a miracle tool. It makes a great spread of sparks, but it needs very good tinder to spark a flame. Fluffy tinder material is best either from plants, fabric, or rope. If for some reason you have a flammable liquid like gas, kerosene, lighter fluid, lamp oil or even a flammable spray from an aerosol can –use it on your tinder and you should get an immediate flame. Otherwise you may be sparking for a while.
Implementing the Methods: Concentrated Heat
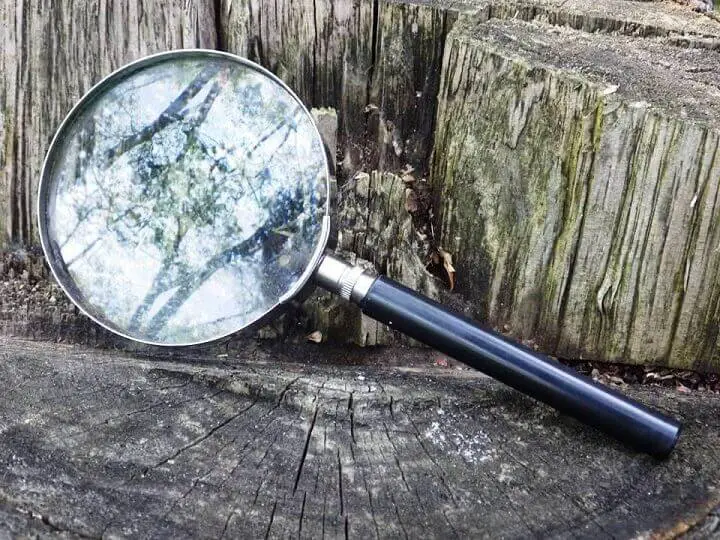
5. Magnifying Glass
This is another method that has its roots in the past, or at least to some degree. Using a magnifying glass to concentrate the rays from the sun can easily create a pinpoint of bright and very hot light that will quickly cause paper or most tinder to eventually smoke and then burst into flame.
It’s also possible to shape a magnifying lens from a piece of clear ice, but you have to use your hands to shape the ice and that’s tough to do in winter without a fire.
All you need to do is focus the light from the sun to a point in the same spot on your tinder nest. After a few seconds, you should see smoke and eventually flame. Of course if helps if the sun’s out, or you’ll need to consider an alternative method.
6. 9-Volt Battery Method
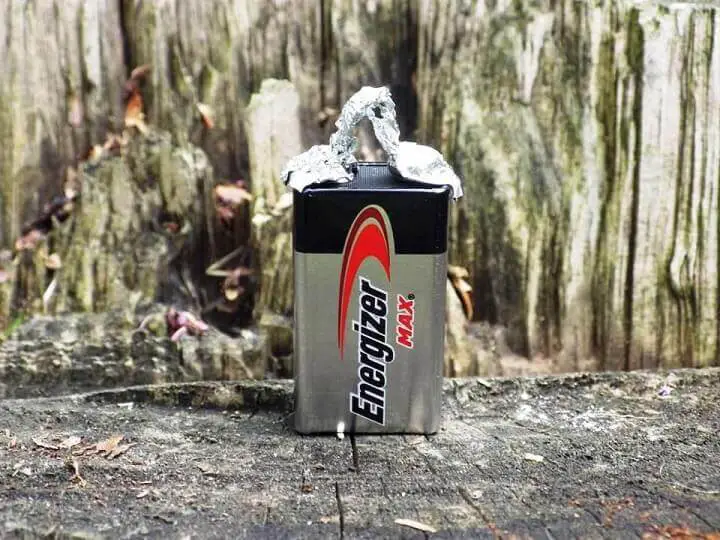
Another way to concentrate heat is to use a 9-volt battery. The fundamental concept is to use a piece of foil to connect the positive and negative terminals. The foil will get hot in the center after being connected to the positive and negative poles and can eventually create enough heat to cause any tinder in contact to burst into flame.
1. You can use a piece of foil from a chewing gum wrapper to create your heat.
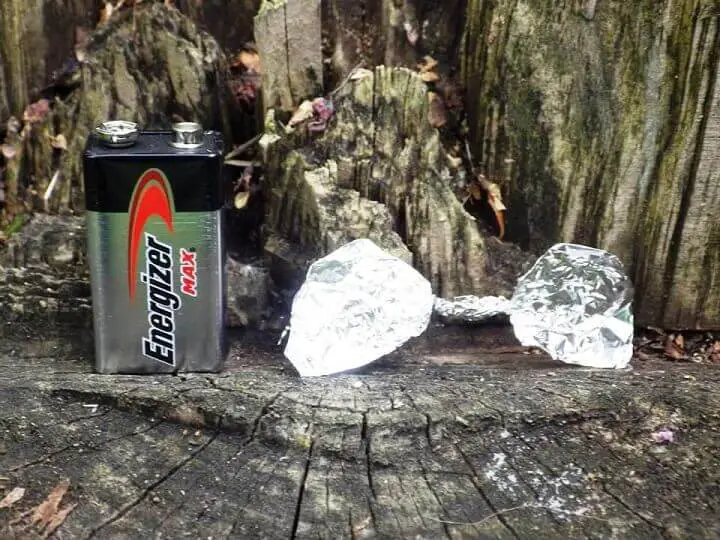
2. Twist the wrapper so you have a narrow wire of foil in the center.
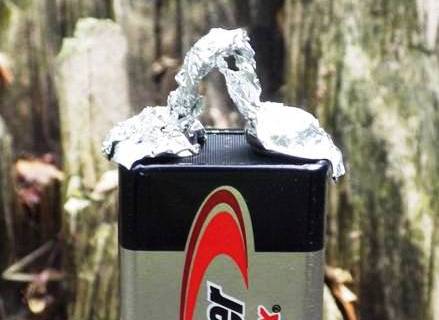
3. Wrap each side of the butterfly of foil to the terminals on the 9-volt battery.
4. Lay the battery down in the tinder at the base of your previously constructed teepee fire and sprinkle more tinder over the thin, narrow wire of foil.
5. Eventually the thin wire will begin to glow and that should lead to your tinder bursting into flames. Quickly remove the battery from the fire.
You can try this with standard flashlight batteries as well, but the results are sometimes disappointing. 9-volt batteries get a better result.
And Don’t Forget
Hot coals and sparks can actually be found all around you. Before you engineer some fire tools like an ancient Egyptian or make sparks like Nicola Tesla, check the ashes from that fire pit from last night’s fire. Even the smallest coal still burning deep under the ashes may be bigger than any you make with a friction method.
And as for that lighter that’s out of fluid, if it still sparks, it’s worth a try if you don’t have a fire stick or are in an area without flint.
Are there other ways to start a fire without matches? Like anything else, there always are. Let us know your favorite in the comments section below.
Fire is a critical success factor in many survival situations, and it’s worth knowing the various ways you can bring a fire to life. It’s also a good reminder to pack a survival kit or at least carry a lighter or some matches with you at all times because if there’s one thing that will always be true about survival… it’s that you never know.
Like this post? Don't Forget to Pin It On Pinterest!
You May Also Like: