Estimated reading time: 20 minutes
Yeast is Everywhere. You Just Have to Know Where to Look.
The yeast we buy in the store was invented in 1868. Before then, bakers used wild yeast to make their bread rise. The Egyptians are believed to be the first to make bread with yeast about 4,000 years ago.
We'll cover a lot of the techniques they used because we’re working with the assumption that you don’t have access to store-bought yeast and don't have any stockpiled. Given the fact that commercial yeast has a shelf-life of 2 years, stockpiling yeast may not be an answer in the first place.
Want to save this post for later? Click Here to Pin It On Pinterest!
What is Yeast?
Yeast is a fungus. It’s a single-celled microorganism. It thrives on natural sugars and as it grows and multiplies, it gives off carbon dioxide gas and alcohol as waste products. This is a result of the fermentation process that takes place as the yeast converts sugars into ethyl alcohol and carbon dioxide.
The carbon dioxide is what gets trapped in bread dough, causing it to rise, and the alcohol is what turns grapes into wine and grains into beer and spirits. The alcohol burns off when the bread is baked, but the air cavities caused by the carbon dioxide remain.
Multiple Yeast Species
There are 1,500 varieties of yeast species. The most widely used is Saccharomyces Cerevisiae or the “sugar eating fungus” which is the species isolated by Fleischman’s in 1868 to make the first commercial yeast. It’s the type of yeast primarily used in bread baking.
The first form of manufactured yeast was a cake that was a small square of active yeast that needed refrigeration and spoiled quickly. As a result of World War II, Fleischman’s developed a granular, dry yeast that’s still used today.
The sugars that yeast consumes consist of sucrose found in sugar cane and sugar beets (white sugar), fructose and glucose found in honey, molasses, maple syrup and fruit, and maltose which is a natural sugar found in the whole grains that make flour.
Wild Yeast
Another variety of yeast is the wild yeast or Saccharomyces exigus. It’s commonly found on fruits, plants, and grains and was the yeast that the ancient Egyptians and other ancient cultures used to make their bread.
You can recognize it as the light, white film or dust that sometimes shows up on grapes, blueberries, and other fruits. It’s this wild yeast that we’ll be exploring as an alternative to store-bought yeast.
Where to Find Wild Yeast

Like any other form of fungus, yeast is everywhere floating in the air as spores and settling onto just about everything. Fortunately, there are certain destinations that keep it alive and growing naturally.
These locations are predominantly plants, but it’s the plants high in natural sugars that seem to present the wildest yeast. That’s why the fruits of wild plants are often a source of wild yeast.
Traditional Wild Sources
If you ever wondered who invented wine, the answer is simple: grapes. Grapes are a yeast magnet, and grapes can actually ferment on the vine and turn into wine. The same goes for other fruits high in fructose like plums, apples, blueberries, and even oranges.
It’s believed that the Egyptians used the wild yeast from grapes to make their bread, but that’s only a suspicion. What’s worth noting is that even raisins carry wild yeast and so do other dried fruits you might have in your pantry like apricots, prunes, and others.
What's important is that they are still soft in their dry state, not overly saturated in chemical preservatives, and the skin is intact. Dehydrated fruits in #10 cans like strawberries simply won’t work.
Herbs are another possibility and a few people have even touted wild grape leaves and stems for when the wild grapes were out of season. Regardless, the key is to find a fruit or plant that is unaffected by pesticides or fungicides and hasn’t been washed. Maybe that’s why wild fruits are your best bet for wild yeast.
Capturing the Yeast
In a nutshell, you’re going to combine warm water with something in a large glass canning jar.
32 ounces is the standard recommendation because you’re going to be adding more flour and water as you go. You’re going to let your wild yeast water combination sit in the jar in a warm area loosely covered for about a week.
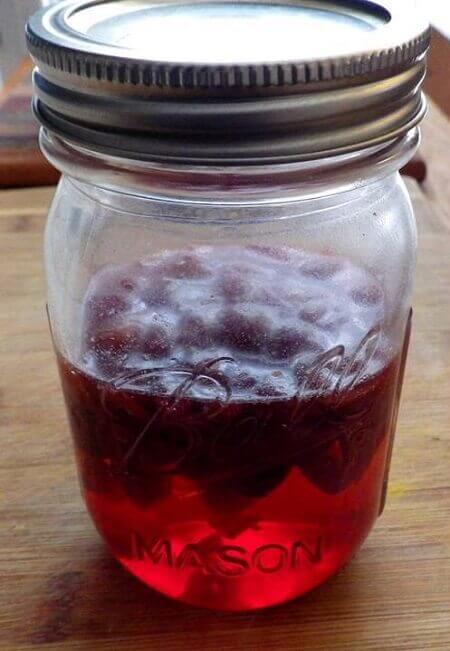
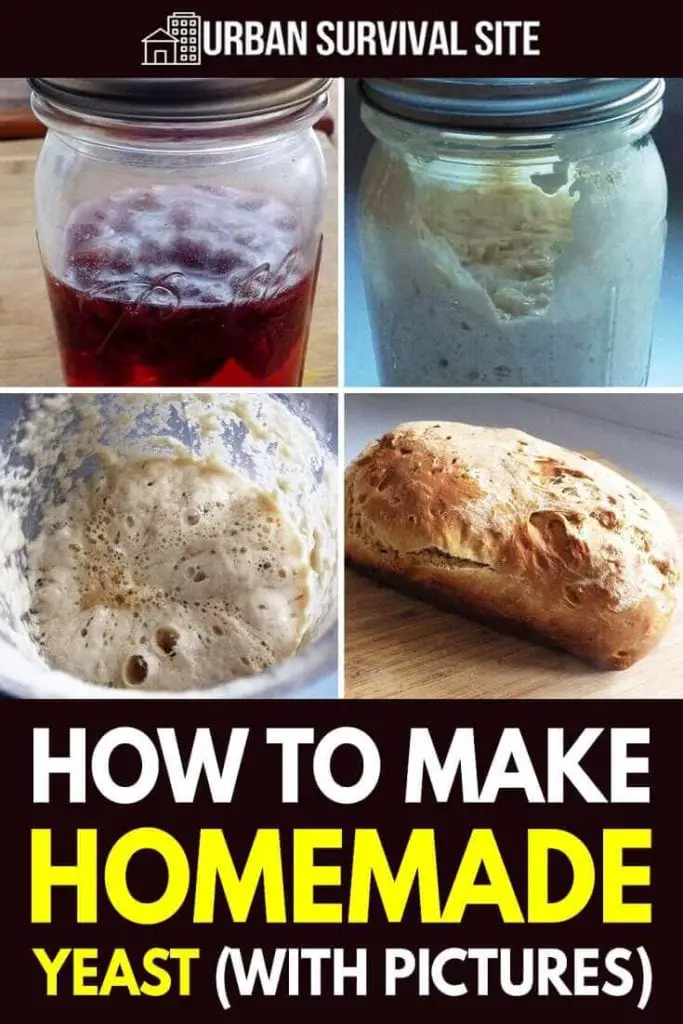
After about a day, you’ll notice the color of the water is starting to change and the yeast source may be floating.
With luck, your water will turn cloudy and bubbles will form at the top of the water. This is a sign that you’ve successfully captured some wild yeast.
If you’re unsure about having success, you can always have a few jars from different sources going at the same time. This could be a jar with wild grapes, another with raisins, and a third with just water and whole wheat flour. Even an unbleached flour made from whole wheat could naturally produce yeast. If all three work, combine the waters. If one or two fail, you hopefully have success with the third.
You then drain the water through a screen and add it to a new, sterilized jar along with flour and a sweetener like sugar or honey to get it started.
You don’t have to add any kind of sugar, especially if you’re using a naturally sweet source like grapes or apples, although wild grapes are low in natural sugars.
This next part of the process is referred to as a “starter” and you’re essentially creating an environment for the wild yeast to grow and multiply.
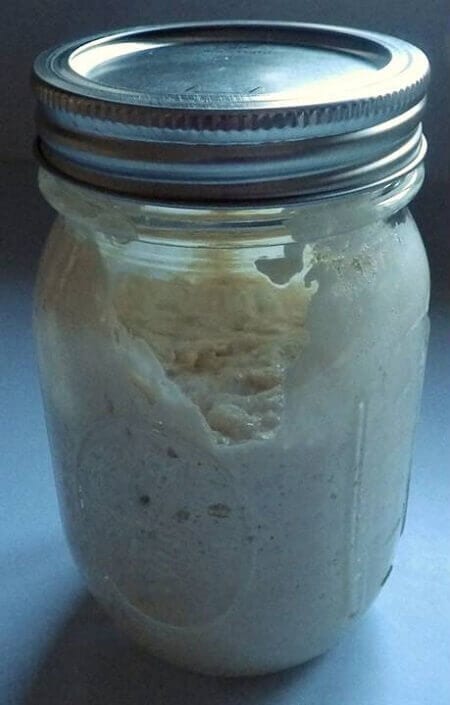
It’s the same process used to make a sourdough starter, but the hints of flavor you get from your wild yeast may vary from a traditional sourdough.
A portion of the starter dough is then added to flour to make your dough for your bread, and the remaining starter is reserved and maintained with the addition of more warm water and flour to keep it going and growing. It’s best kept refrigerated, but you can also freeze it and it will come back to life when thawed and re-fed more flour and warm water.
We’ll get into specific recipes and process for capturing and growing wild yeast along with some bread recipes but first, here are some things to keep in mind as you attempt to grow your own yeast at home.
Yeast Growing Tips and Cautions
Here’s a collection of yeast growing tips and cautions for both the preliminary process of isolating the yeast in warm water and continuing to grow it in a starter of flour and water.
Wild Plants:
Wild herbs and fruits are a common source for wild yeast, but make sure you only use edible wild plants and fruits. Poison Ivy is the obvious thing to avoid but many plants and fruits are toxic to various degrees. The simple rule is: if you wouldn’t eat it, don’t soak it in water to harvest yeast.
Water Source:
Avoid tap water that has been chlorinated. The chlorine will kill the yeast. Bottled water, spring water, and even well water work fine for harvesting and growing yeast. Yeast prefers a water pH that is slightly acidic to neutral.
7 is a neutral pH and well water averages a pH of 6.5 to 8.5. The minerals in well water also help yeast growth, but any water will work as long as it hasn’t been chlorinated. If city water is your only source, let it sit in a pitcher for 24 hours and the chlorine will neutralize.
Potato Water:
Potato water shows up again and again as a great liquid medium for encouraging yeast growth. If you have potatoes, boil some and use warm potato water to jump-start your yeast growth. Some people add some mashed potatoes to their jars as well. That’s up to you.
Temperature:
Try to start with water that’s about 110 degrees Fahrenheit. You could use a thermometer or water that is warm to the touch, but not hot water. Water that is too hot will kill the yeast.
Pamper Your Yeast:
Over time, keep your yeast jar in a warm spot. Possibilities include on top of the refrigerator, next to the stove, the counter above the dishwasher, or a sunny windowsill. The temperature range over the days it takes to grow your yeast is ideally between 70 degrees and 85 degrees Fahrenheit.
Dried Fruits:
Dried or preserved fruits are an excellent source of wild yeast if you don’t have access to fresh fruits or wild plants. Just make sure they are sulfur-free. There’s a food color preservative called Sulfur Dioxide that will show up in the ingredients list on the package. It’s safe to eat, depending on your feelings about food additives. But if the dried fruit has this additive, don’t use it. The yeast will be dead on arrival.
Odors:
There will be odors emerging from any yeast growth, and while they’ll be a bit pungent at the outset, they should mellow out over time to a faint sweetness. The things to watch out for are offensive odors you would associate with a septic tank. While wild plants have their share of yeast, they also could have bacteria that will thrive in your warm water mix. If in doubt, throw it out.
It’s another reason to have more than one jar going if you’re concerned this might be a problem. That way, you have a backup or two if one goes bad. And yes, the fermentation process associated with yeast does in fact produce alcohol which kills germs, but that active fermentation doesn’t begin at the start of the process when you’re first capturing the wild yeast, so stay vigilant.
Fresh Fruits:
Ideally, any fresh fruit you use as a yeast source like grapes, plums, apples, or others are either harvested from your own property or grown and purchased locally at a farm stand. Grocery stores wash their fruits, and many fruits that they have delivered are also washed when harvested. This removes the wild yeast which occurs on the outer peel or skin of the fruit. Contrary to conventional wisdom, you don’t want to wash the fruit before immersing it in your jar of water. You want to keep the wild yeast.
Sterilization:
Any jar or container you use to grow your yeast should be sterilized at the outset. Making yeast for fermenting wine or beer requires extensive sterilization across steps, but for bread yeast, all you have to do is start clean and sterile at the beginning of the process. Baking the bread will also kill any resident bacteria from a wild yeast harvest 99.9% of the time.
Gluten:
Gluten-free is a phrase you hear a lot these days. Some people are genuinely gluten intolerant and could even have celiac disease. But you should know that yeast loves gluten. Bread flour has the most gluten followed by all-purpose flour. 100% whole wheat flour has the least amount of gluten, although it may contain wild yeast.
If you want to increase your odds of success, use bread flour as your yeast growing medium. You could get good results with whole wheat flour, but wild yeast is fussy and some people report that yeast grown in whole wheat flour gives the bread an off-flavor. One possibility is to blend some bread flour and whole wheat flour together. The unbleached whole wheat flour may give you the added bonus of its own wild yeast.
Curiously, whole rye flour has been identified as a yeast superfood. If you have some, use it to get your yeast going or as a boost while it’s growing. Not necessary but worth knowing. Once again, up to you. And it is possible to grow yeast in a gluten-free medium if you want to make gluten-free bread, but you want to make sure to add sugar or honey to give it something to feed on. You could add a sweetener to any other flour to kick-start the yeast growth as well.
Mold:
If you notice distinctive colors that are not obviously derived from the fruit or vegetable like pink, green, blue, white, or black, or fuzzy mold—toss it immediately. Yeast isn’t the only fungus to find its way onto fruits and plants. Raisins will make the water a light brown, turning to a cloudy brown. That’s fine. Grapes could easily give you a purple or shade of blue. No surprise. But if the color is unexpected based on the source, that’s not good.
Surface Growth On Top:
If the top of the starter has a film that’s either white or a clear yellow liquid, don’t worry. That means the starter needs more flour and water. Add it the minute you notice it. There’s nothing wrong, the yeast is just telling you it’s hungry.
Maggots:
Don’t blame the yeast. Some flours have eggs from various flies waiting to emerge. If you spot maggots in your starter, toss it and start over. You might want to toss the flour as well. If there were maggots in there once, there are probably more where those came from.
Winter:
Good news. Yeast survives in winter. In fact, many people freeze some of their yeast starter for later use. If it’ll survive your freezer, the wild stuff will survive outside in winter. Better yet, winter cold kills many free-ranging bacteria floating in the air, so you may get a cleaner wild yeast harvest. Spruce tips are often touted as a source of wild yeast in winter, and pine cones as well.
4 Steps to Making Your Own Yeast
These are broad steps with some mini-steps in between. Once you get the hang of it and have some success, you’ll see that it’s actually pretty easy and you may start using use wild yeast on a regular basis.
Here are the 4 basic steps:
- Harvesting and Capturing the Yeast
- Growing the Yeast in a Starter
- Using Your Yeast for Baking
- Preserving Your Yeast
You’ll also need some basic equipment:
- Large jars with lids (wide-mouth Mason jars if you have them)
- Chopsticks for moving stuff around in the jars
- Un-chlorinated water
- Flour for the starter (bread flour is best)
- Sugar (white sugar, brown sugar, honey, molasses, or maple syrup)
- Cookie sheet for drying and preserving for later use
- Bread baking equipment (mixing bowl, bread pans)
1. Harvesting and Capturing Wild Yeast
Your primary challenge is finding a reliable source for “found” or wild yeast. Here are many of the possibilities that people have used over thousands of years. Some are from the wilderness, others from orchards, and others hiding quietly in your pantry.
All of these sources should be unwashed for this first step and, in small quantities, sufficient to fit into a 32-ounce jar filling it up to a maximum of 1/4 of the jar space. If you like, you can use multiple jars to increase your chance of success until you get the hang of how this all works.
- Grapes (wild grapes are best)
- Plums
- Blueberries
- Apples (all varieties including crab apples)
- Orange peels
- Grape leaves and stems
- Spruce tips
- Pinecones
- Herbs like mint, lemon balm, tarragon, and other sweet herb varieties
- Raisins
- Dried apricots
- Prunes
- Whole wheat grains
- 100% unbleached whole wheat flour
There are no doubt other possibilities. The general key is to make sure a natural sugar is present in the plant in some way to sustain the wild yeast that alighted while blowing in the wind.
- Jar with lids all sterilized
- Warm water (ideally 110 degrees)
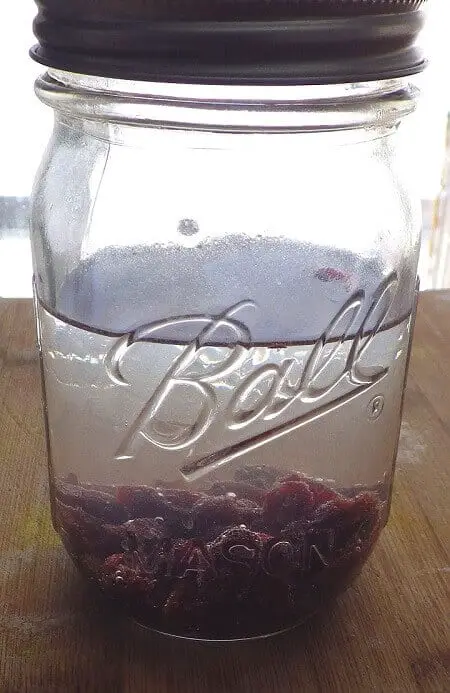
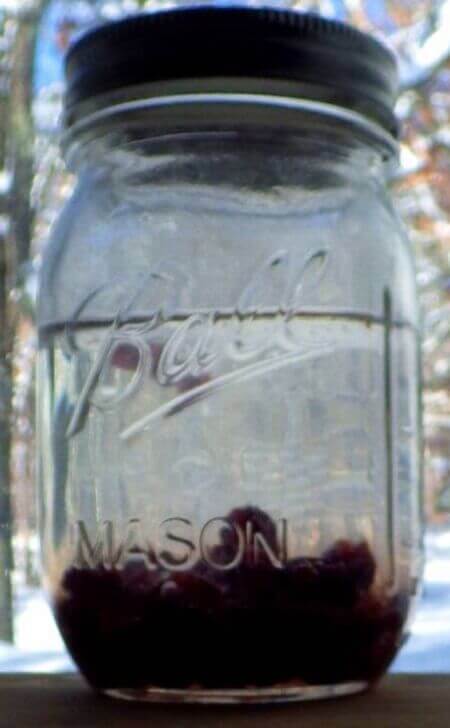
- Wild yeast source (we’re using raisins)
Directions:
- Add a cup of raisins to the jar (or whatever else you may choose to use).
- Fill the jar 2/3 full with warm water (110 degrees F).
- Let the jar sit in a warm place for at least 7 days.
- Check the jar daily. You’ll notice the water taking on a translucent color at first and then slowly begin to get cloudy. That’s good. That means the yeast is present and has come to life.
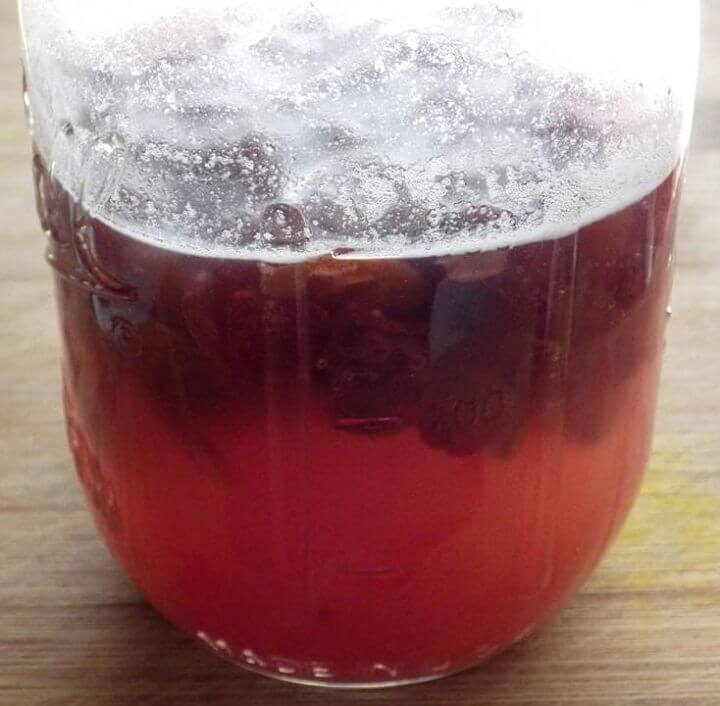
- Keep checking the jar and look for bubbles floating on the surface. That’s really good because that usually means the yeast has activated and is starting to grow and multiply.
- After about 5 or 6 days, you’re ready to strain your yeast for the next step.
2. Growing the Yeast in a Starter
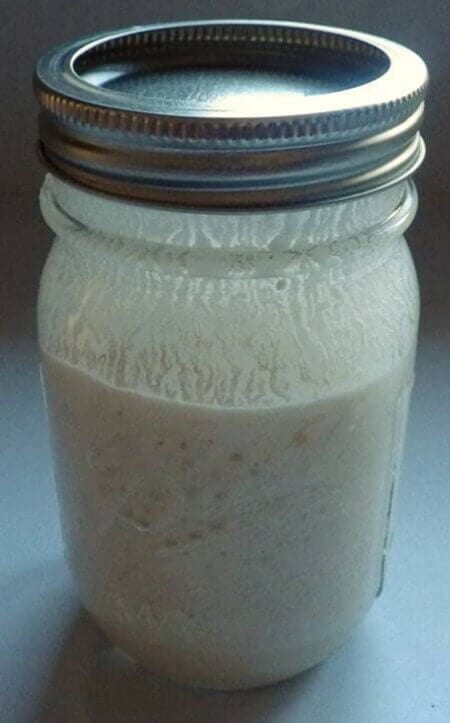
- Strain the yeast water into another sterilized jar until it’s about 1/2 full.
- Add flour and stir with a chopstick until it’s the consistency of pancake batter.
- Add a teaspoon of a sweetener like sugar or honey or whatever you have on hand and blend it into the mix. (Optional, but not a bad idea.)
- Loosely cover the jar with a lid and let sit in a warm place.
- Check the jar from time to time. You’re looking for bubbles to start showing up.
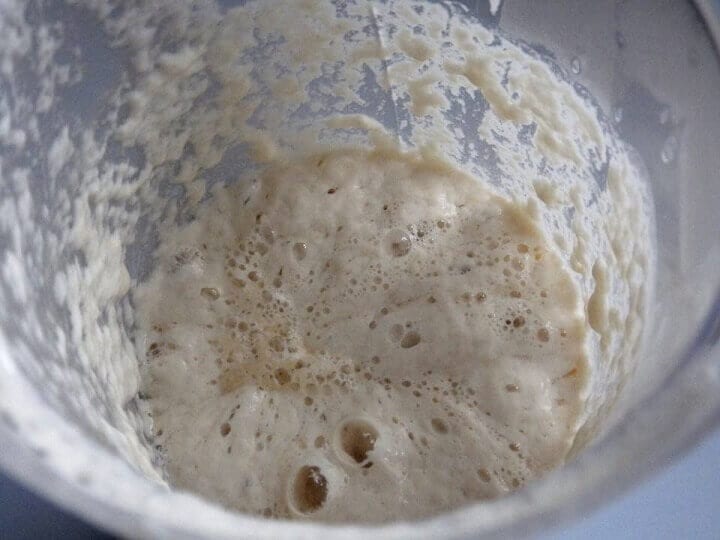
- Continue to add a little flour and warm water for a few days to strengthen the starter. If it looks like it will overflow, discard half. On average, it can take a week to establish a good yeast starter.
3. Using Your Yeast for Baking
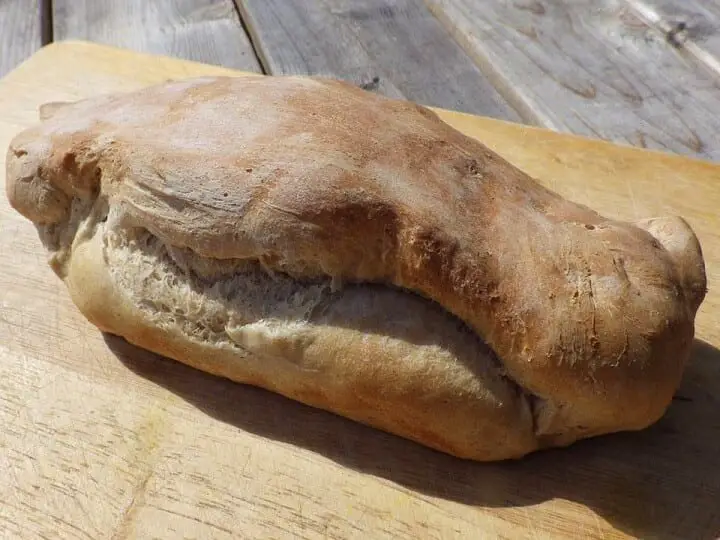
You can use your homemade yeast for anything that calls for yeast as an ingredient. We’re going to play it safe and use a tried-and-true recipe that has historically used a yeast starter: Sourdough bread.
It’s quite possible the result won’t have the same flavor profile as a San Francisco sourdough because the flavor of any wild yeast can vary, but regardless, we should get a good result.
Wild Sourdough Bread Recipe
(Makes a 1-pound loaf)
Ingredients:
- 1 cup of yeast starter
- 1 cup of flour (add a little more a tablespoon at a time if the dough is too loose or sticky)
- 1 teaspoon salt
- 3/4 cup of warm water (add a little more a tablespoon at a time if the dough is too dry)
If you want to make a larger loaf, you don’t have to add more starter. The one cup of starter is enough, although you will have to add more warm water if you add more flour.
Here’s some easy math for proportions and loaf sizes:
- 1 cup of starter + ¾ cup water +1 cup of flour = 1-pound loaf
- 1 cup of starter + 1¼ cup of water + 2 cups of flour = 1.5-pound loaf
- 1 cup of starter + 1½ cups of water + 3 cups of flour = 2 pound loaf
You’ll also have to find a larger bread pan for the larger loaves, and remember you can always add a bit more flour or water to get the dough consistency right.
Directions:
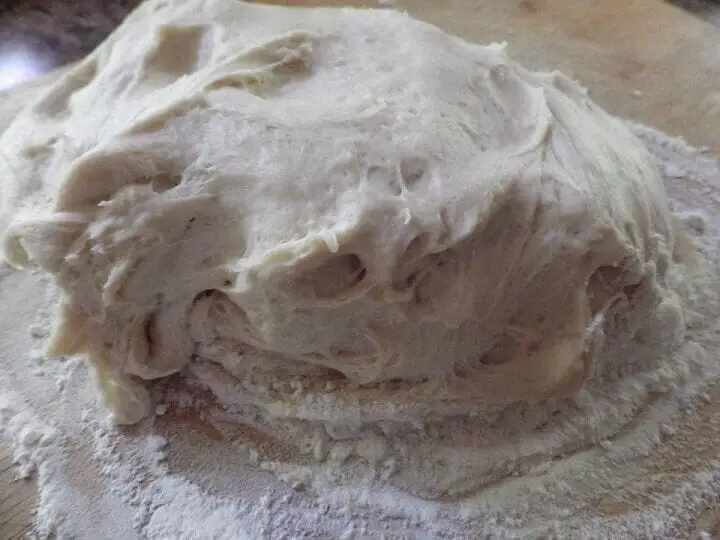
- Combine the ingredients in a bowl and mix with a spoon or your hands.
- Toss some flour on a surface and knead the dough for about 10 to 15 minutes.
- Oil a bread pan.
- Drop the dough into the pan and cover with a damp washcloth and let it rise in a warm spot in the kitchen for about an hour. If you want, you could let the dough rise on the counter for an hour and punch it down and let it rise in the bread pan for another hour or more. It all depends on how well your yeast behaves and what kind of rise you get in the dough.
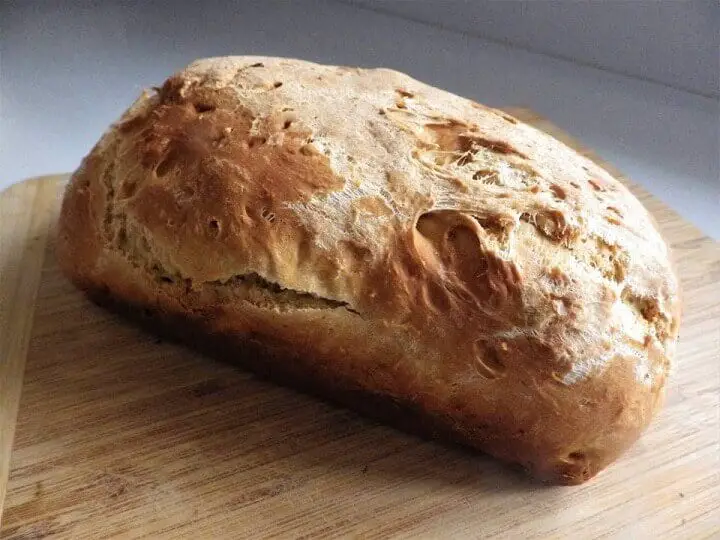
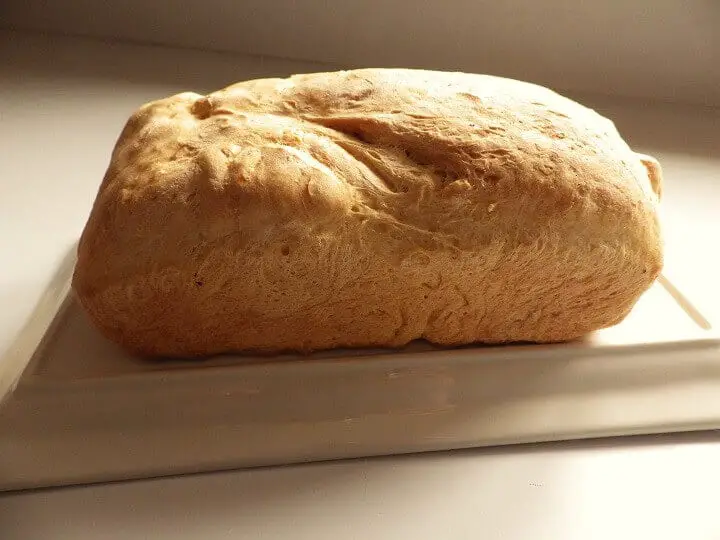
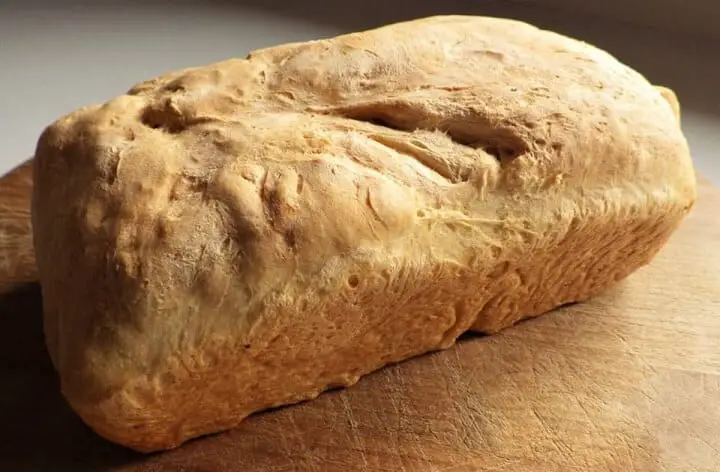
- Preheat the oven to 350 degrees F and bake on the middle rack for 25 to 30 minutes or until the crust is browned.
- Let rest for 10 minutes and slice and serve.
4. Preserving Your Yeast
Most people don’t want to wander the woods harvesting wild yeast every time they bake a loaf of bread. If you’re one of those people, you should take some steps to preserve your newly tamed wild yeast. Another thing to consider is that this is a hit or miss proposition. It may not work the first or second time. When you finally get a good result from a nice loaf of bread, you want to hold onto that successfully captured wild yeast.
There are 3 ways to do this: refrigerating the starter, freezing some starter, or drying the starter as a powder. All 3 methods work, and some people do all 3 just to make sure they never run out of yeast again.
Then again, if you bake frequently, you can just keep your starter on the counter. You’ll have to check it daily to see if it needs more water or flour, and this assumes that you will be using the starter quite frequently.
You’ll also want to keep the lid loosely attached and maybe crack it open once a day to “burp” the starter and release any carbon dioxide gas that has built up. If you choose not to keep your yeast going on the counter, you need to get a little more ambitious, although it’s all pretty easy.
Here’s how to do it:
Refrigerating Your Yeast
Just tuck your jar in the back of the fridge. You’ll still need to keep an eye on it because it will still be active and may need to be fed with water and flour once a week and occasionally burped. Here again, keep the lid loose.
Freezing Your Yeast
The easiest way to do this is to pour your starter batter into ice cube trays and, after they’re frozen, store them in a re-sealable plastic bag. 1/4 cup of starter yields 3 average size ice cubes, so if you need a cup of batter, you’ll need 12 frozen cubes of yeast starter.
The yeast should keep for years (assuming you have nothing better to keep in the freezer) and should reactivate when thawed and added to warm water and flour in any recipe.
Drying Your Yeast
Pioneers would spread the yeast batter on a cookie sheet, cover it with cheesecloth and let it dry in the sun. Crumbling the dry batter on the cheesecloth over a bowl collected the flour. Save in the fridge in a jar.
You could also spread the batter on some small plates and dehydrate in a food dehydrator. When dry, crumble the batter and store in the fridge the same way.
An oven is an option but requires some attention. Spread the yeast starter batter on a cookie sheet and let it dry in the oven on the middle rack at the lowest oven setting. Check it frequently and the moment it is brittle enough to turn into a powder, take it out. If this isn’t done perfectly, the heat will kill the yeast, so stay vigilant.
If you’ve ever made your own yeast, feel free to share your ideas, sources, and successes in the comments section. This is a very valuable skill for a very valuable food source that is often hailed as the foundation and fuel of civilization: bread.
Like this post? Don't Forget to Pin It On Pinterest!
You May Also Like: