

Estimated reading time: 18 minutes

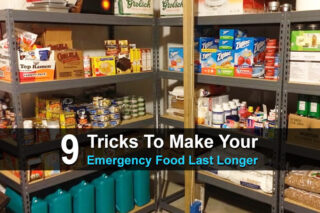
If you live in an area prone to natural disasters, or if you're worried about a grid-down scenario where the food and water supply are cut off, you should build a one-month supply of emergency food. You can buy prepackaged emergency food kits, but they usually don't taste very good.
Yes, food buckets will keep you alive, but they'll be a problem for people with kids, who are used to different foods, and people with dietary restrictions or medical conditions like diabetes. Plus, those food buckets are very expensive.
For all these reasons, it's better to put together your own one-month food supply with foods from the grocery store.
Want to save this post for later? Click Here to Pin It On Pinterest!
Table of Contents
Some Realities to Overcome
In many emergencies, it’s fair to assume that the electricity may be out and conveniences like refrigeration, freezing, and even conventional cooking might be unavailable. Here’s the list of those realities and how to overcome them as you put your food supply together.
No Refrigeration
It’s difficult to store a significant amount of many foods over the long-term even if you have a dedicated, second refrigerator. There’s also the possibility that the power will be out, and many foods won’t last days let alone a month without refrigeration.
As a result, you need to think about foods that are stable without refrigeration while still satisfying fundamental needs related to taste and nutrition.
Related: 10 Ways To Store Meat Without a Refrigerator
No Freezer
Freezing is often touted as the best method to store many foods over the long-term, but there’s always a question of available space in any freezer; proper packaging to avoid freezer burn, and that big question about reliable electric power.
If planning and preparing for an emergency, it’s always wise to assume that electric power will be unreliable or simply unavailable. Foods will last 48 hours in a freezer without power and only 24 hours in a refrigerator. That’s far from our one-month goal.
Related: 10 Ways to Bake Bread Without Electricity
No Stove or Microwave
Preparing meals inevitably involves cooking. It’s important to think about the types of meals you could prepare without a stove or microwave. It makes sense to learn and understand all of the off-grid options for cooking from open fires to brick stoves and even propane and solar powered cooking approaches.
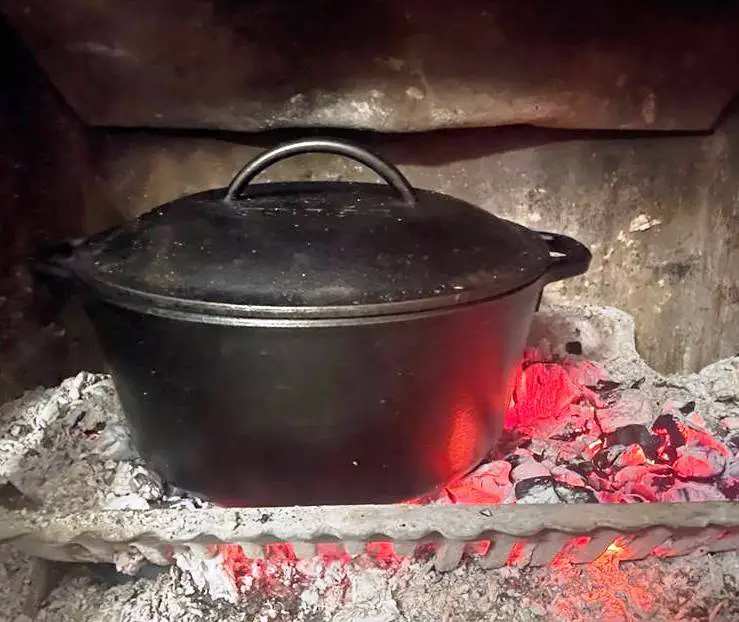
And while you’re at it, make sure you have the proper cookware for any off-grid cooking style. Cast iron is a classic approach in addition to tripods, grates and other equipment to support cooking pots and pans over an open flame.
Related: How to Cook Anything in a Dutch Oven
No Time
Any emergency affecting where and how you live is going to dramatically change your lifestyle. Modern conveniences will not be as readily available, and the only way to compensate is to do many things manually. That takes time and it can be difficult to find the time to cook complex meals.
As a result, we’re going to try to keep focused on meals that are easy to prepare. Some could require long simmering, but those kind of recipes usually don’t require a lot of attention. The key is to be able to successfully cook a meal efficiently, and to try and do it with as little cleanup as possible.
Related: 6 Easy Meals to Cook Over a Fire After a Disaster
Nutritional Challenges
An important thing to consider when assembling any meal plan is balanced nutrition. The average active adult male needs at least 2500 calories a day to maintain their weight, and it’s likely that everyone will be very active during a time of emergency.
The average active adult female needs 2000 calories a day to maintain body weight. Children’s calorie needs vary depending on age, but 1500 calories a day is a safe bet as an average.
Pay close attention to the calories listed on any package to understand calorie counts per serving, and if preparing meals for a family, always make sure you take a little time to understand calorie totals. Ultimately, calorie totals will largely be driven by portion size at any meal so pay attention to calories per portion to reach your daily calorie goals.
And remember that calories from carbohydrates can provide instant energy, but adding calories from fat will also help to increase internal body heat in winter and provide long-term energy through the day.
After calories it’s critical to ensure that some levels of protein, fiber, and nutrient dense foods are in each meal as much as possible. This includes vitamins and minerals although a vitamin supplement is worth storing with your one-month food supply.
Physical Exertion and Stress
The reason a balanced nutritional diet is so important has to do with the increased levels of physical exertion and stress that accompanies any emergency. Physical exertion burns calories so you don’t want to get into a calorie deficit, and an emergency situation is a lousy time to go on a diet.
Stress levels also increase, putting an added burden on the immune system. It’s during disasters that everything from the water supply to the air and a good share of food become sources for disease and illness. A strong immune system helps fend off the threats, and balanced nutrition helps support and enhance the immune system, and here again -s o do those vitamin supplements.
Basic Solutions

The meal plans we’re about to put together use foods from sources that have safe shelf-lives without refrigeration or freezing. However, they all require proper processing to some degree, proper packaging and storage.
The sources vary. Some you can buy prepared; most you can make yourself. The idea is to have the ingredients on hand to assemble and cook your meals safely, simply and nutritionally.
There are ways to simplify meal preparation by assembling ingredients in the package so final meal prep is simply heating or adding water and heat. Another option is as simple as canned foods, but any foods you process and can yourself should be pressure-canned to ensure long and safe shelf-lives.
We’ll list numerous resources for many of the things we’ve covered at the end of the article. In the meantime, here’s a little detail on emergency food options.
Dehydrated Foods
Dehydrated foods represent a broad category. In many respects pasta and even flour could fall in the category of dehydrated and they should definitely be a part of your recipes and storage, but be aware that wheat berries actually have a longer shelf-life than flour, although you need to mill them into a flour first.
The dehydrated foods we’ll be using include dehydrated eggs, cheese, butter, and a range of vegetables and fruits including dehydrated tomatoes, peppers, onions, mushrooms, apples, blueberries, strawberries, grapes (raisins), cranberries (craisins), apricots, and peaches.
Some fruits and vegetables have been dehydrated and then reduced to a powder as a recipe ingredient – most notably tomato powder and various berry powders.
There’s also a whole category of dehydrated meats either the real meats like chicken, bacon and beef or textured vegetable protein (TVP) that is often flavored to taste like chicken, beef, pork, bacon and even taco meat.
Related: How to Rehydrate Your Food Storage
Pressure-Canned Foods

It’s easy and smart to pressure-can your own foods for long-term storage. Examples include pressure canned beef, pork, chicken, bacon and both fish and shellfish.
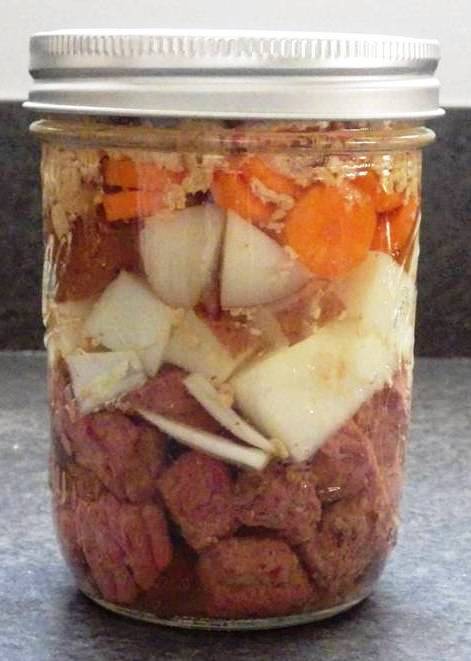
Pressure canning is also used for complete meals in a jar that you can put together including chili with beans, spaghetti sauce, beef stew, various soups, and just about any other recipe that is served as a soup or stew.
The reason pressure canning is so important is that it effectively raises the processing temperature up to 290 degrees Fahrenheit to effectively kill bacteria, and enable a longer shelf life than foods canned in a traditional water bath.
Related: 100+ Foods You Can Pressure Can
Naturally Shelf-Stable Foods
There are many foods that are surprisingly shelf-stable with shelf-lives measured in decades and even centuries without refrigeration or freezing. Honey is the classic example, and you often hear of honey found in an ancient Egyptian tomb that was still food-safe after 3,000 years.
Other shelf-stable foods that we’ll store and use for our one-month meal plans include 100%, real maple syrup, Ramen noodles, Worcestershire sauce, dried beans, coconut oil, and salt which will last indefinitely. We mention these because they are common recipe ingredients, but their shelf-life makes them valuable additions to our emergency menu.
Related: 11 Healthy Foods That Will Outlast You
Canned Foods
Canned foods seem like an obvious option for food-storage and a survival menu but be careful out there. Some canned foods last longer than others and if you don’t frequently eat and rotate your food storage you should stick with the foods that make good meal components and have a safe shelf-life.
What’s also true is that many canned foods lose their nutritional value and taste over time. Canned foods are a good idea, but don’t assume that a diet of nothing but canned foods is ideal, particularly if they have been on the shelf for a long time.
Some of the canned foods that last for years and retain nutritional value include canned tuna, peanut butter, sardines, and herring. We’ve included those in our recipes and all have shelf-lives of 3 to 5 years.
Related: Longest-Lasting Canned Foods for Your Stockpile
Water
Don’t take water for granted. It’s a primary ingredient in many of the meals on any menu and can be scarce during an emergency as food, heat, and electricity. Complicating everything is that water sources can become significantly polluted after a disaster.
Make sure you have water treatment equipment on hand. This could be as simple as a pitcher water filter, a backpacking water filter, or more robust water filtering and purification equipment. Even something as basic as Potable Aqua tablets can purify water.
Then again, you can always boil water to purify it if in doubt. But don’t assume that just using water in a recipe that might boil for a bit is sufficient. Water should be boiled at least 3 minutes to kill all bacteria. Any less is a risk and getting a water born illness during a disaster only makes everything worse.
Related: 20 Ways to Purify Water Off The Grid
Food Storage Packaging Solutions
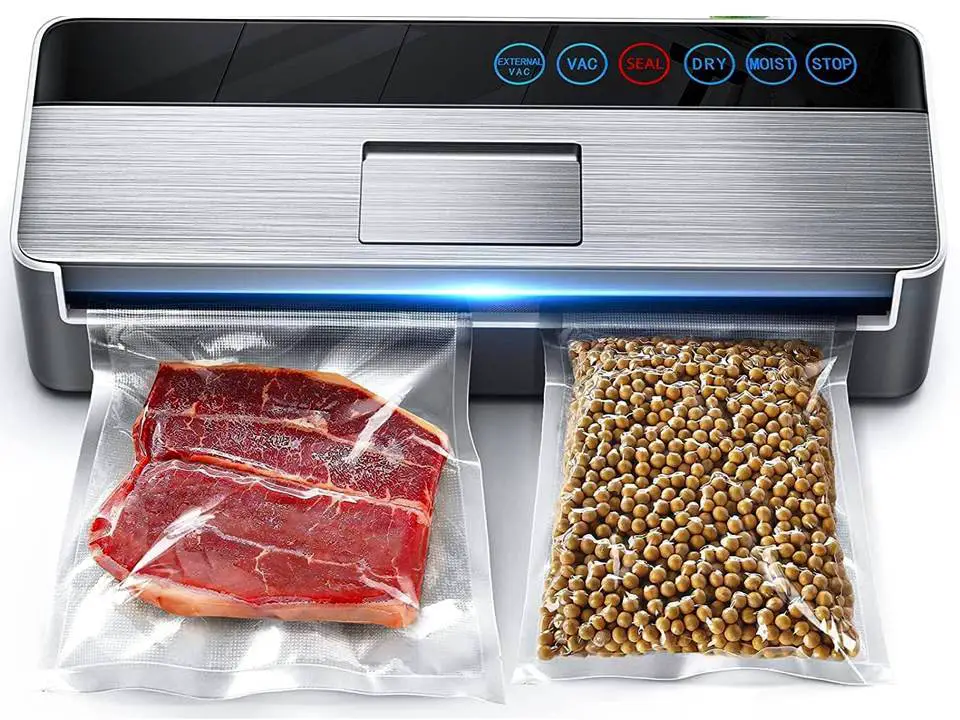
If you are processing and packaging your own food for long-term storage make sure you understand the nuances of proper food packaging. A vacuum sealer is a very good option for packaging many foods to deprive bacteria, molds and viruses from thriving in an oxygen-rich environment.
There are also oxygen absorbing packets that can be added to many packages to further ensure that your food doesn’t turn into a petri dish for bacterial growth.
Moisture absorbers are another option for food packaging. Moisture can not only create an environment conducive to bacterial growth, but is the primary reason that fungus often appears in stored foods.
Finally, mason jars that have been properly sterilized and handled with sterilized equipment can create an ideal environment for long-term storage of meats, and other highly alkaline foods that are prone to bacterial growth.
We mentioned pressure canning earlier and it also makes sense to purchase a pressure canner and understand the basics of how to preserve food safely for the long-term using a pressure canner.
Related: Vacuum Sealing: The Best Way to Preserve Anything
Pre-Packaging Breakfast, Lunch, Dinner and Snacks
One of the best ways to make meal prep easier is to prepackage recipes by combining all of the ingredients, whether dry or wet, in the same package. You can adjust the serving size to your family or package as individual servings.
The idea is to create what is sometimes referred to as “dump and stir” meals. You open the package, dump it into a pot or pan with or without water and just heat and stir.
It’s not always that easy, but it helps when everything else seems overwhelming. Just make sure you pay attention to proper packaging and processing if you’re going to store these meals for the long-term.
Related: How to Make Meals in Jars for a Rainy Day
Prepper Meal Plan
We’re going to explore emergency meal plans over 10 days for breakfast, lunch, and dinner. To get a 30-day food supply, just multiply the meals and the ingredients by 3. We’ll also provide total weights to put into food storage and identify calories for each meal.
It may seem that repeating the same meals every 10 days could get redundant, but 10 days creates enough space between the meal variations to still make it seem like a good mix. In fact, if you think about what you eat over a normal 10-day period, you may be surprised to see that they repeat at about the same frequency.
You can also vary the meal pattern, make a favorite more often or skip one here and there as long as you have a little extra ingredients on hand. Because some of the foods like flour, rice and beans are going to be stored you can improvise as well.
Most of the meals are easy to prepare from a pre-packed mix of ingredients, canned foods either purchased or home processed, and various dry ingredients made with water. Things like mixed nuts and dried fruits can also serve as snacks in addition to meal side dishes. The one ambitious addition is baked bread or biscuits that can be made in quantity when time permits for use in meal after meal.
Below is a list of suggested emergency meals for breakfast, lunch, and dinner, but you can come up with your own menu. Just make sure none of the ingredients need to be refrigerated, and make sure each person gets around 2500 calories per day.
Breakfast
Breakfast 1:
- Scrambled eggs with cheese (from cheese powder and dehydrated eggs)
- Biscuits with country gravy from a pre-packaged mix
- Coffee
- Fortified orange drink
Breakfast 2:
- Oatmeal with raisins and craisins and honey
- Bacon either canned or TVP
- Coffee
- Fortified grape drink
Breakfast 3:
- French toast (from home-baked bread and dehydrated eggs) with real maple syrup
- Dried fruit bowl (apples, apricots, peaches and raisins)
- Coffee
- 12 ounces Protein fortified Chocolate Milk
Breakfast 4:
- Cinnamon oatmeal with dried apple chunks and honey
- Egg and sausage omelet (from dehydrated eggs and canned or TVP breakfast sausage_
- Fortified Orange drink
- Coffee or tea
Breakfast 5:
- Hashbrowns with bacon bits (dehydrated potatoes and either canned bacon or bacon flavored TVP)
- Toast with butter (baked bread with blend of olive oil and butter powder)
- Fortified Grape drink
- Coffee
Breakfast 6:
- Pancakes with real maple syrup
- Breakfast sausage (canned)
- Dried fruit bowl (rehydrated berries, dried peaches and apricots)
- Protein fortified chocolate milk
Breakfast 7:
- Cream of wheat with canned fruit cocktail and honey
- Cheese omelet (with powdered eggs, cheese and butter powder with olive oil)
- Coffee or tea
- Fortified orange drink
Breakfast 8:
- Waffles topped with mixed dried fruit and maple syrup
- Scrambled eggs and bacon bits (egg powder)
- Coffee or tea
- Fortified grape drink
Breakfast 9:
- Mixed vegetable quiche (dried vegetables rehydrated and powdered eggs)
- Biscuits and jelly
- Coffee or tea
- Protein fortified chocolate milk mix
Breakfast 10:
- Pancakes mixed with chopped dried fruit
- Hashbrowns
- Coffee or tea
- Protein fortified chocolate milk
Lunch
Lunch 1:
- Vegetable soup (canned or premixed)
- Kippered herring and/or sardine sandwich
- Iced tea
Lunch 2:
- Canned chili with beans
- Cornbread
- Fortified grape drink
Lunch 3:
- Mac and cheese with TVP
- Dried fruit (apples, apricots, peaches)
- Fortified protein chocolate milk mix
Lunch 4:
- Beef stew (canned)
- Bread (baked)
- Iced tea
Lunch 5:
- Chili mac (canned chili and macaroni)
- Fortified orange drink
Lunch 6:
- Peanut butter and chopped dried fruit sandwich
- Mixed nuts
- Iced tea
Lunch 7:
- Canned soup
- Bread
- Fortified protein chocolate milk
Lunch 8:
- Tuna salad sandwich
- Dried fruit
- Fortified grape drink
Lunch 9:
- Peanut butter and jelly sandwich
- Raisins and craisins
- Iced tea
Lunch 10:
- Canned soup
- Brown rice and beans
- Fortified protein chocolate milk
Dinner
Dinner 1:
- Spaghetti (pasta and canned sauce bought or homemade and pressure canned)
- Garlic bread (garlic powder, butter powder and olive oil blended)
Dinner 2:
- Beef stew
- Biscuits
- Fortified grape drink
Dinner 3:
- Tuna and pasta casserole with cheese (powdered cheese) cooked in Dutch oven
- Fortified protein chocolate milk
Dinner 4:
- Beans and brown rice with dehydrated vegetables
- Mixed nuts
- Fortified orange drink
Dinner 5:
- Pasta, chicken and cheese casserole cooked in Dutch oven
- Canned fruit cocktail
- Fortified grape drink
Dinner 6:
- Tacos with homemade tacos, taco TVP, brown rice and rehydrated tomatoes, peppers, onions cheese powder/olive oil blend for toppings
- Iced tea
Dinner 7:
- Beef stew
- Biscuits
- Fortified protein chocolate milk
Dinner 8:
- Homemade flatbreads topped with a choice from a buffet of vegetables, tuna, herring and sardines, peanut butter and mixed nuts, beans or dried fruit
- Fortified protein chocolate milk
Dinner 9:
- Chili mac casserole with vegetables and topped with cheese
- Cornbread
- Canned fruit cocktail
- Fortified orange drink
Dinner 10:
- Steak fajitas with canned beef and homemade tortillas topped with cheese, rehydrated vegetables and beans
- Mix of dried fruit and nuts
- Iced tea
Shopping List (Based on 1 Adult)
All of the ideas above are made with the ingredient listed below. The quantity of each should create the portions and nutritional variety for 1 adult for 30 days across a rotation of these 10 meals every 10 days.
To expand the meals to more people, multiply by the number of people, although for kids you can multiply by half.
The cost will vary depending on how and when you buy them, but will typically cost much less than buying one of those pre-packed, one-month meal packages you often see on the Internet.
You also have the option to not only vary the types of meals to suit your taste, but make any necessary adjustments to ingredients that would adversely affect someone with a medical condition. Here’s the shopping list with links to give you a sense of pricing.
- 1 #10 Can Dehydrated eggs
- 1 #10 Can Butter Powder
- #10 Can Milk Powder
- 1 #10 Can Cheese Powder
- 1 #10 can Dehydrated Potato Shreds
- 1 #10 Can Chopped Onion
- 1 #10 Can Chopped Green Peppers
- 1 #10 Can Tomato Powder
- 1 #10 can Fortified Orange Drink Mix
- 72 Packages Grape Drink Mix
- 2 pounds Protein Fortified Chocolate Milk Mix
- 1 #10 Can of Taco TVP
- 3.5 Pounds Of Bacon TVP
- 14 Ounces of Instant Coffee and Powdered Coffee Creamer
- 4 Pounds of Sweetened Iced Tea Mix
- 12 Cans of Fruit Cocktail in Fruit Juice
- 48 Tea Bags – Assortment
- 1 Gallon Olive Oil
- 32 Ounces of Raw Honey
- 64 Ounces of Peanut Butter
- 32 Ounces of Mixed Nuts
- 200 Fruit Jelly Packets
- ½ Gallon of Real Maple Syrup
- 5 Pounds Brown Rice
- 10 Cans of Tuna in Oil
- 12 Cans of Sardines
- 12 Cans of Herring (Kippers)
- 20 Pounds Whole Wheat Flour (or Wheat Berries)
- 2 Pounds of Corn Meal
- 10 Pounds of Sugar
- Spices and Seasonings such as salt, pepper, cinnamon, garlic powder, or spices to suit your taste. You may have many of these already on hand in your kitchen pantry
- 10 Packaged Gravy Mixes (beef, chicken and turkey, pork)
- 1 Pound Yeast for Baking Bread
- Baking Powder and Baking Soda for biscuits, pancakes and waffles
- Hot Sauce (brand of your choice)
- Adult Vitamin Supplement – 200 tablets
- Children’s Vitamin Supplement – 120 tablets
Equipment for Cooking without Electricity
In an emergency you can use standard kitchen cookware over an open fire or charcoal grill for cooking, but there are some specialized cooking tools for off-grid cooking you might want to consider including:
- Dutch Oven
- Pressure Canner
- Cast Iron Skillets
- Campfire Cooking Tripod
- Campfire Cooking Grate
- Campfire Stockpot
- Solar Oven
- Propane Cookstove and Spare Propane Cylinders
- Campfire Cooking Utensils
Links to More Information
Having a one-month supply of shelf-stable foods in long-term storage is only the first step. Take the time to either learn about cooking without electricity or with these types of foods, or purchase some of the books that can give you a reference at a time when the Internet may be down or unavailable.
Articles:
- 10 Ways to Store Your Emergency Water
- 15 Homemade MREs That Will Last for Years
- Home Preserved Foods that Should NOT Be Stored Long-Term
- How to Make Flour from Beans, Nuts and Seeds
- How to Make Pioneer Cornbread
- How to Safely Can Meat at Home
- How to Store Rice Long-Term
- How to Turn Meat Into Powder for a Longer Shelf Life
- Survival Cooking After The Collapse of Society
Books:
- The Cowboy Cookbook
- The Dutch Oven Camping Cookbook
- The Emergency Cookbook – Cooking Without Electricity
This Can Be a One-Time Thing
The value of the approach we’re taking here is that it’s not a significant investment for years of survival. It also doesn’t require the constant discipline of eating what you store, and storing what you eat.
If you buy carefully and stick to foods with proven shelf-lives, and at least check on them every couple of years, you can store this food supply once and at least have the reassurance that you’re ready for a disastrous situation.
And don’t forget, most of us already have pantries with everyday foods that can supplement this plan. All you have to do is take the time and some extra money and patiently store these foods. With any luck, you’ll never need them, but you’ll at least have one less thing to keep you up at night.
Like this post? Don't Forget to Pin It On Pinterest!
You May Also Like: