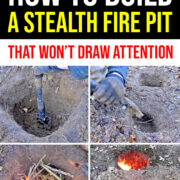


Estimated reading time: 13 minutes

It’s a Fire in a Hole with an Air Vent on the Side.
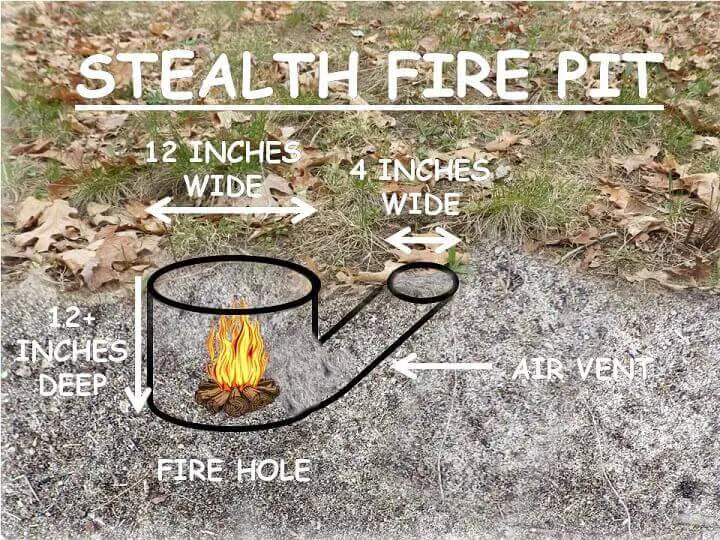
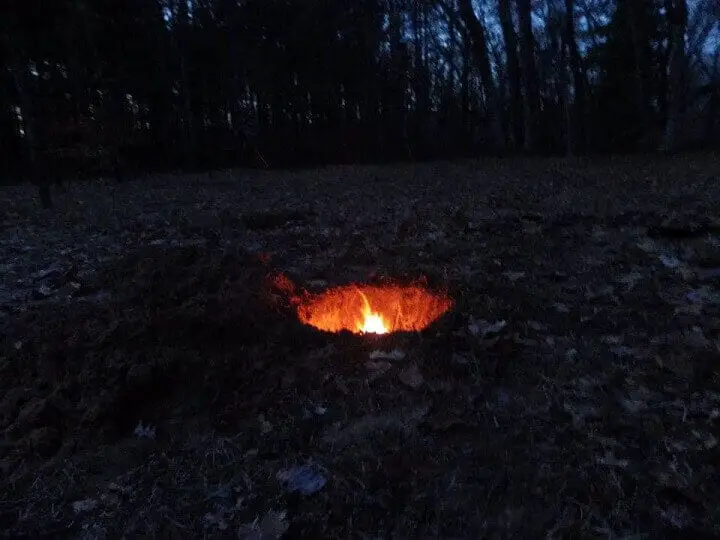
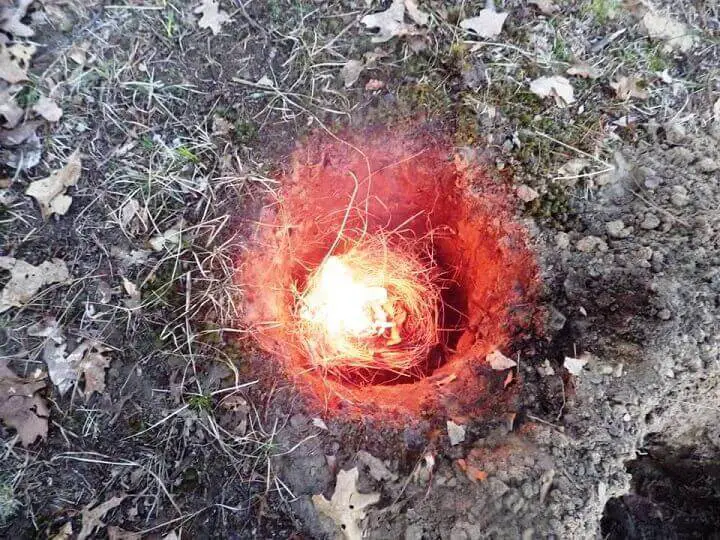
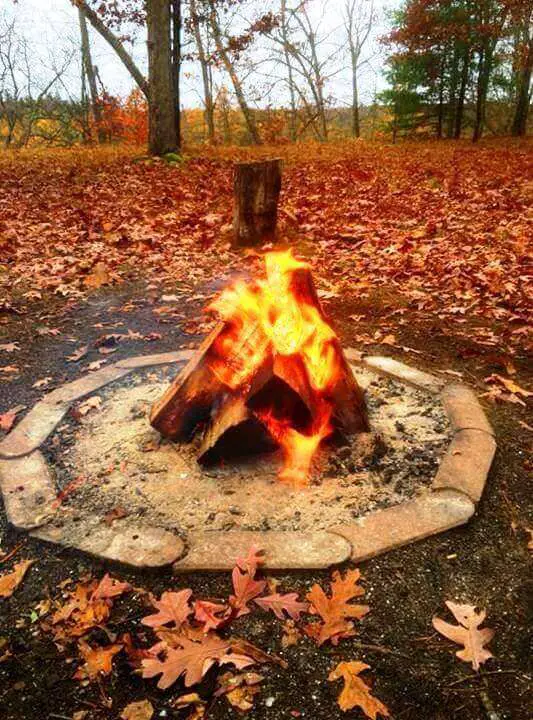
There’s a stealth fire building concept sometimes known as the Dakota Fire Pit. It’s a campfire design that burns surprisingly hot and, because it’s built inside a hole, doesn't broadcast a flame that would be visible for miles.
It requires a bit of engineering including a second vent hole located upwind and dug at an angle down towards the base of the main fire hole. Check out the diagram below to see what I mean.
Want to save this post for later? Click Here to Pin It On Pinterest!
It’s An Old Idea
The idea of the Dakota Fire pit was to build a fire for cooking or warmth that would not be visible to others. Pioneers crossing the plains often didn’t want to attract attention and one story attributes the name to homesteaders and army scouts trying to avoid the attention of hostile tribes in the late 1800s across the Dakotas.
It’s the Rocket Stove Concept in the Ground
A Rocket Stove is designed to draw air with a lower vent in the stove. The airflow caused by the heat from the fire draws air into the vent to feed and continuously fuel the fire. A stealth fire pit operates on the same principle except the air vent is dug in the ground.
Finding a Location
There are a lot of opinions on the best location for a stealth fire. It goes without saying that the location should be obscured by its surroundings. It also makes sense to avoid the top of hills or ridges. But then there are conflicting opinions on the exact location.
Some advise that it be built next to a tree with small trees and leaves directly above to diffuse the smoke. That may not be the best idea.
A fire built in a hole effectively blocks the light of the fire from being seen at a distance but the light of the fire will illuminate anything above or directly next to it, and smoke will do what it wants to do regardless of some leaves on a tree.
Other opinions recommend relatively open ground in an obscured area to avoid illuminating surrounding trees, cliffs, or large boulders.
Don’t light up the night.
Given the range of opinions, it seems best to build the fire pit in an area that’s hard to see at a distance without nearby tall natural structures that can be illuminated by the fire below.
Building a Stealth Fire Pit

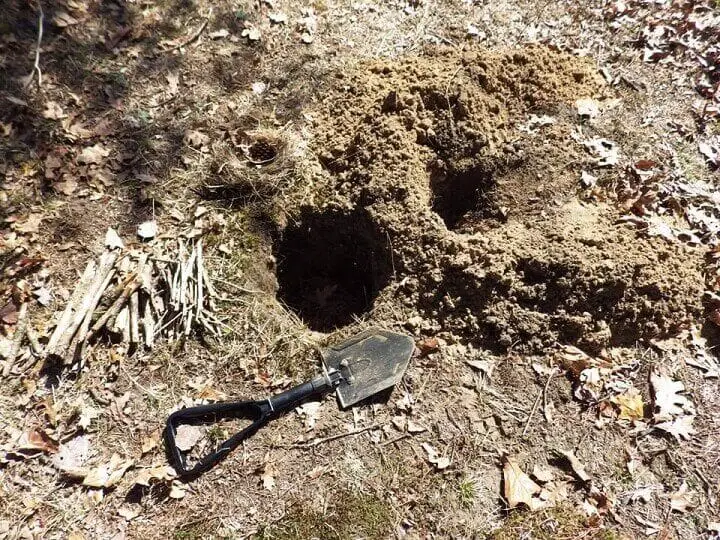
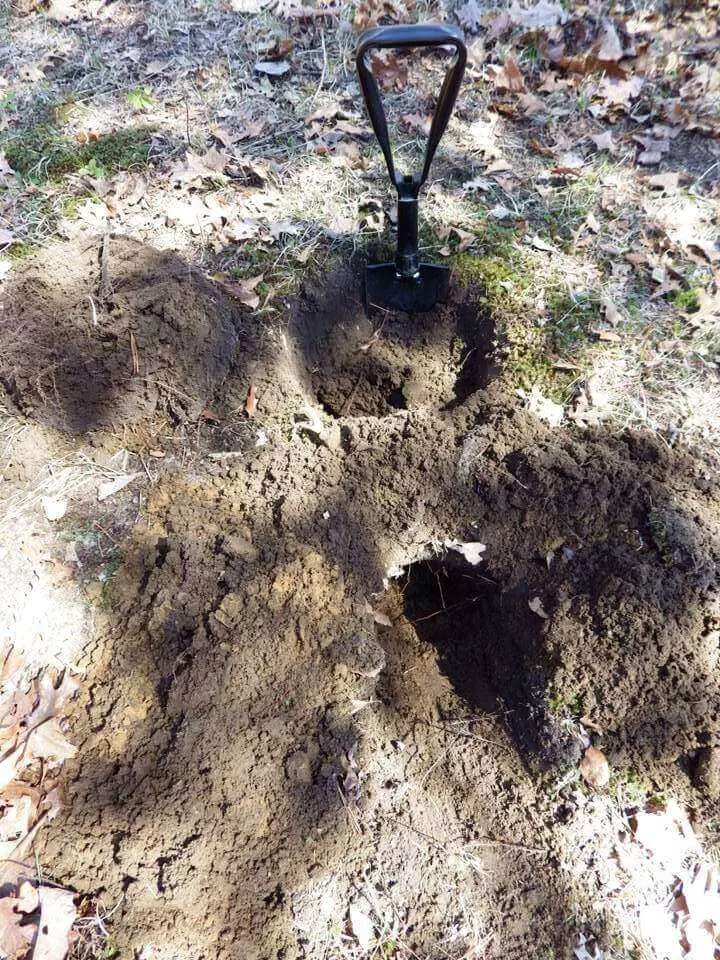
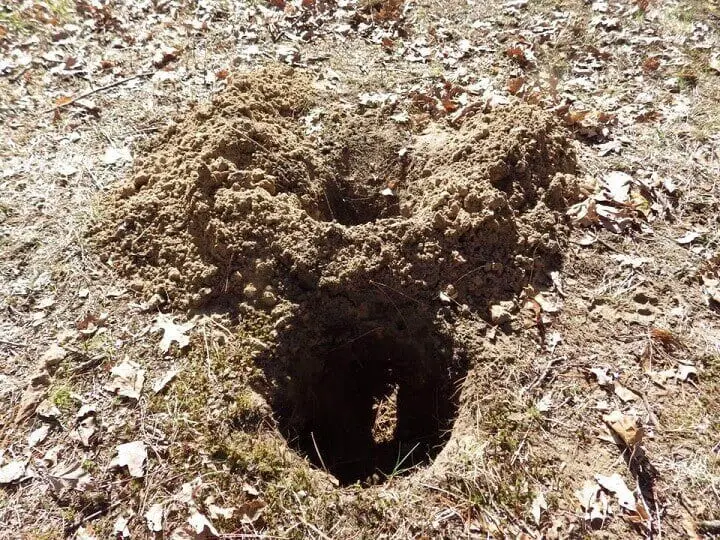
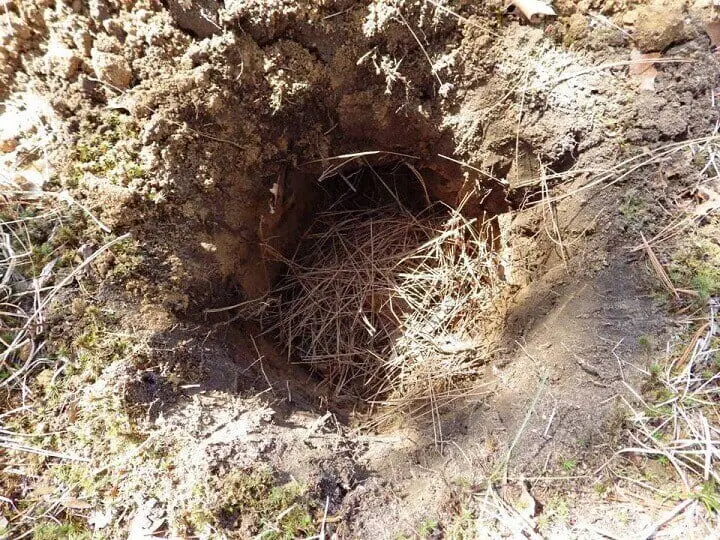
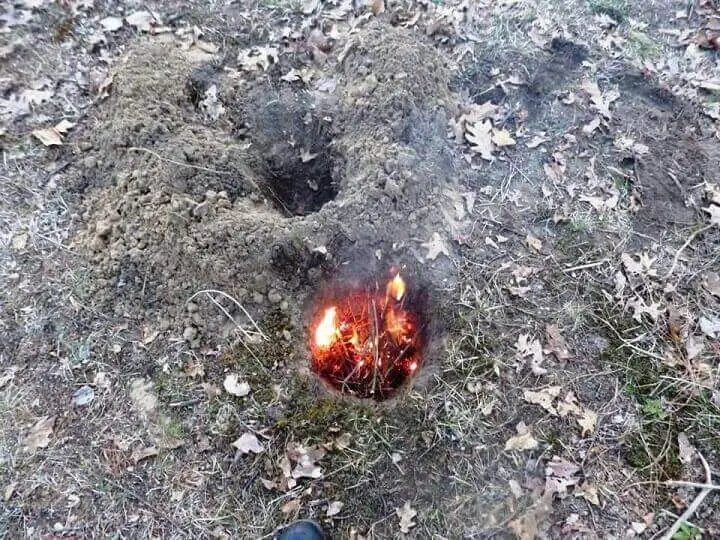
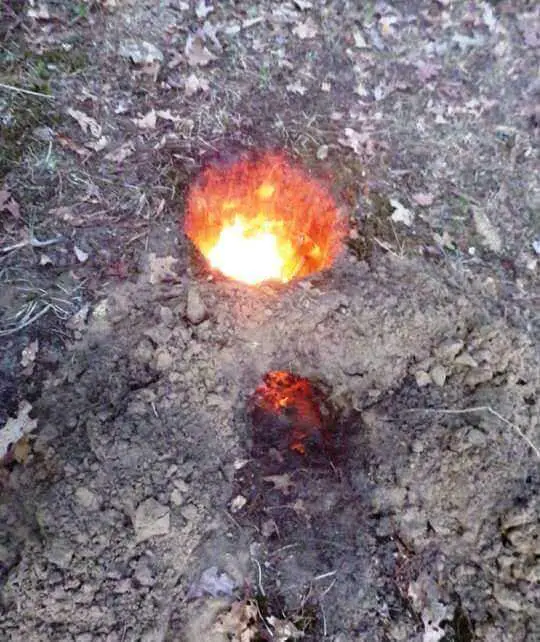
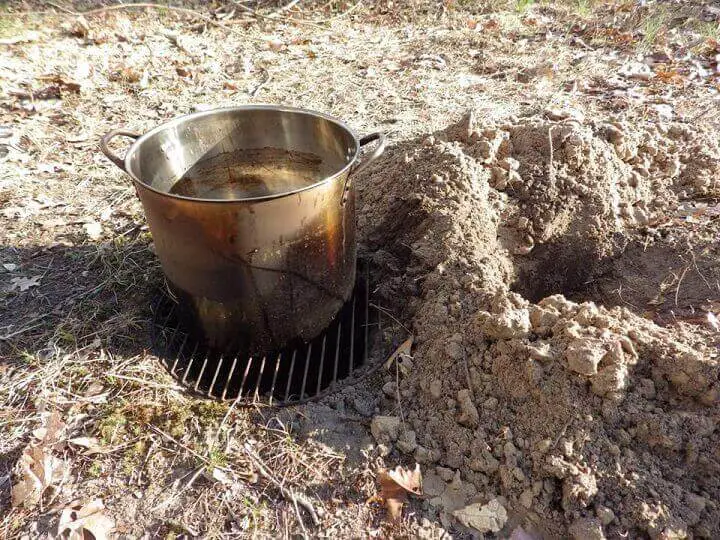
You’re going to be digging two holes. One hole about a foot in circumference and the second smaller hole about a foot away from the first hole measuring about 4-inches in circumference dug at an angle to the base of the fire pit bottom.
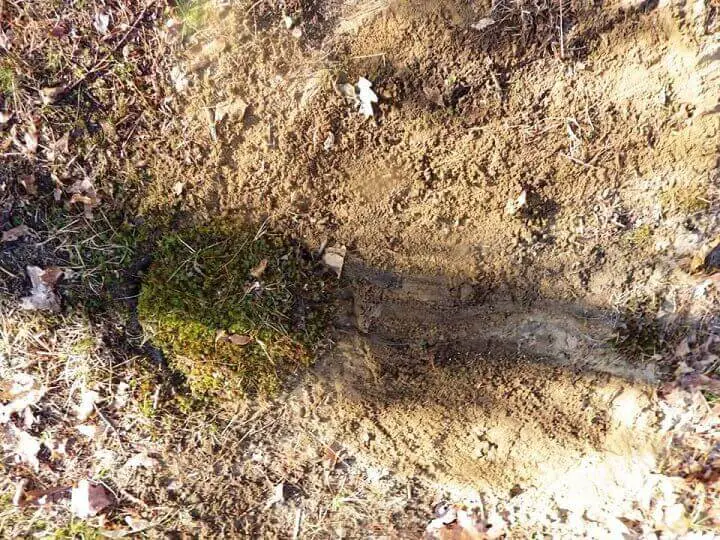
Cut your fire hole first by using your shovel to define a circle about a foot in diameter. Try to loosen the soil and sod in one piece and set it aside.
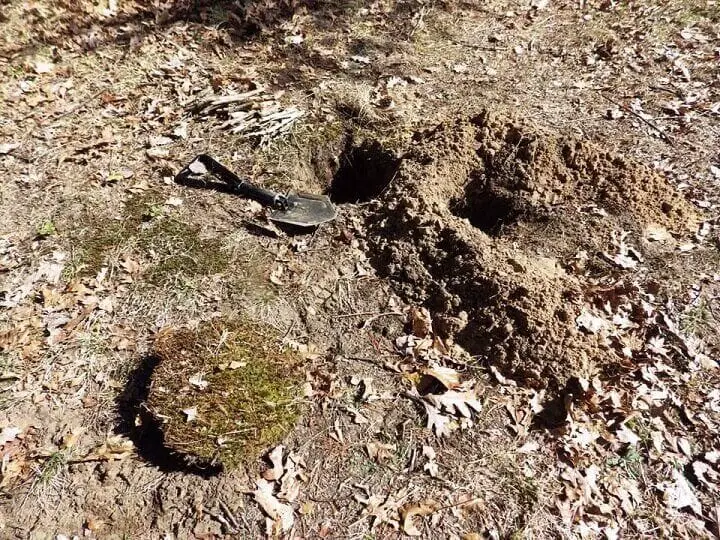
Save the sod.
After you extinguish your fire and fill the hole with soil, you can replace the sod circle over the fire hole and scatter some debris so you don’t leave any signs of your fire or your presence in the location.
Dig straight down.
The primary fire hole should be dug straight down at least a foot deep. A shovel is best, but a sharpened digging stick will work in a pinch. In fact, you’ll probably need a digging stick to dig the air vent on an angle to the fire pit. Get ready to use your hands for some digging as well.
Soils Challenges
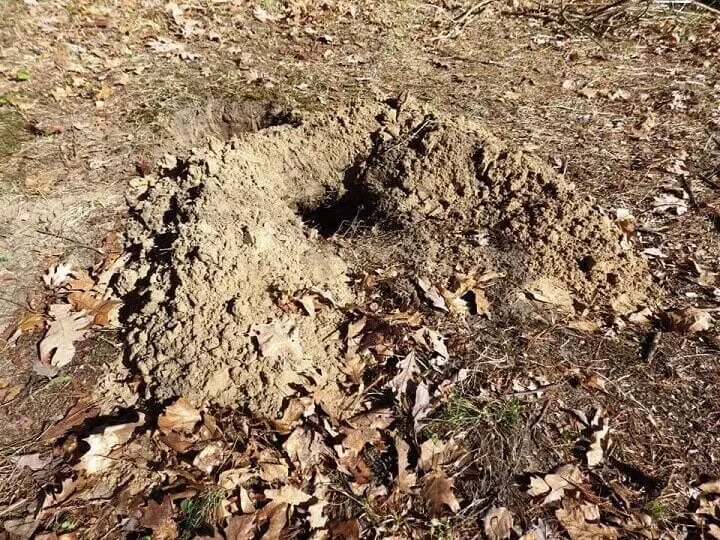
Digging the primary fire hole is fairly straight forward and your only challenge may be the occasional root or rock. If the soil is just too flinty or riddled with roots, move on and find another spot.
The biggest challenge is digging the fire vent. It should be dug upwind from the primary hole, but digging an angle to the base is the hard part. Be patient and work a little at a time while estimating how your angle can meet the base of the main fire hole.
Sandy soil can be the biggest challenge and if your vent hole collapses, you can bridge the gap with sticks and stones and cover it with soil. Clay has the most structural integrity but if you’ve ever dug through clay, you’ll probably wish it was sand.
Advanced Vent Work
Your vent hole is what will keep your fire going. Hopefully, the air finds its way down there. Any wind will help and the heat from the fire will draw some air from the vent, but you can do a few simple things to make the vent more efficient.

Capturing the wind.
- Dig a shallow sloping trench pointing upwind a bit downward and outward from the vent hole rim.
- Mound some soil up between the vent hole and the fire pit to serve as a wind stop to catch a bit of breeze and force it downward.
- And make sure you dig your vent upwind of the prevailing wind if you can.
You don’t have to overdo it, but it all helps a little.
Building the Fire
Starting a fire in a steeply dug hole is a little different than conventional fires. The problem is lighting tinder at the base of a fire built and stacked in a hole. Here are some ideas about how to make that easier.
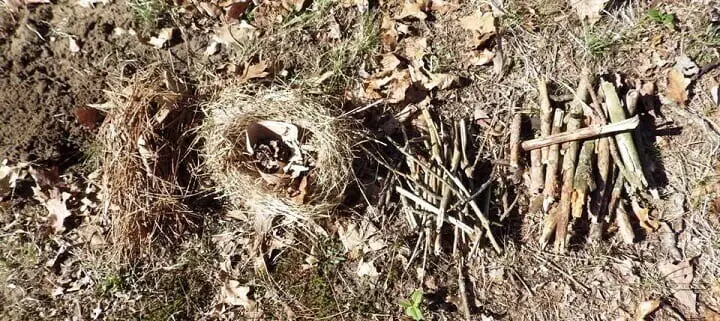
1. Build A Tinder Nest
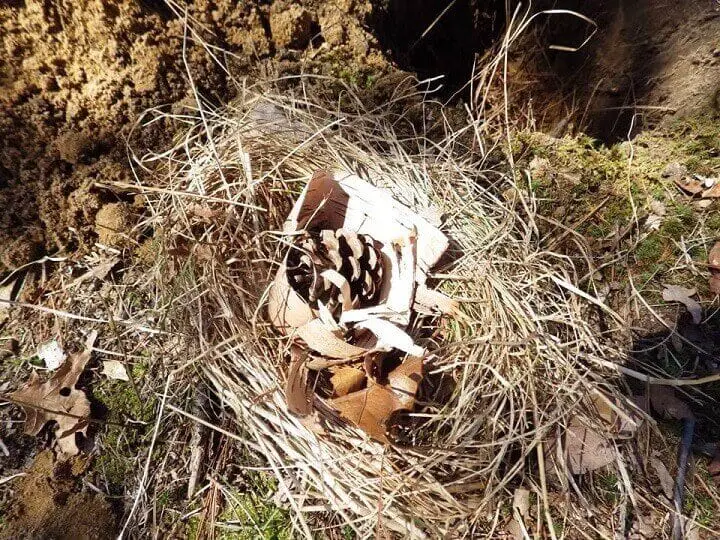
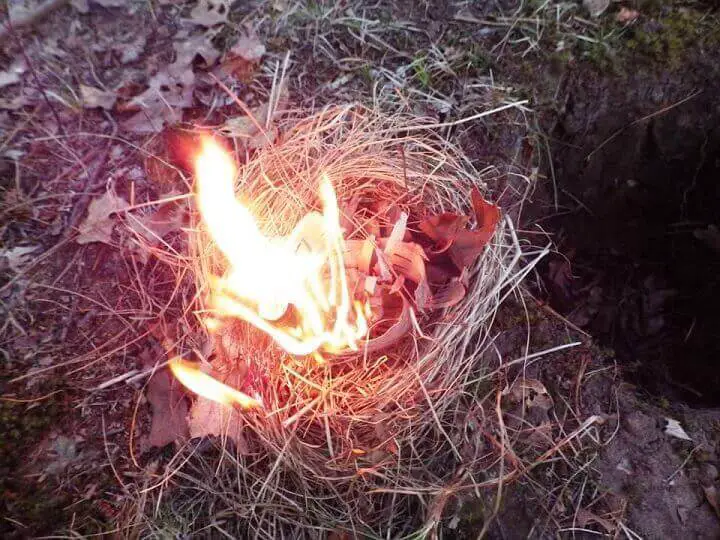
This is as simple as coiling some dry grasses or weeds to make a small nest and adding your tinder to the center. You should have some kindling stacked next to you while you hold the nest and light it and then drop it down into the empty hole.
As the tinder burns, drop kindling on top to keep the fire going. A piece of bark also works to hold and deliver your tinder to the bottom.
2. Line The Bottom Of The Pit With Tinder
Because you're dropping your kindling into the fire pit, you want to get your fire off to a good start. Lining the bottom of the pit with tinder will give your tinder nest added fuel. This will make it easier to get the kindling burning and get your fire pit lit.
3. Use Dry, Dead Wood
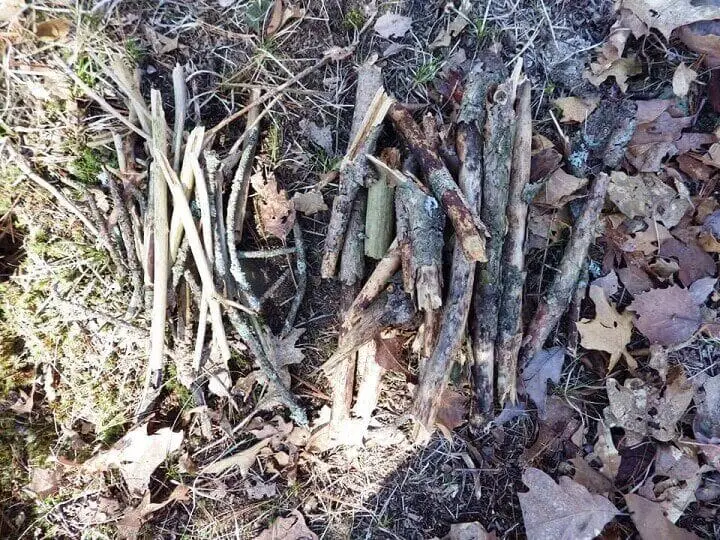
Smoke at night is less of an issue but you really don’t want a smoky fire. Avoid green branches or dead branches that have been lying on the ground and have become saturated with moisture. Once your tinder is burning, drop your kindling into the pit and you should be good to go.
4. Keep It Small
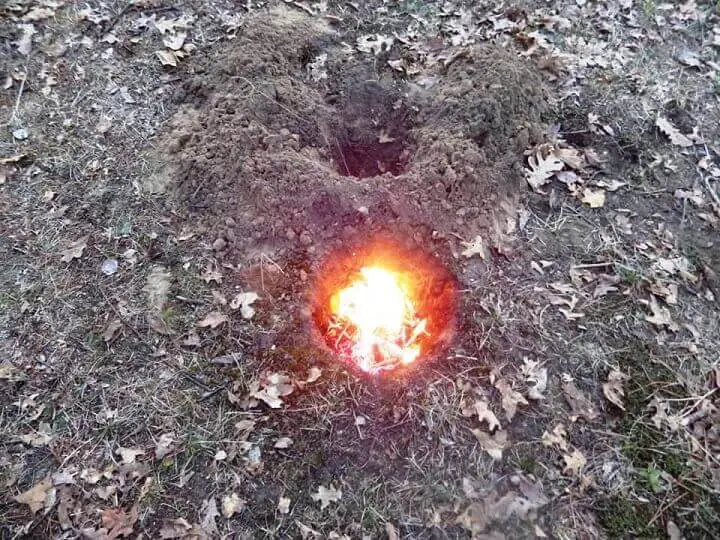
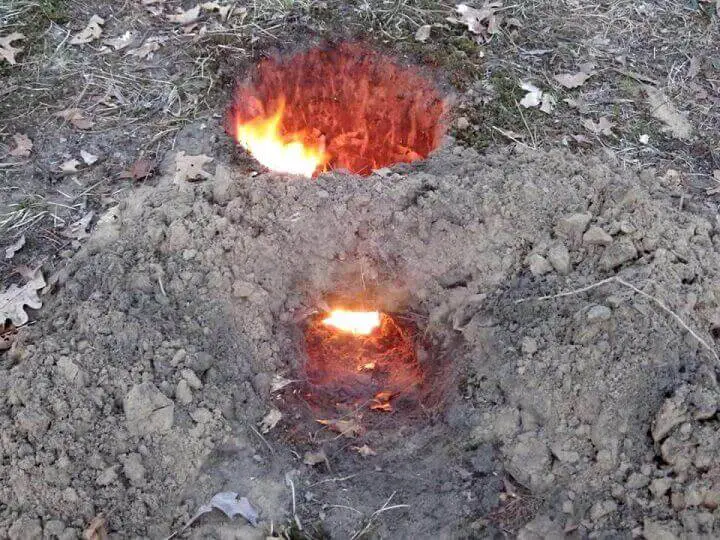
The idea of a stealth fire is to keep a low profile. The fire you build should keep a low profile as well. As the coals burn down any wood you add will quickly ignite due to the convection from the vent. Don’t make it big enough for the flames to lick and leap over the edge of the pit.
If you’re trying to avoid attracting attention, that’s a sure giveaway.
Speaking of Smoke…
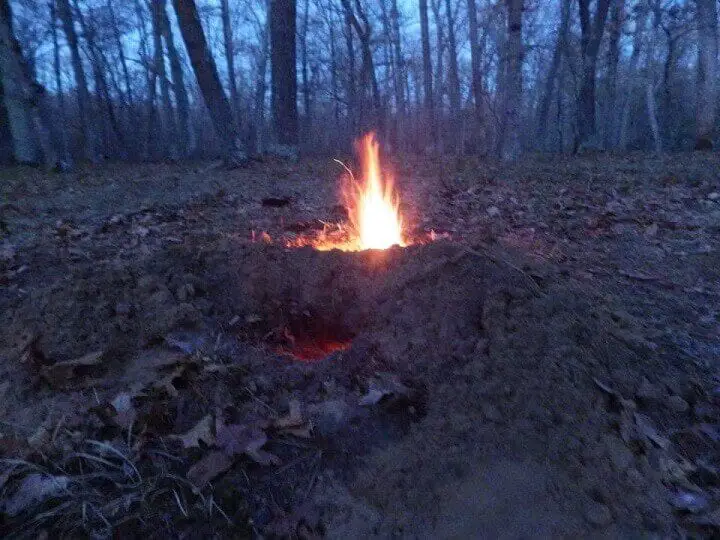
Firelight is what betrays a location at night. Smoke is the giveaway during the day. If stealth if your goal, smoke is your enemy during daylight hours.
The best time for a Stealth Pit fire is when it's windy. It will not only fuel your air vent nicely but will dissipate any smoke your fire produces. Traditional campfires fail in the wind.
The heat is blown horizontally away from the fire making it difficult to cook and providing little warmth on a cold day. The fire also tends to burn out quickly.
A stealthy, pit fire doesn’t have that problem. The walls of the hole concentrate the heat, channeling it straight up and making short work of boiling water in a pot over the pit or taking the edge off of cold hands and feet. It also protects the fire from rapid burnout in blustery winds.
Finally, it presents less of a fire hazard especially in early spring and late fall when the surrounding vegetation tends to be dead and dry. If you’re trying to keep a low profile with a fire, starting a forest fire is highly counter-productive on many levels.
After the Fire

A fire in a hole is a good idea if you don’t want to be seen. Leaving the hole behind is a good clue that someone was in the vicinity.
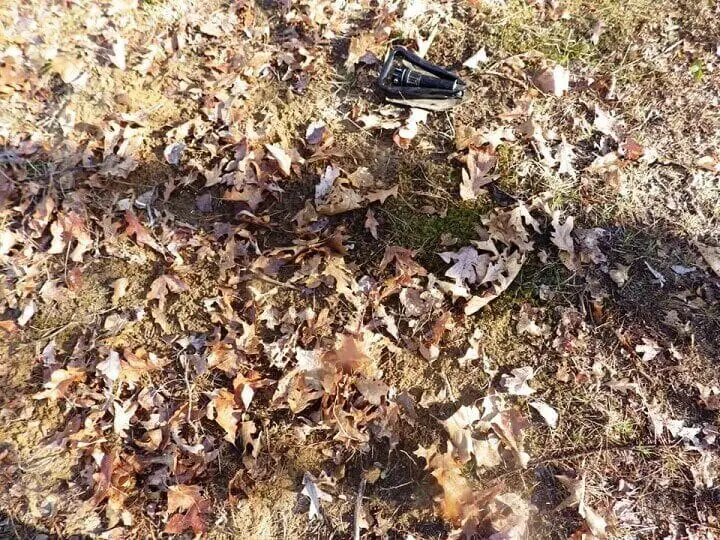
When it’s time to move on, fill the hole and replace the piece of sod you dug out. Gather some brush and other detritus and spread it around on the ground around the area of the fire. You want to make it look like you found it -undisturbed and not traveled.
It’s a Good Fire Option for Any Reason
A deep, pit fire is a great option for cooking, warmth, and windy days in addition to being hard to see from a distance. It’s also a smart idea if an area has any risk for a forest fire. Then again, any fire can cause that to happen so be careful out there.
Hopefully, the only reason you ever build a Dakota Pit fire is to boil some sweet corn or tame a high wind. But it’s always good to know and understand the concept… just in case.
Like this post? Don't Forget to Pin It On Pinterest!
You May Also Like: