

Estimated reading time: 13 minutes
Compared to many of you, I am still at the beginning of my journey as a prepper. I really only started looking into preparedness when my 2-year-old son was born. It's surprising how much becoming a parent makes you think about the need to protect your family. Ever since then, I've wanted to make sure that if a disaster does happen, I'll be able to keep my wife and son warm, fed, and safe.
In addition to learning more about survival, I've been practicing archery since 2010. The aim of this article is to introduce fellow survivalists to archery and explain why it's a good skill to learn. I’ll also go into detail on the pros and cons of using bows as a way to defend yourself and your family, and I'll explain the different types of bows and which ones would be best to get.
I want to reassure you that if the SHTF, you won’t need to be a master archer. Knowing the basics should be enough to get you started and keep you safe and well-fed. Let’s get started…
Want to save this post for later? Click Here to Pin It on Pinterest!
Why Archery is A Good Skill To Learn
Some of you might be thinking, why should I learn to shoot a bow and arrow when I have access to other weapons such as guns? There are five reasons why I think learning archery is worth the effort.
1. Provides A Food Source
If the SHTF, food might be hard to come by, so you might have no choice but to go out and hunt for food. A bow is an incredible tool to help with hunting game, but it can also be used on other food sources. For example, bowfishing uses the bow to catch fish.
The benefit of a bow over a gun is that it allows for stealth hunting, allowing you to get closer to your intended target and thus increase your chance of hitting it. Due to the noise a gun can produce, a bow doesn't give away your position.
2. Portability
We don't know what situation might require you to get out in the wild and survive. In certain situations, you won't have the luxury of traveling with a lot of equipment. There are many bows that are known as “takedowns.” These allow you to take the bow part into much smaller pieces, making it much easier to travel with.
3. Low Cost
If you are like me, you are probably looking at a lot of items needed to protect yourself and your family. It's therefore good to know that you can get a decent takedown bow for a couple of hundred bucks or less. You don’t need a really expensive bow. As long as it can shoot your arrows with accuracy and power, that will be good enough.
Another thing to think about is arrows. They tend to be very cost effective and, as you improve your archery skills, you should be able to retrieve your arrows and continue using them. And unlike ammo for guns, you can easily learn how to make your own arrows.
4. Less Paperwork and Less Strict Laws
There are a lot of laws and paperwork involved in owning a gun. With archery, you don’t actually have to worry about any of this. The main law is that you cannot walk around the streets with the bow fully strung and an arrow nocked, which is understandable.
5. Improved Fitness Levels
If you have to focus on surviving, it helps if you have some degree of fitness. You don’t see many survival films where the main character is overweight and out of shape. Archery isn't going to give you the body of Thor, but it can definitely improve overall fitness.
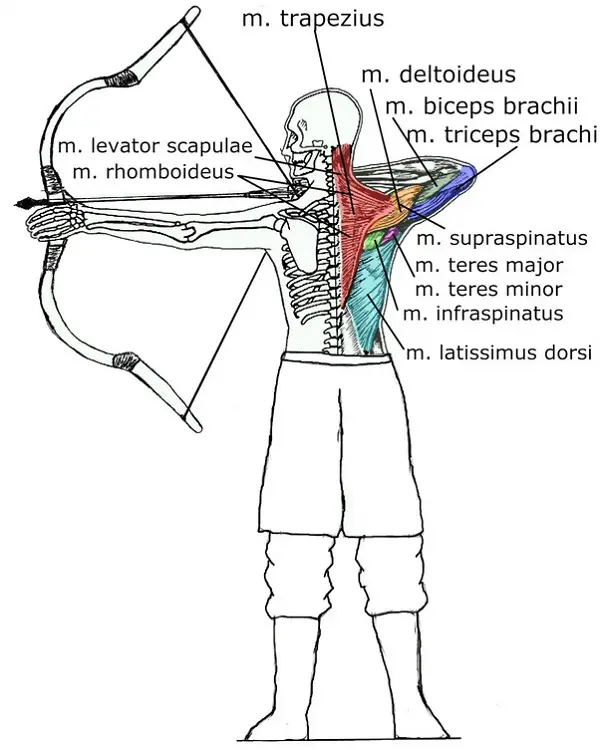
It helps your upper body strength due to the amount of weight you pull back when you draw the bowstring, and it helps burn calories with the amount of walking needed to collect shot arrows.
Whether we need to defend ourselves from aliens, zombies, or a Grizzly bear, bows are an excellent weapon to use. Below are the pros and cons of using a bow as a method of self-defense.
Bows for Self-Defense – Pros and Cons

Pros
- Low Cost
- A wide range of bows available
- Portability
- Ease of learning
- Shoots with little sound
- Legal to own
- Can make your own ammo
- Quicker to take multiple shots
Cons
- Takes time to master
- If unstrung, bow takes longer to set up
- Risk of breaking higher than a gun
Types Of Bows And Which Is The Best For Survival
Before I talk about which bow I think is best for survival, I'll explain a little about the different bows available. There are four types that are the most common and each one has its own pros and cons.
1. Longbow
The longbow is probably one of the more iconic bows. It’s the type you see in many medieval/fantasy films. These bows are made from one long piece of wood with a string attached from one end to the other. Longbows are known for the speed and power. However, this does come at a cost. It's a lot harder to pull back the drawstring.
As these bows are also made out of a single long piece of wood, they are harder to transport/store.
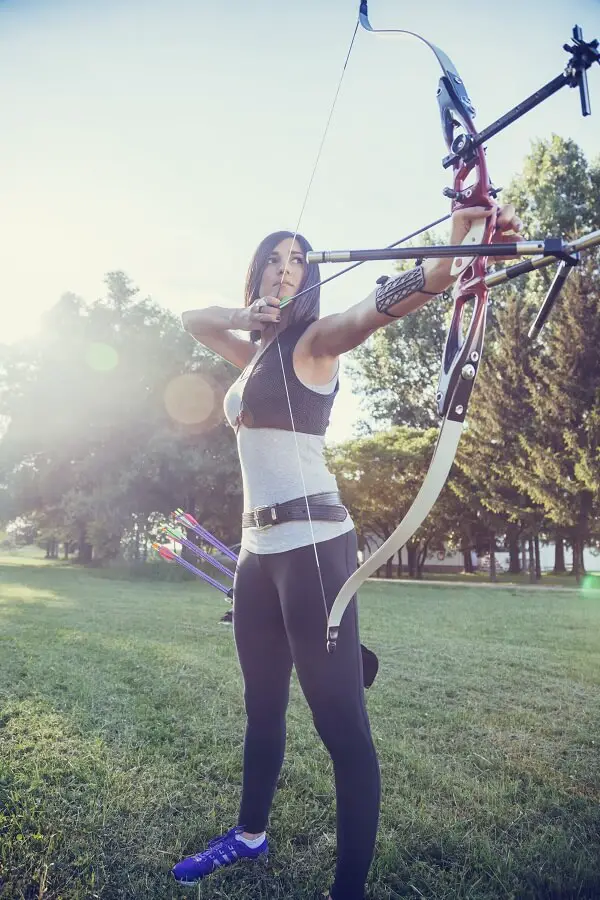
2. Recurve
Recurve bows look very similar to a longbow, except the limbs (the bit the bowstring connects to) are curved and pointed away from the archer. This helps them to produce more energy and thus shoot with a decent amount of power and speed. Many recurve bows are also takedown bows, which means the limbs will either unscrew or simply pull off, which makes it much easier if you needed to travel with it.
They usually don't have as much draw weight as longbows, but if you're planning on using it for survival, you would want one that has a draw weight of 40 pounds or more. You'll need to hold this weight when aiming at your target, which can be very tiring.
3. Compound
Compound bows are a little more futuristic in their design; they use a cam and pulley system. At the end of each limb is a cam, and the bowstring goes around these. When you draw the bowstring back, it goes through the cam system. It is this that causes something called Let off. Basically, if you have a 60-pound compound bow when fully drawn, the cams take over so its like you are only holding 15 pounds. This makes it much easier for you to walk around with it fully drawn, or spend a little longer aiming at your target.
The major downside to these bows is that you cannot take them down, making it hard to travel with them. And due to the pulleys, if any of these parts were to break, you might not have the parts available to easily fix them.
4. Crossbow
The last bow is the crossbow. This is more like a hybrid as it combines elements of a bow with a gun as you shoot the bolts with a trigger button. The main benefit of crossbows is that you can easily walk around with them once the bolt is attached, allowing you to aim longer and be prepared. They can also shoot with incredible speed and strength, although some will comment that they are not as accurate.
The main problem with crossbows is that they're sophisticated, there are many different mechanical parts. These parts have a risk of breaking or malfunctioning, which you might not be able to get fixed. Depending on the crossbow, some can take a lot of effort to load.
Which type would I recommend?
If I was going to choose from one of the above, I think the best would be recurve bows. I recommend this type of bow over the rest for many reasons. The number one reason is the fact that you can take them down, which makes them easier to transport. It also means they take up less space.
The recurve bow is also very simple and not overly complicated, which means you simply attach the arrow, aim, and shoot. You don’t need to worry about all the different mechanical parts.
How To Start Learning Archery

There are some excellent resources online that will teach you how to get started in archery. There are also clubs in every state, so you should be able to find one local to you that might run a beginners course.
Below are some basics to getting started, but I highly recommend getting some formal training or spending as much free time practicing as possible.
5 Quick Steps to Shooting a Bow
The following steps are not going to get you hitting your target each and every time. They will, however, help you get the basics down.
Step One: Standing Correctly
You might not think you need to focus much on how you're standing. It is, however, an important lesson to learn. If you are not stood correctly, you won’t be able to get a full draw of the bowstring, which means the strength and power won’t be in the shot. You could also find your balance being off and your arms not being positioned correctly, resulting in your arrow not hitting the target.
You want to stand sideways against the target with your legs split so they are shoulder-width apart. Your feet should be perpendicular to the target, your shoulders relaxed, and your chest up. Check out this video to help explain the stance in more detail.
Step Two: Nocking The Arrow Onto The Bow
On the arrow, you will notice a plastic part at the back. This is called the nock. When we say “nocking the arrow”, this is basically connecting the nock to the bowstring, which fastens it in place.
You will also notice the arrow has three plastic vanes just below the nock. Two are an identical color and one is a different color. You need to make sure you place this on the bowstring so the single color is pointing away from the bow. When you nock the arrow, you will hear a click. The tip of the arrow is then positioned onto the arrow rest.
Step Three: Holding the Bow
If you are right-handed, then you will be holding the bow with your left hand. Simply place your hand around the grip of the bow; it should fit comfortably. Many people grip the bow, but this is wrong as it can cause you to move the bow after you have shot the arrow.
As you pull the bowstring back on the next step, you will notice that it causes the bow to be held more securely on its own in your hand. The thumb should be pointing toward the target and your remaining fingers should be relaxed and positioned at roughly 45 degrees on the bow.
Step Three: Drawing The Bowstring
When you draw the bowstring, you want to ensure your first three fingers are placed around the bowstring just below the arrow with the string sitting in the first groove of your fingers. The thumb should be positioned pointing down towards the palm and your little finger tucked away.
Keeping your elbow straight, pull the bowstring back until your fingers get to the corner of your mouth. This is what we call an anchor point, and as long as the technique remains the same and your anchor point remains the same, you can soon learn to predict where the shot will go. It should hit the same target every time.
When you first get started, you will feel the pull on your shoulder and upper back. As you practice, these muscles will strengthen and it will become easier. It’s important to make sure you keep your elbow in line with the arrow, as this will help provide additional power to the shot.
Step Four: Aiming
With the bowstring drawn, you want to start aiming at your target. If you are using a sight, position the pin on your intended target. If you are not using a pin, then you might find you will need to raise your arrow slightly above the target. This is because you are looking through your eye line, and the arrow is a little lower than that.
Try not to spend too much time aiming as you are holding a lot of weight on both arms. If you wait too long, they will get tired and start to shake. Breath, aim, and shoot. Ideally, you want to do it in a couple of seconds.
Step Five: Shooting
When they let go of the bowstring, many people pluck it like a guitar string. This will cause the arrow to go off course and will result in it having less power. We call the shooting step the “release.” This is because we are “releasing” the bowstring from our fingers. Simply ease your fingers off the string and allow it to escape and propel the arrow at your target.
It is important that as soon as the arrow leaves the bow, you remain still. Many people are tempted to move the bow or their head to look and see where the arrow has landed. This will impact your arrow's movement and could push it off target. Allow the arrow to leave your target, and when you hear the “twack” as it hits your target, then you can take a look and see if it reached your intended destination.
NOTE – Don’t Dry Fire Your Bow!
Dry firing is when you draw the bowstring back and release when there is no arrow nocked. This can result in the bow breaking as the energy is normally transferred to the arrow when you release the string. If there is no arrow, the energy will go into the limbs and could break them.
It’s very important that you do not do this, as it will void your manufacturer's warranty.
Conclusion
So there you have it. I've explained why I think you should learn archery and how to get started. It’s something I am continuing to improve on so I can look after my wife and son after the SHTF.
This guide is fairly long and the steps on actually learning archery were as concise as possible, but hopefully, it still gave you a basic understanding. There are many resources online that go into even more detail.
If you do have any questions, please leave a comment and I'll be more than happy to offer any advice.
Useful Sites:
Like this post? Don't forget to Pin It on Pinterest!
You May Also Like:

Related Posts:
 6 Tips To Help You Survive a Blizzard
 Best Prepper Jobs To Help Rebuild Society After SHTF
 The Government Will Help These Cities First After The SHTF
 5 Tips To Help You Handle Extreme Environments after Bugging Out
 10 Gray Man Tips To Help You Blend In During A Crisis
 9 OTC Items To Help Fight Radiation Poisoning
Related Posts:
6 Tips To Help You Survive a Blizzard
Best Prepper Jobs To Help Rebuild Society After SHTF
The Government Will Help These Cities First After The SHTF
5 Tips To Help You Handle Extreme Environments after Bugging Out
10 Gray Man Tips To Help You Blend In During A Crisis
9 OTC Items To Help Fight Radiation Poisoning

