


Estimated reading time: 5 minutes
When you're deep in the wilderness, knowing how to preserve meat can mean the difference between feast and famine. And one of the oldest and most reliable methods for doing this is making jerky. Whether you're a hunter, backpacker, homesteader, or simply preparing for a grid-down scenario, the ability to turn fresh meat into long-lasting jerky is a survival skill worth knowing.
In warm, dry weather, the process is surprisingly simple; there are no special tools or ingredients required. But in cool or damp conditions, you'll need to get a bit more creative, possibly building a primitive smoker to get the job done.
In this video, Clay Hayes explains how to turn raw game meat into shelf-stable jerky that can easily last for months. You can watch the video and read the instructions below.
Want to save this post for later? Click Here to Pin It On Pinterest!
As Clay points out, meat spoilage can be deadly. Chris McCandless, from Into the Wild, died of starvation despite having killed a moose. Without the knowledge or means to preserve the meat, it spoiled quickly, and the consequences were fatal.
The core issue is microbial activity. Meat spoils because bacteria grow in the presence of moisture. So the key to preservation is simple: remove the moisture. If you dry the meat thoroughly, and you can keep it without refrigeration.
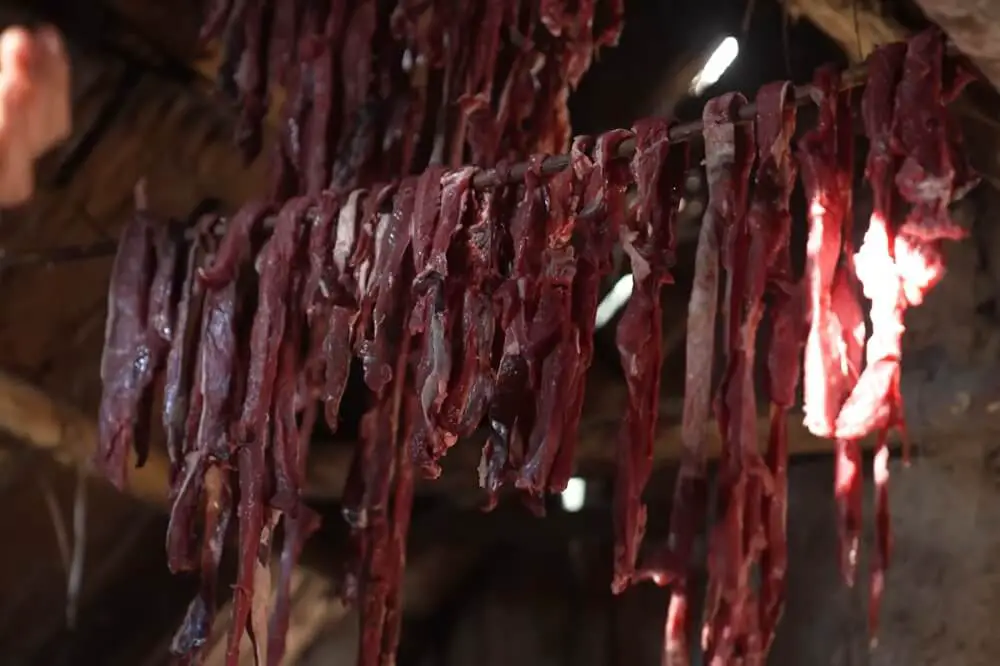
Method 1: Building a Primitive Smoker for Cool or Damp Conditions
In wet, cool environments, air drying isn't enough. You'll need to build a smoker to safely dry the meat. Here’s how Clay does it:
Materials Needed
- Green (non-coniferous) wood for smoke
- Small dry firewood
- A rack built from sticks
- Covering materials (like bark, a tarp, or branches)
Step-by-Step Instructions
- Build the Rack: Construct a simple drying rack using sticks to hang your meat from. It should be above your fire but not directly in the flames.
- Start a Small Fire: Build a small fire underneath the rack and let it die down to coals.
- Add Green or Punky Wood: Once the fire is reduced to coals, add green hardwood (Clay uses plum tree wood). Avoid conifers like Douglas fir, which can give the meat an acrid taste.
- Enclose the Smoker: Block off the smoker with surrounding material to trap the smoke and heat. This helps dry the meat slowly and evenly.
- Maintain Low and Slow Heat: Keep the smoke going for hours or even days, depending on how thick the meat is sliced. Rotate the meat periodically for even drying.
Bonus: The smoke not only dries the meat but also inhibits bacterial growth.
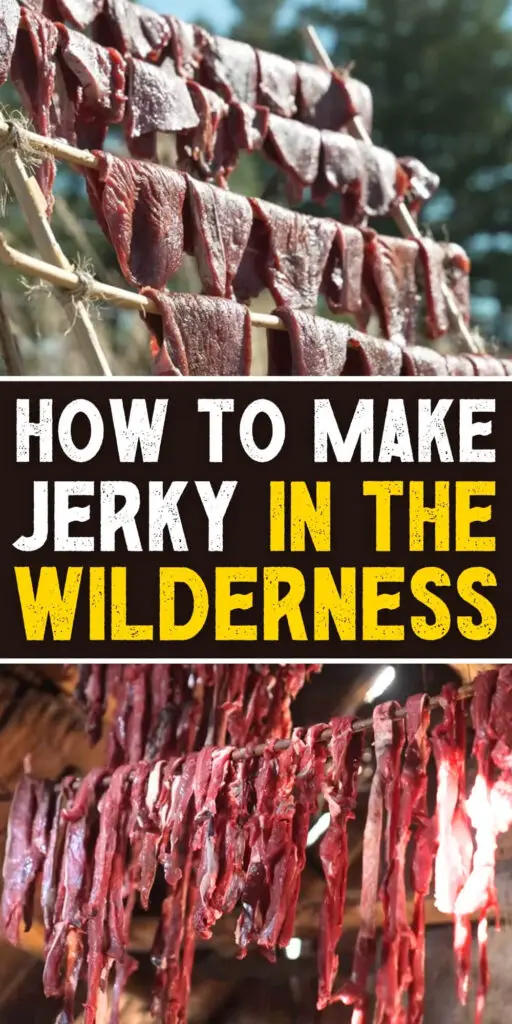
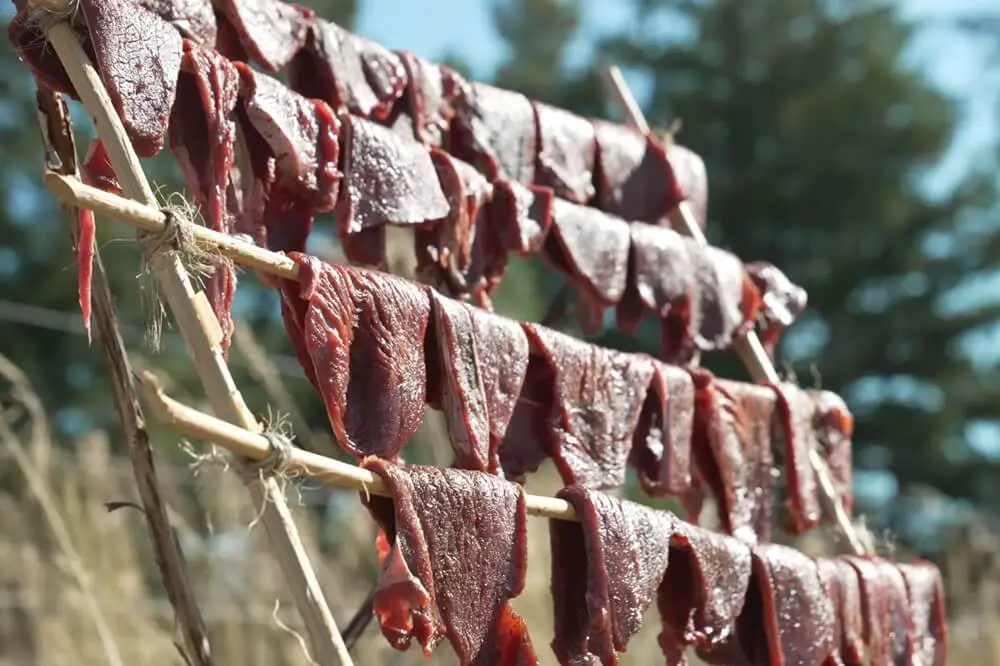
Method 2: Sun-Drying Jerky in Ideal Conditions
In warm, dry, breezy weather, sun-drying meat is a faster, easier method.
Ideal Conditions
- Temperature: ~70–75°F
- Humidity: 20% or less
- Good airflow and sunlight
Step-by-Step Instructions
- Select Lean Meat: Fat doesn’t dry and will spoil. Trim off all visible fat. Clay uses lean white-tailed deer meat.
- Slice Thinly: Cut meat into strips ¼ inch thick or less. Thinner slices dry faster and more evenly.
- Butterfly for Larger Pieces: For smaller cuts, slice and open them up to increase surface area. This helps the meat dry better and more quickly.
- Hang the Meat: Place the strips on a stick rack exposed to full sun and wind.
- Rotate and Monitor: Flip the meat periodically to expose all sides. Spread out the pieces to maximize surface area.
- Bug Control: While flies and yellow jackets may land on the meat, Clay notes they rarely lay eggs on properly drying meat. For added protection, a smoky fire nearby can help repel insects — if fire conditions permit.
- Check for Doneness: In less than a day, meat should develop a dark, dry rind and become firm to the touch. It should no longer feel moist or soft.
How Long Does It Last?
When properly dried and kept dry, jerky can last months, even years. Store it in breathable cloth bags or paper, and avoid plastic if you don’t have a moisture-free environment. Mold forms when moisture is trapped.
Keep in mind that while jerky is great for storage, it's tough on the teeth and gets monotonous. But you can reconstitute it by simmering it in water with other ingredients such as mushrooms, berries, or wild greens to make a hearty stew.
Like this post? Don't Forget to Pin It On Pinterest!
You May Also Like: